

Updated on
Quick Answer:
You can record audio on your MacBook by using SurFlex Screen Recorder, Voice Memos, QuickTime Player, or Audacity. With SurFlex Screen Recorder, you can capture system sound, microphone audio, or both.
If you’re wondering how to record audio on your MacBook Pro or MacBook Air to capture internal sound, microphone audio, or both, you’ve come to the right place. We’ll provide you with detailed tips to help you achieve this. Read on to learn how to record audio on your MacBook and capture any audio content you wish.
Table of contents
How to Record Audio on MacBook Flexibly
Tool: SurFlex Screen Recorder
There are built-in audio recorders on macOS that allow you to directly record voice on Mac via a microphone. However, if you want to record internal audio or record both internal and external audio on your MacBook, you will need a third-party audio recorder like SurFlex Screen Recorder to help.
This audio recorder allows you to record any audio on your MacBook and save it in your preferred format, such as MP3, AAC, WAV, OGG, WMA, or FLAC. Whether you want to record your voice on your MacBook Air or record internal audio on your MacBook Pro, SurFlex Screen Recorder will be helpful.
Besides, as its name suggests, SurFlex Screen Recorder is capable of recording screen activities on your Mac, making it easy for you to screen record on MacBook Pro or MacBook Air with audio.
To record audio on MacBook Pro or MacBook Air:
Step 1. Launch SurFlex Screen Recorder on your Mac and choose the audio recording mode.
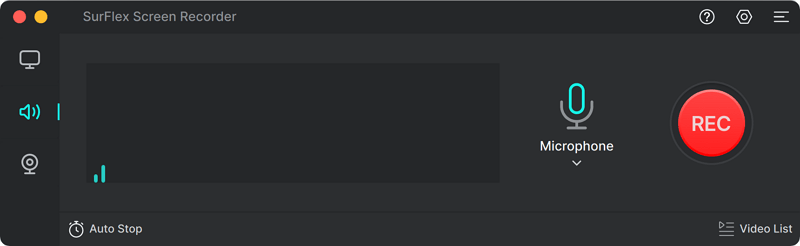
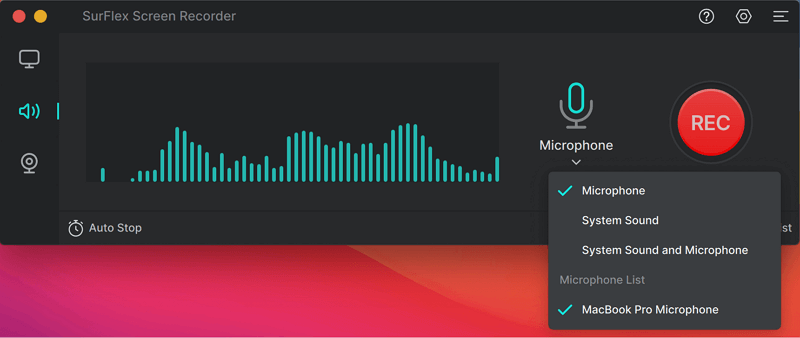
Step 2. Click the Arrow icon to select the audio recording type, including Microphone, System Sound, and System Sound and Microphone. Then click REC to start recording audio on your Mac.
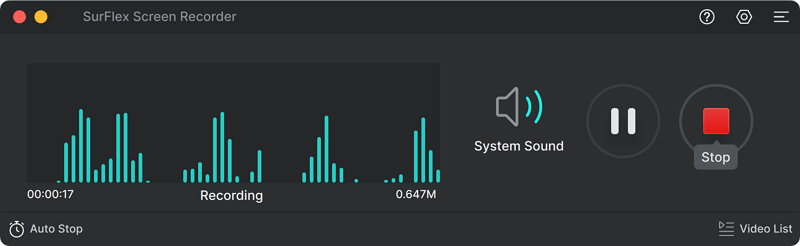
Step 3. Once the audio recording is completed, click Stop and check the audio file in the recording list.
How to Record Voice on MacBook Pro or Air
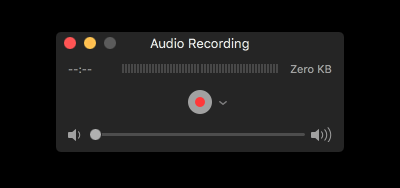
Tool: Voice Memos
As stated earlier, your computer comes with a built-in voice recorder app called Voice Memos. This app enables you to record your voice on your MacBook using the integrated microphone or an external audio input device. If you only need to record microphone sound, using Voice Memos will be suitable for your needs.
To record voice on your MacBook:
Step 1. Launch the Voice Memos app on your MacBook.
Step 2. When you are ready, click the Record button to start recording your voice.
Step 3. When you are finished with the recording, click Done.
Step 4. Trim the audio and rename the file to save the audio recording.
How to Record Audio on MacBook Directly
Tool: QuickTime Player
Another preinstalled audio recording app on macOS is QuickTime Player. However, the MacBook doesn’t have the built-in ability to record internal audio, so by default, this app can only capture microphone sound. Nevertheless, you can still record system sound on your MacBook for free by adding and properly setting up a virtual audio driver on your Mac. If you prefer to use QuickTime Player to record computer audio on your Mac, you can refer to the guide on QuickTime audio recording for more details. In this guide, I will focus on demonstrating how to record microphone audio on your Mac using the app.
To record audio on your MacBook for free:
Step 1. Open QuickTime Player on your MacBook Pro or Air.
Step 2. Go to File > New Audio Recording.
Step 3. Click Options (the arrow icon next to the Record button) and select the recording device, namely your microphone. (If you have set up an audio driver, you can select it to record internal audio on your Mac.)
Step 4. When you are ready to record, click Record to start recording audio on your MacBook.
Step 5. When needed, end the recording and save the audio file to your MacBook.
Both built-in voice recorders on your Mac will save the recording in M4A. If you want to record WAV files on your Mac, you will need to use any of the third-party audio recording apps.
QuickTime Player is also a screen recorder that allows you to screen record with audio on your Mac.
How to Record Audio on a MacBook Pro or Air for Free
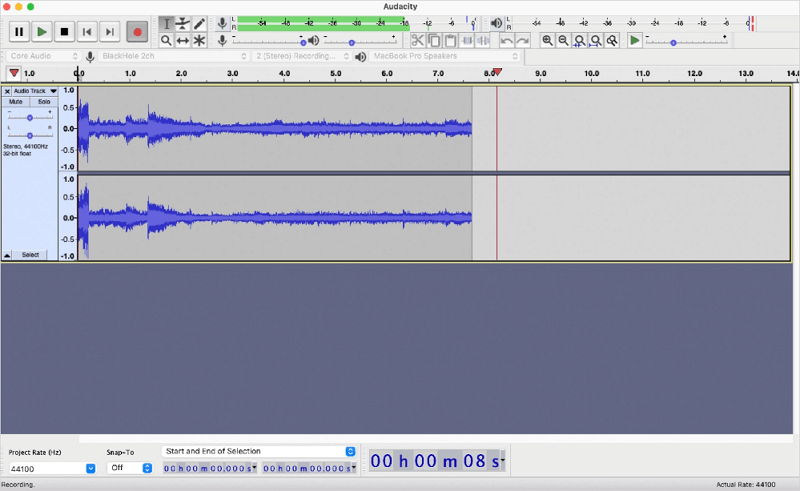
Tool: Audacity
Audacity, a free audio recorder and editor, is capable of recording internal audio or external sound on a MacBook. However, to enable it to record audio from your computer, you will need to configure an additional audio driver, such as BlackHole or Soundflower, on your Mac. If this is what you’re looking for, you can refer to the guide on how to use Audacity to record computer audio on Mac to learn how to download and install the audio driver correctly. Once you have completed the installation, you can follow the steps below to easily record audio on your Mac.
To perform audio recording on MacBook:
Step 1. Download and install Audacity on your MacBook.
Step 2. If you want to record your voice, choose your microphone as the recording device. If you want to record computer audio, choose the audio driver instead.
Step 3. Click the Record button to start the audio recording.
Step 4. When the recording is finished, click the Stop button.
Step 5. Edit the audio track according to your preferences.
Step 6. Go to File > Export and choose your preferred audio format to save the audio file to your Mac.
Wrapping Up
Whether you’re using a MacBook Pro or MacBook Air, you now have several options for recording audio using different tools. To summarize:
If you only need to record your voice, using the built-in Voice Memos app or QuickTime Player will be convenient.
If you want to record internal audio, you can use a third-party audio recorder like SurFlex Screen Recorder, the native QuickTime Player, or the freeware Audacity. However, the latter two options require manual setups for a virtual audio driver.
If you need to capture both internal and external audio, a professional audio recorder like SurFlex Screen Recorder will be the best choice.
Specify your needs and apply the most suitable tool to capture your desired content.
About the Author
You May Also Like
-
How to Record on SoundCloud on All Devices
You will know how to record on SoundCloud to capture audio streams from SoundCloud on your computer or mobile in detailed steps.
Myra Xian Updated on -
3 Tips for Recording Music on Computer
If you are going to record music on computer, check this guide and you will know how to record music on laptop or PC easily.
Myra Xian Updated on -
How to Record a WAV File on All Devices
You will know how to record a WAV file on your computer or mobile phone in this guide. Choose a suitable method according to device you use.
Myra Xian Updated on