

Updated on
Quick Answer:
You can record your voice or record the screen and your voice on Mac with tools including Voice Memos, QuickTime Player, SurFlex Screen Recorder, and OBS Studio.
Recording voice on a Mac is easily achievable, thanks to the availability of both pre-installed and third-party voice recorder apps. If you’re interested in learning how to record voice on Mac, I’m happy to inform you that there are several easy methods available. Here are a few of them:
Table of contents
How to Record Your Voice on Mac with Voice Memos
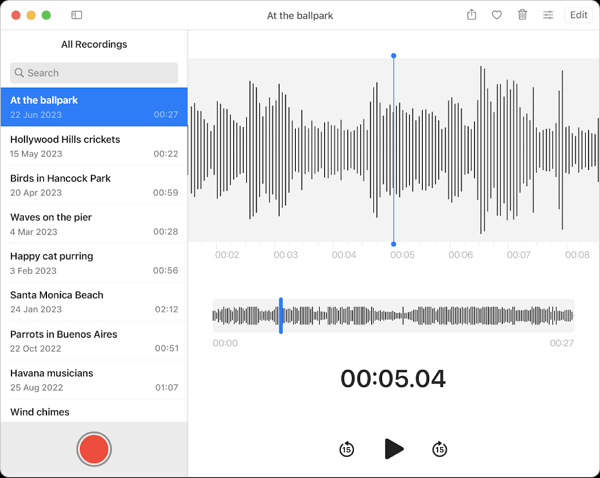
If you only want to capture your own voice, the most suitable way for you is to try the Voice Memos app on your Mac. It allows you to create a voice recording on your Mac easily for free. Afterward, you can trim and rename the audio file according to your needs. If this app meets your needs, follow the steps below to capture your voice without any hassle.
To record voice on Mac:
Step 1. Open the Voice Memos app on your Mac.
Step 2. Click Record to start recording the microphone audio.
Step 3. Click Done in the lower-right corner of the window to end the recording.
Step 4. Trim and rename the audio file.
How to Voice Record on Mac with QuickTime Player
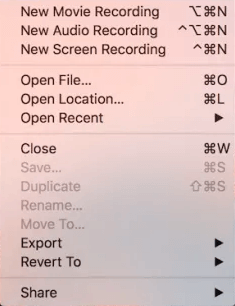
On your MacBook or iMac, you have multiple apps that allow you to record voice on your Mac. Alongside Voice Memos, QuickTime Player is another viable tool for capturing your voice. With proper setup, QuickTime Player can also record internal audio on your Mac to capture system sound. However, since you specifically want to record sounds on your Mac via the microphone, you can do so directly with QuickTime Player without requiring any additional configurations.
To voice record on Mac:
Step 1. Make sure your microphone or external audio input device works properly.
Step 2. Go to QuickTime Player > File > New Audio Recording.
Step 3. Click the arrow icon next to the record button to choose the microphone you use and set up other options.
Step 4. Click the red Record button to start recording sounds on Mac.
Step 5. Save and rename the audio recording.
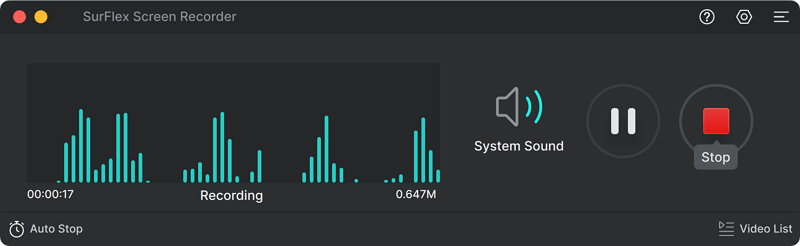
How to Record Sound on Mac with SurFlex Screen Recorder
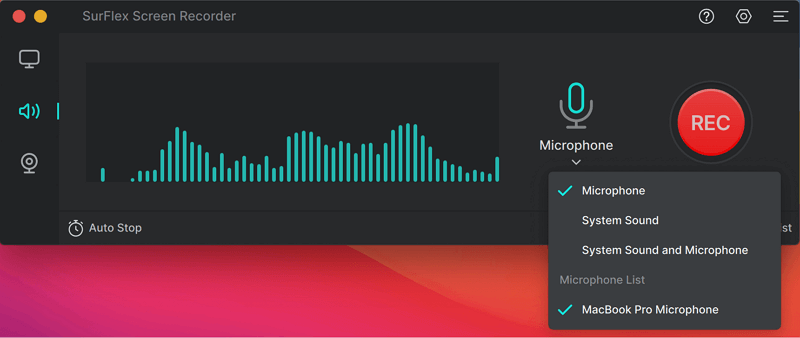
While it’s convenient to record your voice on a Mac using the built-in apps, they may not be helpful when it comes to recording internal audio. This is where a third-party audio recorder like SurFlex Screen Recorder becomes valuable. Once installed on your Mac (also compatible with Windows), it allows you to record microphone sound, system sound, or both simultaneously. Whether you want to capture your own voice or record audio from websites, SurFlex Screen Recorder will be a helpful tool for your needs.
To record sound on Mac:
Step 1. Open SurFlex Screen Recorder on your Mac and select the audio recording mode from the interface.
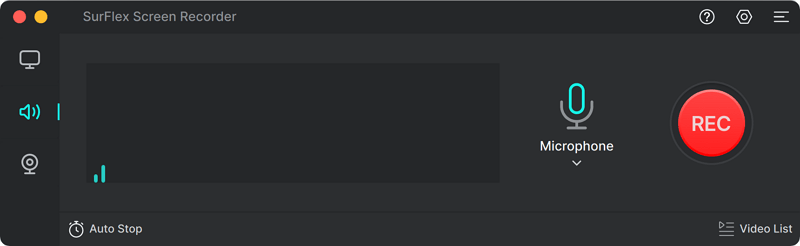
Step 2. Click the Arrow icon to expand more options and then choose Microphone since you want to record your voice.
Step 3. Once the microphone audio recording is done, click the Stop button and check the audio file in the recording list.
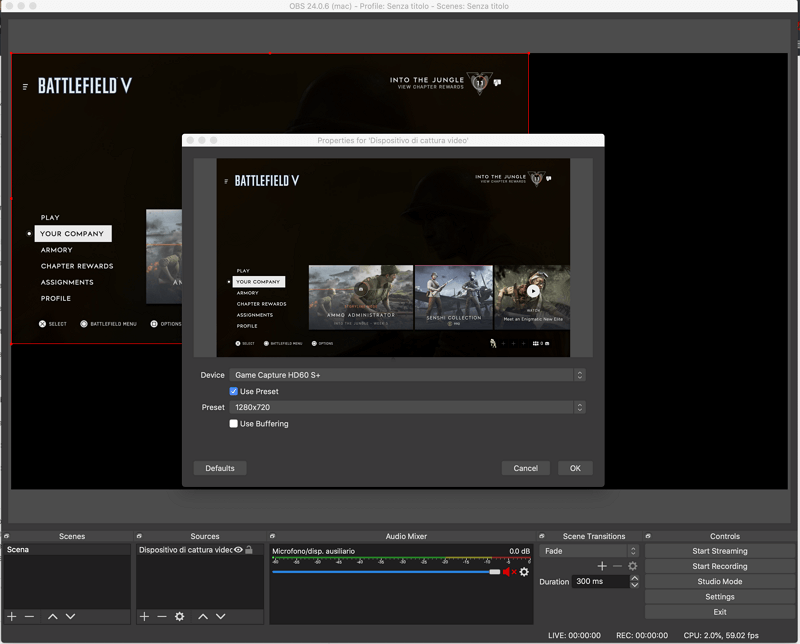
How to Screen Record with Voice on Mac with OBS Studio
When you are going to record yourself presenting a PowerPoint or record a meeting, you may need to screen record with voice on Mac instead of capturing microphone audio only. If that’s what you need, using a third-party screen recorder will fit your needs better. In addition to the SurFlex Screen Recorder mentioned above, you can try OBS Studio, which is a free and open-source screen recorder. It allows you to record screen and audio on Mac at the same time so that you can capture the video and audio you need.
To screen record with voice on Mac:
Step 1. Download and install OBS Studio on your Mac.
Step 2. Before the recording, go to File > Settings to set the output settings.
Step 3. Go to the Sources panel to choose the recording sources you need, such as Window Capture, Audio Input Capture, and more.
Step 4. Click Start Recording in the Control panel when you are ready to record.
Wrapping Up
Whether you wish to solely record your voice or simultaneously record screen and voice on your Mac, you can find a suitable tool to meet your requirements. The built-in apps on Mac can fulfill basic recording needs in numerous situations. However, if you desire more advanced features or customizable options, employing a third-party professional audio recorder becomes necessary.
About the Author
You May Also Like
-
3 Tips for Recording Music on Computer
If you are going to record music on computer, check this guide and you will know how to record music on laptop or PC easily.
Myra Xian Updated on -
Detailed Steps to Record Game Audio with Audacity
If you want to record game audio with Audacity, check this guide and you will know how to use Audacity to capture computer audio with ease.
Myra Xian Updated on -
How to Record Voice on Windows 10 | New Guide
If you want to know how to record voice on Windows 10, read this guide and you will know how to get it done with simple tips.
Myra Xian Updated on