

Updated on
Quick Answer:
You can record internal auido on a Windows 11 PC or laptop with the help of SurFlex Screen Recorder (capture any audio), Audacity (record system sound or microphone), Chrome Audio Capture (capture Chrome audio), or OBS Studio (record screen and audio).
Although there is the built-in Voice Recorder on Windows 11 that allows you to record audio on your PC, it can only record voice from the microphone. Thus, when you need to record what you hear on Windows 11, you will need a third-party audio recorder to help. If that’s what you want, check this guide and you will know how to record internal audio on Windows 11 with four proven ways.
Table of contents
How to Record Internal Audio on Windows 11 Easily
Tool: SurFlex Screen Recorder
Whether you want to record computer audio, microphone sound, or both, you can use the audio recording feature in SurFlex Screen Recorder to achieve your goal. When you record internal audio on Windows 11 with this app, you can capture any audio from your browser, an app, or the system sound and save the audio files in MP3, AAC, WAV, OGG, WMA, or FLAC. Whether you want to record audio from a browser, record audio from YouTube, or capture game audio, it will serve you well.
Besides, SurFlex Screen Recorder is a screen recorder that allows you to record both screen and audio. That means you can also apply it to screen record on Windows 11 with audio when you need to.
To record internal audio on Windows 11:
Step 1. Open SurFlex Screen Recorder, click Settings to set up the output options, and then choose the Record Audio mode.
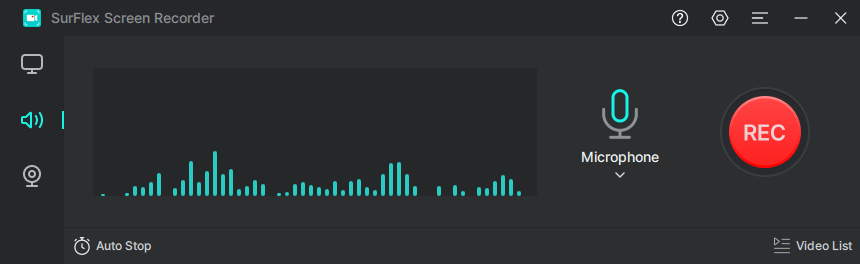
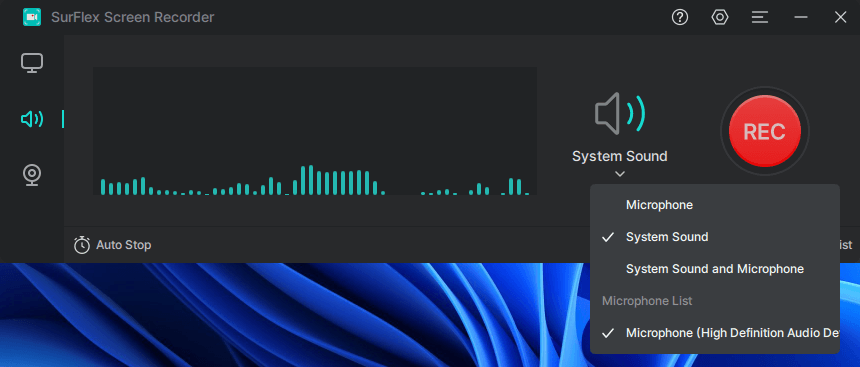
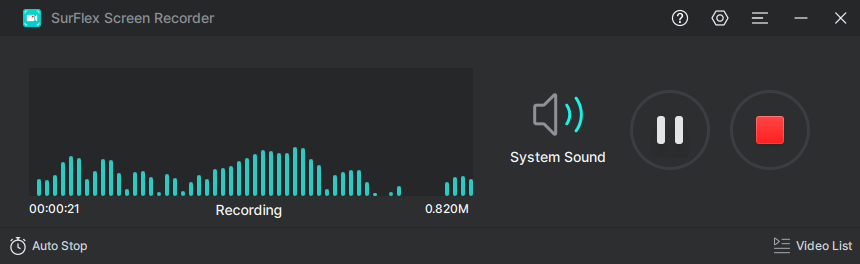
Step 2. To record internal audio on Windows, choose the System Sound option. Then click REC to start recording audio coming from your computer.
Step 3. Once the recording is completed, click Stop.
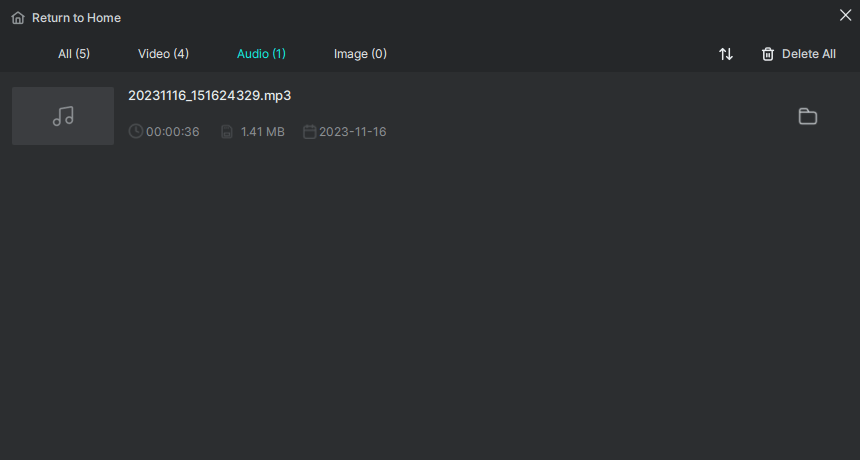
Step 4. Check the audio recording in the popup window.
How to Record What You Hear on Windows 11 for Free
Tool: Audacity
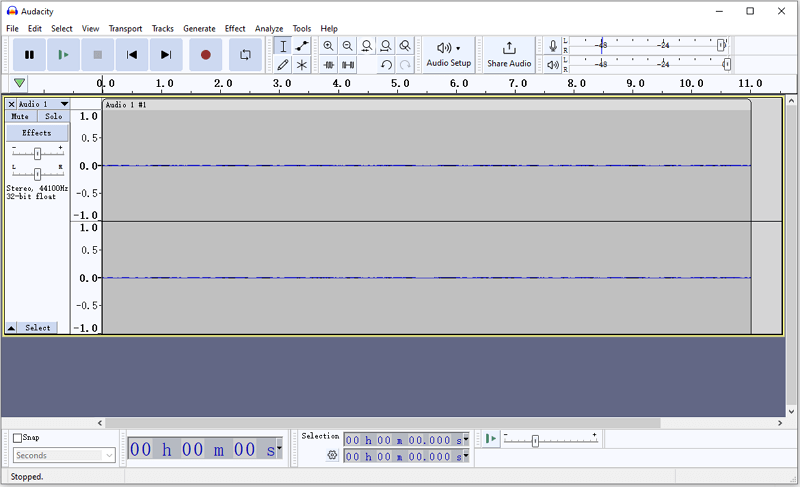
Audacity is a free audio recorder and editor that not only allows you to record audio on Windows 11 but also enables you to edit the audio recordings according to your preference. The audio recording feature helps to record system sound or microphone audio, making it free for you to capture audio coming from your PC or record voice on Windows via a microphone. If you want to record audio without any cost, don’t hesitate to use Audacity to record computer audio on Windows 11.
To record what you hear on Windows 11:
Step 1. Download and install Audacity on your PC or laptop.
Step 2. Open Audacity and go to Audio Setup > Host to choose Windows WASAPI.
Step 3. Go to Recording Device and choose your computer speakers.
Step 4. When you are ready to record, click the red Record button to start recording audio coming from your computer.
Step 5. To end the recording, click the Stop icon.
Step 6. Edit the audio track according to your preferences.
Step 7. Go to File > Export and select the audio format you like.
Step 8. Set the storage path and save the audio file on your Windows computer.
Note: The Recording Device may display options that you may have difficulty distinguishing, particularly the speaker. To identify the correct speaker, you can play any audio and navigate to Settings > System > Sound > Sound Control Panel > Playback. There, you can check which is a playback device. Afterward, in Audacity, select the same option as the recording device.
When you record what you hear on Windows 11 with Audacity, you can export the audio file in MP3, WAV, or OGG. That’s why it is also recommended when you are going to record MP3 on Windows 10. Besides, since it is also compatible with other Windows versions, you can use Audacity to record internal audio on Windows 10 as well.
How to Record Audio from YouTube on Windows 11 for Free
Tool: Chrome Audio Capture
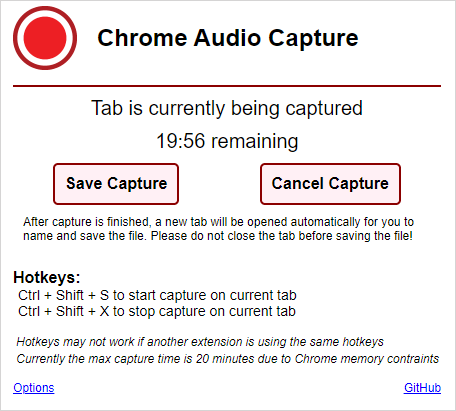
If you are wondering how to record audio from YouTube on Windows 11, here is an easy solution for you, which is to use the browser extension, Chrome Audio Capture. By adding this plugin to your Chrome, you will be able to record audio from Chrome and save it in MP3 or WAV format, without any cost. Therefore, you can use it to record streaming audio from the internet and easily record audio from YouTube on your computer. The next time you wish to record sound coming from your computer in Windows 11, you can still consider using this handy tool.
To record audio from YouTube on Windows 11 for free:
Step 1. Go to Chrome Web Store to add Chrome Audio Capture to your browser and pin it to the toolbar.
Step 2. Open a new tab and navigate to YouTube.com.
Step 3. Prepare the audio you’d like to record and click the extension icon.
Step 4. Click Start Capture to start recording what you hear on Windows 11.
Step 5. When you are finished, click Save Capture.
Step 6. On the new page, click Save Capture again and save the audio recording to your PC.
How to Record Screen and Audio on Windows 11 for Free
Tool: OBS Studio
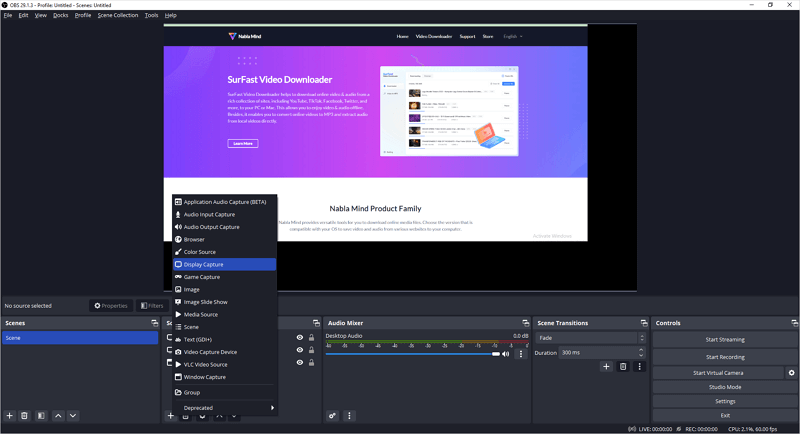
OBS Studio is a free tool for screen recording and live streaming. Although it can’t solely record sound on your Windows computer, with its screen recording features, you can record screen with audio on Windows 11 with ease. If that’s what you want, you can follow the steps below to give it a try.
To record screen and audio on Windows 11:
Step 1. Download and install OBS Studio on your computer.
Step 2. Go to File > Settings > Output to select the output options and then click OK.
Step 3. Head to the Sources panel and click the Plus icon to select the recording sources you need.
Step 4. Click Start Recording in the Controls panel when you are ready.
Step 5. When the recording is completed, click Stop Recording.
Step 6. Go to the folder you select in Settings to check the video.
Wrapping Up
The preinstalled Voice Recorder on Windows 11 is primarily designed to capture audio from the microphone, making it less suitable for recording internal audio on your PC. Therefore, it is advisable to use a third-party audio recorder, such as the ones mentioned above. Whether you need to record popular MP3 or lossless WAV files on Windows, these third-party recorders will be more helpful and efficient in fulfilling your requirements.
About the Author
You May Also Like
-
Record from YouTube to MP3 in 3 Ways
Check the tips in this guide and you will know how to record from YouTube to MP3 or other formats to capture YouTube audio or music.
Myra Xian Updated on -
4 Easy for Recording Pandora on Any Device
Check the tips for Pandora recording and use any of them to successfully record Pandora music on your computer or mobile.
Myra Xian Updated on -
How to Record a Podcast on Zoom | Detailed Guide
You will know how to use Zoom for podcasts and how to record a podcast on Zoom with detailed steps. Read on to get the details.
Myra Xian Updated on