

Updated on
Quick Answer:
You can record internal audio on your Mac with Audacity by adding and configuring a virtual audio driver, such as BlackHole, on your computer and then use Audacity to capture computer audio.
Table of contents
Can You Use Audacity to Record Computer Audio on Mac
Yes, you can use Audacity to record computer audio on Mac. However, Mac doesn’t natively have the ability to record internal audio, be it the system sound or app sound. Thus, even if you can use Audacity to record computer audio on Mac, it is not a direct process and you will need extra software to help. Specifically, you will need to add a virtual audio driver on your Mac and set it up manually and properly. Afterward, you can use Audacity to record computer audio on your Mac successfully.
How to Record Computer Audio with Audacity
Before you record audio on Mac with Audacity, you will need to install and configure a virtual audio driver (here I’d like to take BlackHole as an example) on your computer.
Preparations for audio recording:
Step 1. Download and install BlackHole on your Mac.
Step 2. Open Audio MIDI Setup on your Mac, click the Plus icon and select Create Multi-Output Device.
Step 3. Locate the newly created item and ensure that both BlackHole and your Mac speakers (or Built-in Output) are selected. Additionally, enable Drift Correction for these options.
After the setup, now you can follow the steps below to capture internal audio or streaming audio on your Mac.
Record Computer Audio on Mac:
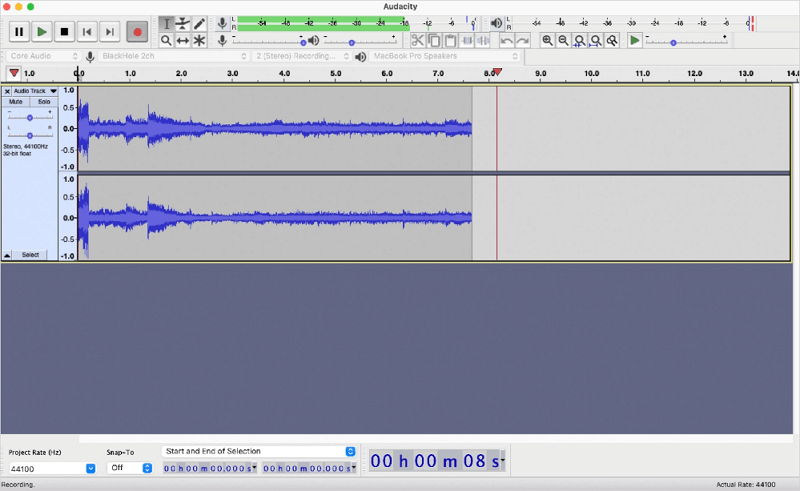
Step 1. Open the Audacity app on your computer.
Step 2. Choose BlackHole as the Recording Device.
Step 3. When you are ready to record, click the Record button.
Step 4. When you are done, click the Stop button to end the audio recording.
Step 5. Edit the audio recording according to your needs.
Step 6. Go to the Menu bar to export the audio file.
Bonus Tip: How to Record Internal Audio on Mac Easily
If you don’t want to go through the complex setup process and want an easier method to record system sound on your Mac, you can try SurFlex Screen Recorder to capture audio that is playing on your computer, such as recording streaming audio, recording audio from YouTube, and more.
In addition to internal audio recording, SurFlex Screen Recorder can help to record microphone sound and record both internal and external audio on your Mac. Besides, it enables you to customize the audio format and audio quality.
What’s more, unlike Audacity which can only record audio on Mac, SurFlex Screen Recorder is capable of recording both video and audio on your Mac. Whether you want to capture audio only or screen record on Mac with audio, it will fulfill your needs well.
In short, if you want a more powerful and flexible video and audio recorder, SurFlex Screen Recorder is an unmissable choice.
To record internal audio on Mac without Audacity:
Step 1. Launch SurFlex Screen Recorder on your Mac and choose the audio recording mode.
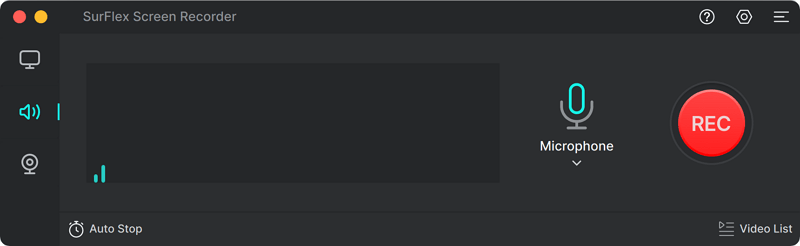
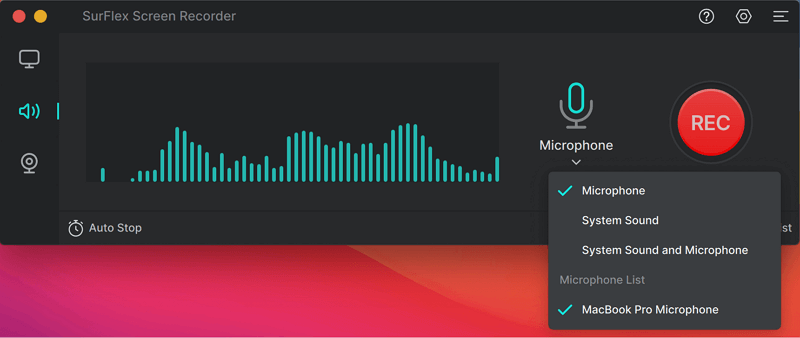
Step 2. Click the Arrow icon to select the audio recording type, including Microphone, System Sound, and System Sound and Microphone. Then click REC to start recording audio on your Mac.
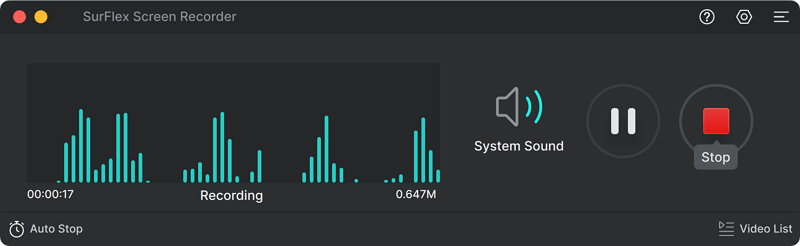
Step 3. Once the audio recording is completed, click Stop and check the audio file in the recording list.
Wrapping Up
Using Audacity is workable but may not be the optimal choice to record computer audio on Mac. That’s because you will need extra software to help and set it up manually. That’s why a more convenient way to record audio from websites, apps, and the system on your Mac is also provided. Choose the way you prefer to apply.
About the Author
You May Also Like
-
4 Ways to Record WAV File on Windows 10
This guide will show you how to record WAV file on Windows 10 with easy and proven tips. Pick up any of them to apply.
Myra Xian Updated on -
How to Record Audio on MacBook Pro & Air in 4 Ways
Whether you are using a MacBook Pro or Air, you will know how to record audio on MacBook to capture any audio you need.
Myra Xian Updated on -
How to Record Audio on Mac: Internal Sound, Microphone, or Both
Check this guide and you will know how to record audio on Mac to capture internal audio, microphoen sound, or both with various tools.
Myra Xian Updated on