

Updated on
Quick Answer:
You can record WAV files on your PC or Mac using software applications like SurFlex Screen Recorder or Audacity. If you’re using an iPhone or Android device, you can also utilize third-party WAV recording apps such as Audio Recorder or Sound Recorder.
WAV is the most popular lossless and uncompressed audio format that ensures good sound quality. Therefore, when you record audio on your computer or mobile, you may want to select WAV as the output format. However, although there is a built-in audio recorder on your device, be it a computer or phone, it generally saves the audio files in M4A format. Thus, when you want to record WAV files, you will need a third-party WAV recorder to help.
Table of contents
How to Record WAV Files on Windows 10
Tool: SurFlex Screen Recorder
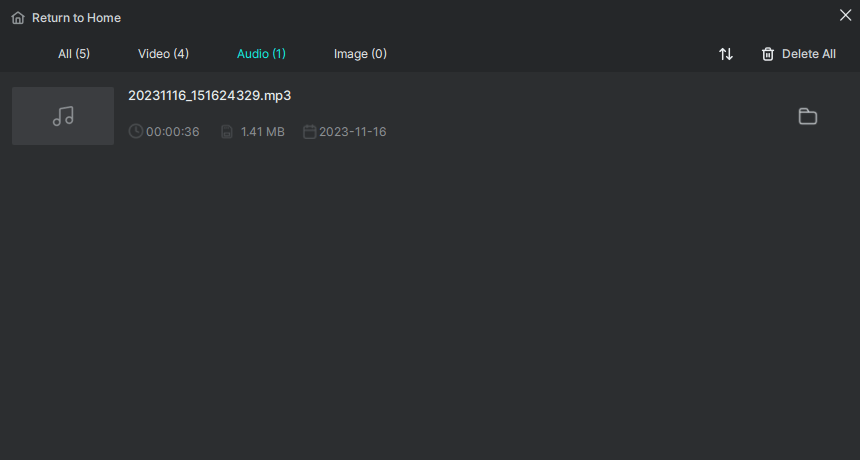
To record a WAV file on Windows 10 or other versions, you can utilize SurFlex Screen Recorder. This software offers an audio recording feature that enables you to capture audio from your speakers, microphone, or both and allows you to generate WAV, MP3, AAC, OGG, WMA, or FLAC files. Regardless of the type of audio you wish to record and the preferred audio format, this audio recorder can help you achieve your goal.
To create a WAV file on Windows 10:
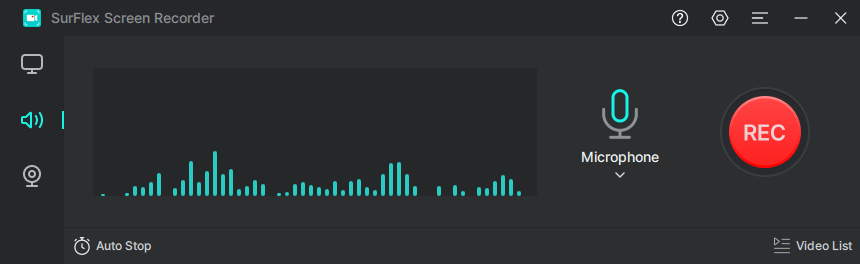
Step 1. Launch SurFlex Screen Recorder and then choose the Record Audio mode.
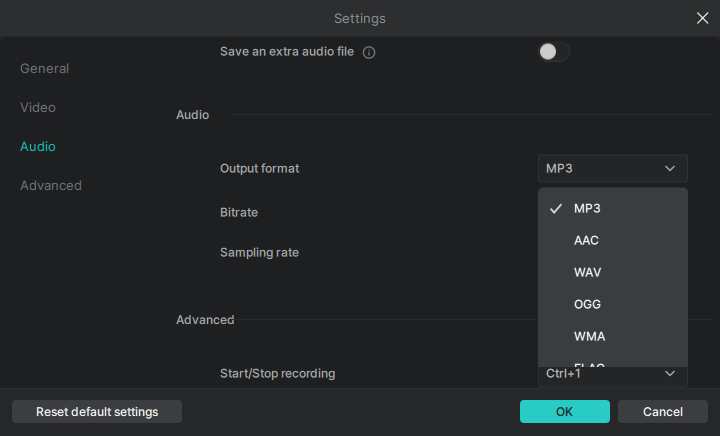
Step 2. Click Settings, choose WAV as the output format, and then click OK.
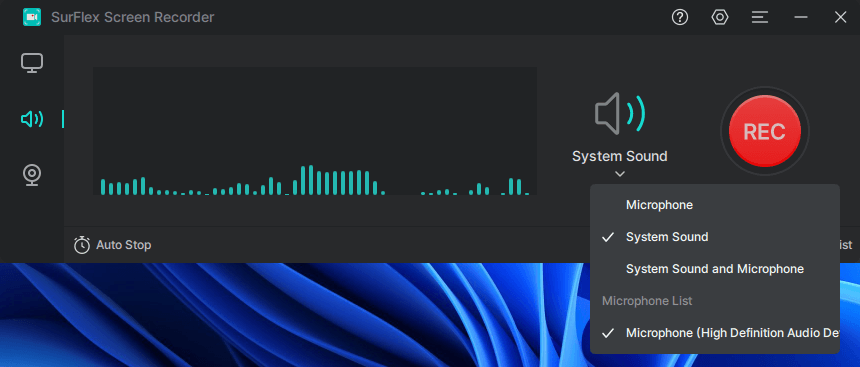
Step 3. Select the audio recording option you need and then click REC to start recording a WAV file on your computer.
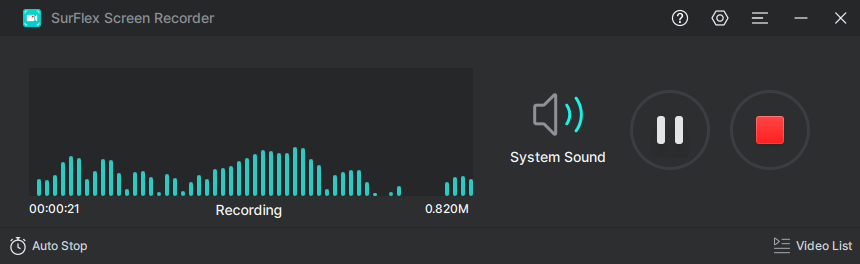
Step 4. Once the audio recording is finished, click the Stop button.
Step 5. Check the WAV file in the recording list.
How to Record WAV Files on Mac
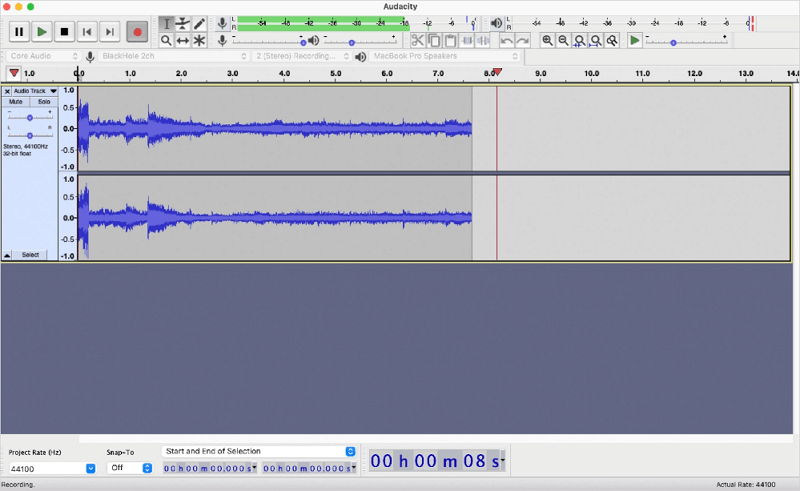
Tool: Audacity
The SurFlex Screen Recorder mentioned above is also compatible with macOS and thus you can use it to easily make a WAV file on your Mac. In addition, you can choose to use freeware, Audacity, to record WAV on Mac. This free audio recorder helps to record internal audio or microphone sound and allows you to save the audio recordings in WAV, MP3, or OGG format, making it easy for you to record audio on Mac in WAV.
However, since Mac doesn’t have the built-in ability to record system sound, you will need a third-party audio driver to help. If you are going to record internal audio on a Mac, check the guide on how to make Audacity record computer on Mac for detailed steps. Here I’d like to show you how to record voice on Mac to create a WAV file.
To record WAV on Mac:
Step 1. Download and install Audacity on your Mac.
Step 2. Make sure your microphone works properly and open Audacity.
Step 3. Choose your microphone as the recording device.
Step 4. When you are ready, click Record to start recording a new audio track.
Step 5. Once completed, click the Stop button and edit the recording if you need to.
Step 6. Click File > Export > Export as WAV to save the recording as WAV on your Mac.
How to Record a WAV File on iPhone
Tool: Audio Recorder in the App Store
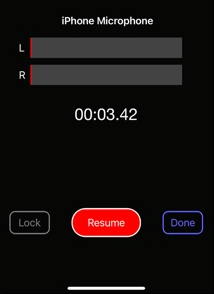
To create a WAV file on an iPhone, you can utilize the Audio Recorder app available on the App Store. This app enables you to record your voice directly on your iPhone and save the audio file in either WAV or M4A format. Additionally, you can edit the audio recording by trimming it, adjusting the speed or pitch, and more. If this is what you’re looking for, you can download and install the Audio Recorder app from the App Store on your iPhone. Afterward, follow the steps below to easily record audio in WAV format using your iPhone.
To record a WAV file on an iPhone:
Step 1. Download and install Audio Recorder on your iPhone.
Step 2. Launch the app and go to Settings to choose WAV as the output format.
Step 3. Go back to the Home page and click the Record button to start recording your voice.
Step 4. When you are finished with the recording, click Done to save the recording to your iPhone.
How to Create a WAV File on Android
Tool: Sound Recorder
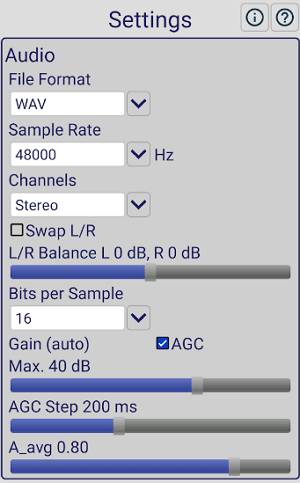
To make WAV files on Android, you also need a third-party audio recorder to help, such as Sound Recorder. It enables you to record audio on your phone via the Microphone and can keep recording even when the screen is off. Most importantly, it supports WAV, allowing you to record a WAV file on your Android phone with a few simple clicks.
To record WAV on Android:
Step 1. Download and install Sound Recorder on your phone from Google Play.
Step 2. Open the app and tap the Settings icon to choose the WAV as the output format.
Step 3. Set up other recording settings according to your needs.
Step 4. When you are ready to record, click the red record button.
Step 5. When you are done, click Stop.
Step 6. Check the audio file in the recording list.
Wrapping Up
Whether you are using a desktop or mobile device, you now know how to create WAV files effortlessly. There are numerous WAV recorder apps and services available, particularly for desktop users. If you intend to capture audio from a website and record it in WAV format on your computer, it is recommended to try the browser extension called Chrome Audio Capture. This extension enables you to record audio from websites and save it as WAV or MP3 files, all free of charge. If it meets your requirements, feel free to give it a try without hesitation.
About the Author
You May Also Like
-
3 Ways to Record Audio from Safari
You will know how to record audio from Safari on Mac with either the built-in or third-party screen recorder tools.
Myra Xian Updated on -
3 Easy Ways to Record Computer Audio Online
When you want to record computer audio online, you can check the proven tips here and apply any of them to capture audio with ease.
Myra Xian Updated on -
How to Record Audio on Mac: Internal Sound, Microphone, or Both
Check this guide and you will know how to record audio on Mac to capture internal audio, microphoen sound, or both with various tools.
Myra Xian Updated on