

Updated on
Quick Answer:
You can record audio on Mac or record screen with audio on Mac with the help of one of these tools: SurFlex Screen Recorder, Voice Memos, QuickTime Player, Audacity, and OBS Studio. With them, you will be able to record internal audio, microphone sound, or both on your Mac.
It’s unnecessary to emphasize the importance and necessity of audio recording on a Mac, as there are numerous situations where it becomes essential to capture audio for various purposes such as offline listening, file archiving, or other reasons.
With that in mind, I would like to present you with a comprehensive guide on how to record audio on Mac using various methods. Since the methods for recording audio on a Mac can vary based on the type of audio you wish to capture, it is important to specify your needs and choose the most suitable method accordingly.
Table of contents
How to Record Audio on Mac in All Types
Tool: SurFlex Screen Recorder
Supports: Computer audio, microphone sound, or both
No matter what kind of audio you want to record from your MacBook or iMac, you can use the easy audio recorder, SurFlex Screen Recorder, to capture whatever sound you like. With this app installed on your computer, you can record sound on your Mac freely, including the system sound, microphone audio, or both. Therefore, whether you want to record internal audio on Mac or record voice on Mac, you can give it a try.
Besides, as its name indicates, SurFlex Screen Recorder is also capable of recording the onscreen activities on your computer. That means you can also screen record with audio on Mac with this tool.
It’s worth mentioning that you can customize the audio recording settings, such as file format and audio quality. By doing so, you can create a recording that satisfies your needs.
To record audio on Mac:
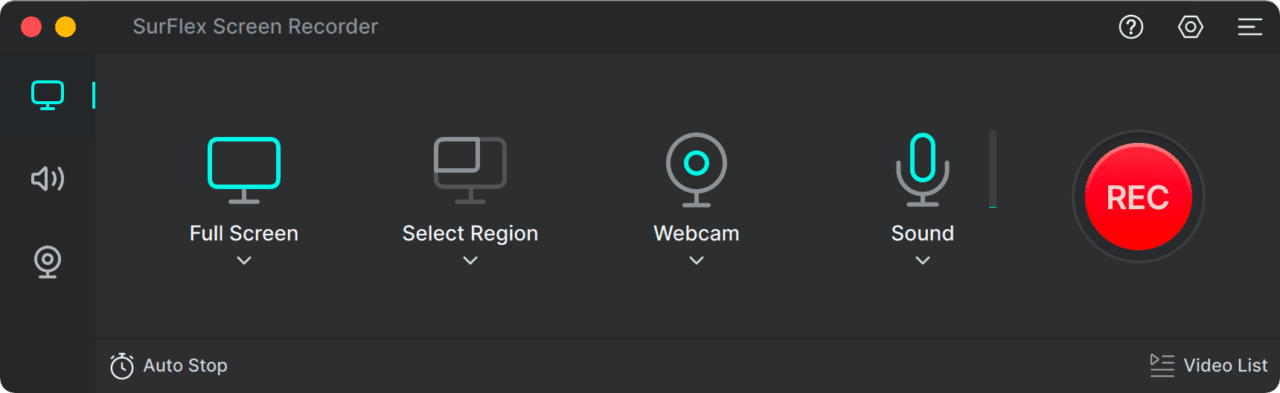
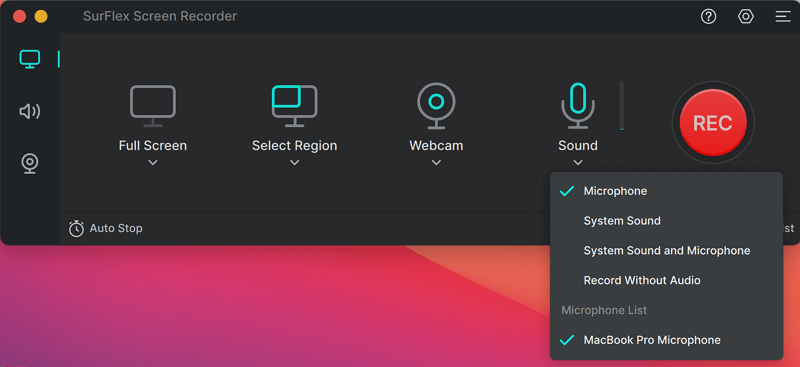
Step 1. Launch SurFlex Screen Recorder on your Mac and choose the audio recording mode.
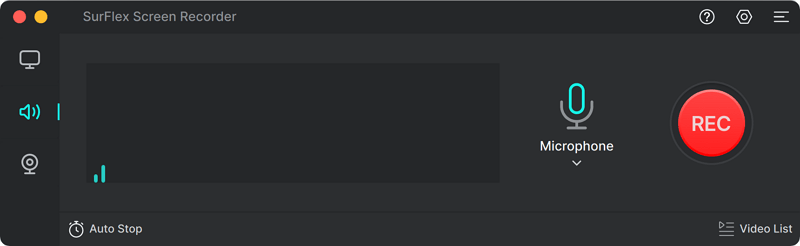
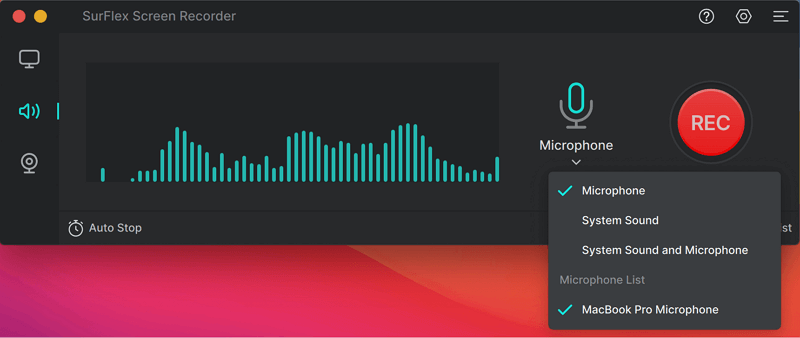
Step 2. Click the Arrow icon to select the audio recording type, including Microphone, System Sound, and System Sound and Microphone. Then click REC to start recording audio on your Mac.
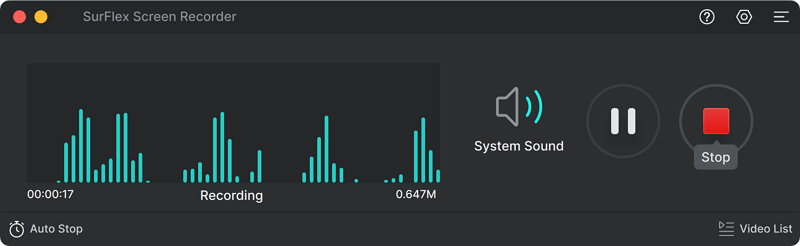
Step 3. Once the audio recording is completed, click Stop and check the audio file in the recording list.
How to Record Voice on Mac
Tool: Voice Memos
Supports: Microphone sound
If you are going to record your voice on Mac, you can do it directly with the preinstalled voice recorder on your Mac, Voice Memos. This built-in app enables you to record microphone sound on your Mac to capture your own voice and save the audio file in M4A format, which you can play on all Apple devices. In short, Voice Memos is the most convenient way if you only want to record microphone sound on your Mac.
To record voice on Mac:
Step 1. Make sure your microphone works properly.
Step 2. Open the Voice Memos app on your Mac.
Step 3. When you are ready, click the Record button to start recording voice on your Mac.
Step 4. When you are done with the recording, click Done and then trim and rename the audio recording.
How to Record Internal Audio on Mac
Although there is more than one native app on Mac that allows you to record sound, none of them works to record system audio on Mac by default. Instead, they can only capture external audio from your microphone or other external sources.
Therefore, when you need to record internal audio on your Mac, you need to either use a third-party audio recorder, such as SurFlex Screen Recorder or add a virtual audio driver, such as BlackHole, to your Mac and then use tools like QuickTime and Audacity to help.
Since the way to record audio with a Mac audio recorder has been detailed already, here I’d like to show you how to record computer audio via a virtual audio driver.
Preparations for audio recording:
You need to install and set up the audio driver properly so that you can capture internal audio on your Mac with QuickTime and Audacity.
Step 1. Download and install BlackHole on your Mac.
Step 2. Open Audio MIDI on your Mac, click the Plus icon, and then choose Create Multi-Output Device.
Step 3. Click the newly created item and check BlackHole and your Mac speakers (or Built-in Output). Also, check Drift Correction next to these options.
Record Computer Sound on Mac with QuickTime Player
With the help of the virtual audio driver, now you can record computer audio on your Mac with QuickTime Player.
Step 1. Launch QuickTime Player on your Mac.
Step 2. Go to File > New Audio Recording to open the audio recording window.
Step 3. Click the arrow icon next to the Record button and choose BlackHole.
Step 4. Click Record to start recording the system sound on your Mac.
Step 5. Once the recording is completed, click the Stop button and save the audio file to your computer.
Record Audio on Mac with Audacity
Audacity is a free and open-source audio recorder and editor that also performs well in recording audio on your MacBook or iMac. After you configure the audio driver, you can follow the steps below to capture system sound on a Mac. Afterward, you can edit the audio recording according to your preferences.
To record audio on Mac with Audacity:
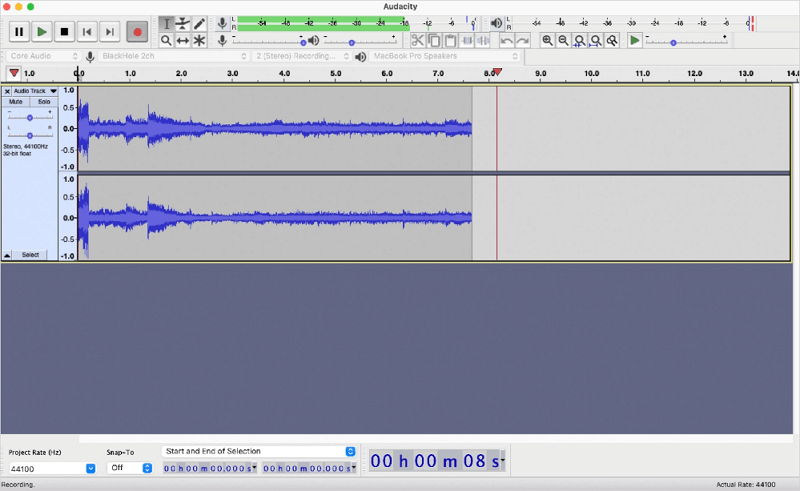
Step 1. Download and install Audacity on your Mac.
Step 2. Open the audio recorder and choose BlackHole as the recording device.
Step 3. Click the red Record button to start recording internal audio on your Mac.
Step 4. When needed, click the Stop button to end the sound recording.
Step 5. Edit the audio file.
Step 6. Go to File > Export to export and save the recorded audio on your Mac.
It’s no doubt that you can also use Audacity to perform voice recording on Mac. To do so, just choose your microphone as the recording device before you start.
How to Screen Record with Audio on Mac
To record a screen with audio on a Mac, you will need a screen recorder to help. There are some choices:
Record Screen on Mac with audio with SurFlex Screen Recorder
As mentioned above, SurFlex Screen Recorder works to record both video and audio. Thus, when you are looking to screen record with audio on your Mac, it will also be helpful.
To record screen on Mac with audio:
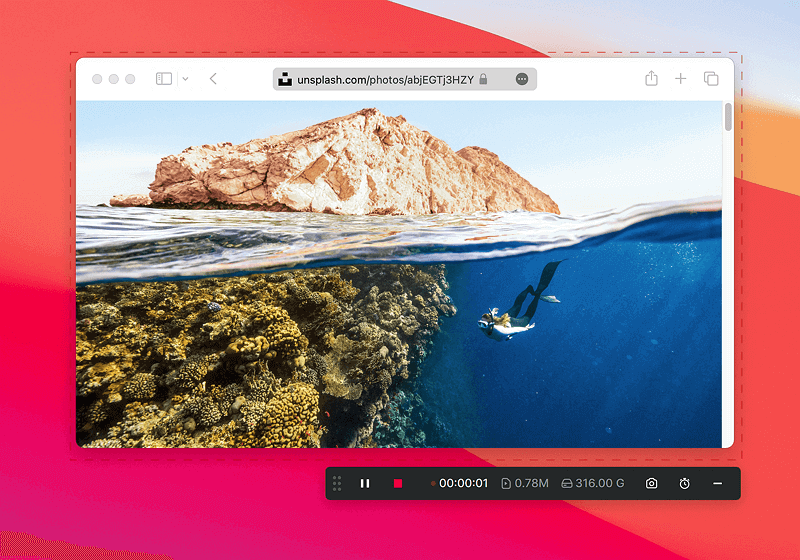
Step 1. Go to Settings to set up your recording preferences, and then choose the Record Screen mode.
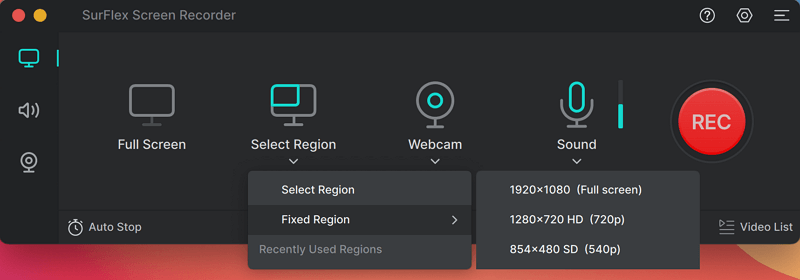
Step 2. Choose to record the Full Screen or a Selected Region and then select the recording area.
Step 3. Enable audio recording, select Microphone, System Sound, or System Sound and Microphone, and then click REC to start recording your Mac screen with audio.
Step 4. Once you have finished recording, click the Stop button and then preview the video.
Whether you want to screen record Mac with internal audio, external audio, or both, you can follow the similar steps above to get it down.
Record Screen on Mac with Audio via OBS Studio
You can also use the free and open-source screen recorder, OBS Studio, to capture screen and audio at the same time on your Mac. When you want to screen record on Mac for free, this is a suitable choice.
To screen record on Mac with audio:
Step 1. Download and install OBS Studio on your Mac.
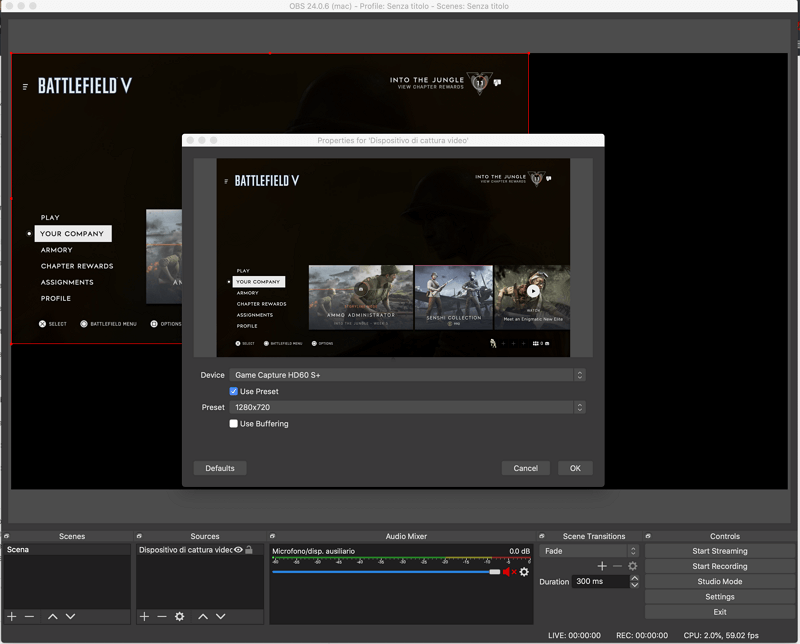
Step 2. Go to File > Settings to set up the output options.
Step 3. Go to the Sources panel and click the plus icon to select the recording sources you need.
Step 4. Prepare the content you want to capture and click Start Recording.
Step 5. When you are finished with the recording, click Stop Recording.
Step 6. Go to the selected folder to check the recorded video.
More Tips on Recording Audio on Mac
When you record sound on Mac, you may also want to know:
How to record audio on a Mac from YouTube?
To record audio on your Mac from YouTube is the same as recording internal audio on your Mac. To do so, you can use a third-party audio recorder like SurFlex Screen Recorder. Such an app helps to record audio from YouTube or other websites.
How to record audio on a Mac from the internet?
To record audio on Mac from the internet, you can choose to use a professional audio recording app to help, such as SurFlex Screen Recorder, or add a virtual audio driver on your Mac, set it up manually, and then use an app like QuickTime to record audio from websites.
How to record audio on a Mac with an external mic?
It’s easy to record audio on a Mac with an external mic since the built-in apps, Voice Memos and QuickTime Player, will do you a favor. To record microphone sound with Voice Memos:
Step 1. Open Voice Memos on your Mac.
Step 2. Tap Record to start recording audio via microphone.
Step 3. Click Done when needed.
Step 4. Trim and rename the audio file.
Wrapping Up
Now that you are familiar with how to record various types of audio on a Mac, with or without visuals, you have the ability to capture your own voice, streaming audio, or system sound using the appropriate solutions. If your goal is to record either system sound or microphone audio, utilizing the built-in app will be sufficient to meet your needs. However, if you require additional functionality such as capturing both internal and external audio, employing a third-party screen recorder is necessary.
About the Author
You May Also Like
-
How to Record Audio on Computer (Internal & External Audio)
In this guide, you will learn how to record audio on PC in Windows 10, Windows 11, or other windows versions with various PC audio recorders.
Myra Xian Updated on -
How to Record Voice on Laptop in Windows 10, 11, and More
There are the simple tips for recording microphone sound. You can use any of them to record voice on laptop without difficulty.
Myra Xian Updated on -
How to Record MP3 on Windows 10 in 4 Different Ways
Read this guide to learn how to record MP3 on Windows 10 easily to capture internal audio, external audio, or both.
Myra Xian Updated on