
Popular Tips

Updated on
Quick Answer:
You can record yourself presenting a PowerPoint using PowerPoint, SurFlex Screen Recorder, Camtasia, or ScreenCapture. Depending on your needs, the best way for you varies.
Thanks to Microsoft Office and powerful third-party screen recorder tools, presentation recording couldn’t be easier nowadays. Whether you are going to record a PowerPoint presentation with audio only or with both audio and video, there are plenty of feasible solutions available. Thus, if you want to know how to video record yourself presenting a PowerPoint, the answers are abundant and easy.
Here I’d like to show you how to record yourself presenting a PowerPoint using four easy ways. Choose the method you like to perform PowerPoint recording with ease.
Table of contents
How to Video Record Yourself Presenting a PowerPoint Directly
To meet the screen recording needs of Microsoft Office users, Microsoft itself has integrated a comprehensive screen recording feature into Microsoft Office. It not only enables you to record a presentation but also allows you to capture the webcam, microphone, annotations, and inks during the presentation. Therefore, when you want to video record yourself presenting a PowerPoint, the built-in screen recording feature will perfectly satisfy your needs.
Thus, without any software installation, you will be able to record yourself on PowerPoint directly using the Microsoft program.
To video record yourself presenting a PowerPoint in Microsoft Office:
Step 1. Launch Microsoft Office and open the PPT file you’d like to record.
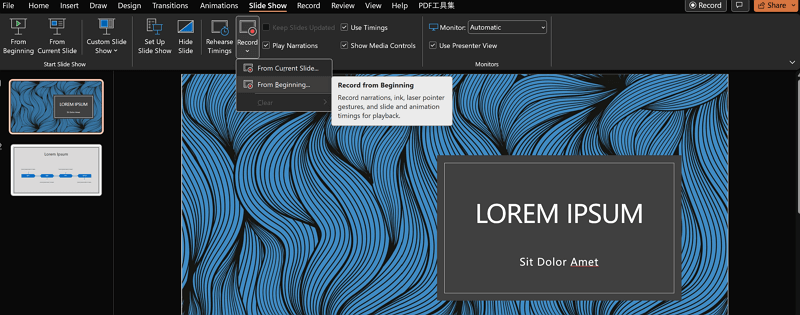
Step 2. Go to the Slide Show or Record tab and click the arrow icon under Record.
Step 3. Choose to record the presentation from the beginning or from the current slide.
Step 4. Make sure that the microphone and camera are enabled.
Step 5. When you are ready, click Record to start the presentation recording.
Step 6. When you are done, click Stop and close the window.
Step 7. Go back to PowerPoint and choose File > Export.
Step 8. Export the recording as a video on your computer.
How to Record Yourself Presenting a PowerPoint Easily
As you can see from the details above, although Microsoft allows you to record PowerPoint presentations with audio and video, it may not be as intuitive, especially when compared to professional screen recording software. Therefore, if you find its operation too complex and prefer a simpler solution, or if you desire more customization options, you may prefer using professional screen recording software such as SurFlex Screen Recorder.
This screen recorder enables you to record yourself presenting a PowerPoint with a few simple clicks. Whether you want to capture the system sound, microphone sound, or both along with the screen, it will do you a favor. Besides, during the recording, you can enable the webcam recording so that you can record PowerPoint presentation and webcam at the same time. By doing so, you will be able to record yourself presenting a PowerPoint effortlessly.
To record yourself presenting a PowerPoint:
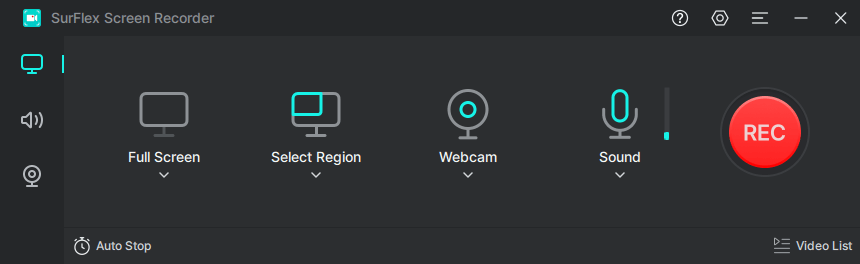
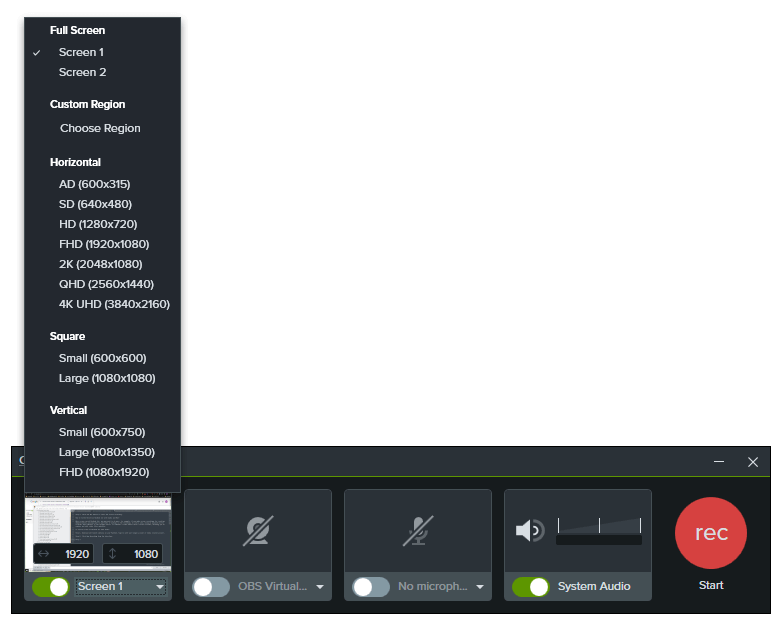
Step 1. Launch the screen recorder on your computer and click Settings to customize the output settings.
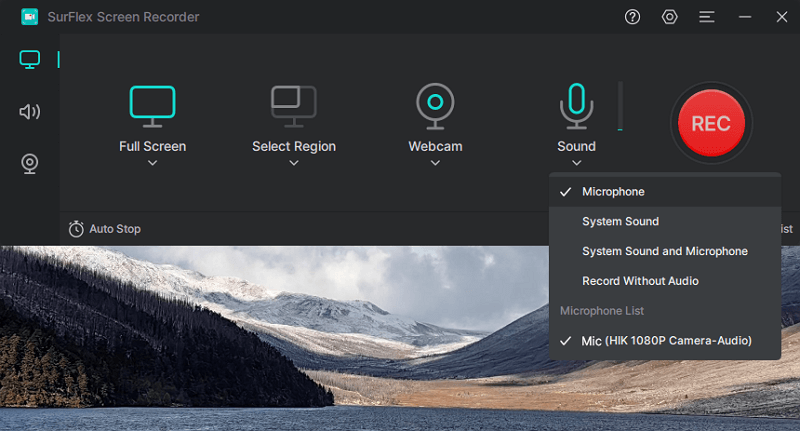
Step 2. To record a PowerPoint presentation with audio, enable audio recording and choose the audio type you need.
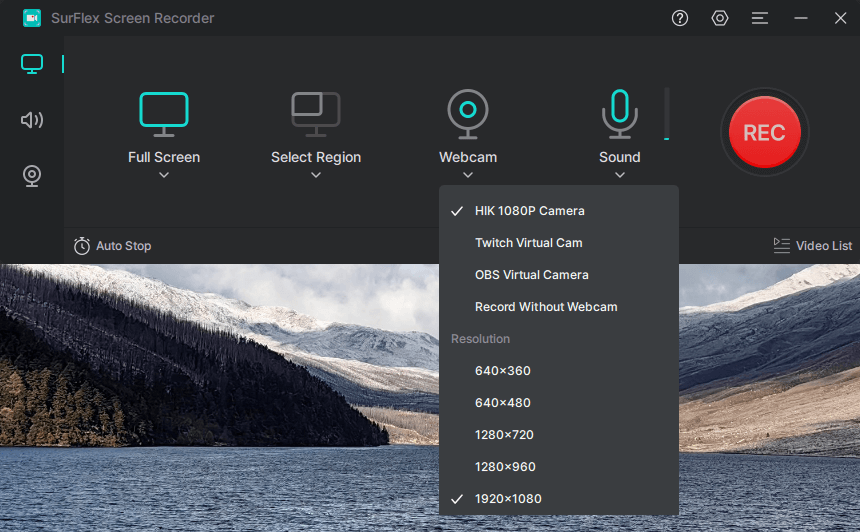
Step 3. To record the presentation with a webcam, turn on Webcam recording, select the webcam you’d like to use, and then choose a resolution you like.
Step 4. Select the PowerPoint window you’d like to capture and adjust the size and position of the webcam. When you are ready, click REC to start recording yourself presenting the PowerPoint.

Step 5. After you capture the desired content, click Stop to end the recording and check the video in the popup window.

How to Record Yourself Giving a PowerPoint Presentation Professionally
If you want to do more during the recording or need to edit the recorded video afterward, it’s advisable to try Camtasia. It combines a screen recorder and a video editor, enabling you to record a presentation with advanced features such as picture-in-picture, noise reduction, and more, and edit the presentation recording using rich video editing features.
To record yourself giving a PowerPoint presentation via Camtasia:
Step 1. Open Camtasia, sign in, and then choose New Recording.
Step 2. Select a recording mode you need.
Step 3. Enable the webcam recording and choose the audio type to be recorded.
Step 4. Click the Record button to start recording the presentation.
Step 5. When you are done, click the Stop button.
Step 6. Edit the video and export the recording.
How to Record Yourself on PowerPoint Online
If you want to spare yourself from software installation, you can switch to an online screen recorder for help. An online screen recording website like ScreenCapture allows you to record yourself on PowerPoint without software or registration. You can also choose to record webcam and audio during the presentation video recording. This makes it easy for you to record yourself talking while presenting a PowerPoint.
Before you start, you should know that the free version of ScreenCapture only allows you to record a presentation with its watermark and save the recording as an MP4 file in HD quality. If you want to enjoy full features, upgrading to the pro version or downloading the desktop version is still necessary.
To record yourself on PowerPoint online:
Step 1. Prepare the presentation you need to record.
Step 2. Check the Microphone, Sound, and Webcam options, then click Start Recording.
Step 3. Click Window, choose your PowerPoint presentation, and then click Share.
Step 4. When you need to end the recording, click Stop Sharing and go back to ScreenCapture to click Stop Recording.
Step 5. Preview the recorded video and click Download to save the HD MP4 file to your computer.

Wrapping Up
Now you know how to record a video of yourself while presenting PowerPoint using four feasible ways. Since all these screen recording tools are compatible with Windows and macOS, you can use them to record a PowerPoint presentation with webcam on PC or Mac freely. Specify your needs and pick up the most suitable tool to apply.
About the Author
You May Also Like
-
How to Record a Presentation on Google Slides: 5 New Ways
You will know how to record on Google Slides with audio and webcam using easy and proven ways. Apply any of them to capture screen.
Myra Xian Updated on -
4 Easy Ways to Record Video in PowerPoint You Will Like
You will know how to record video on PowerPoint, either with or without audio and webcam, using 4 easy tips.
Myra Xian Updated on -
How to Record Slide Show on PowerPoint: Detailed Guide
You will know how to record slide show on PowerPoint using the built-in recording feature in Microsoft PowerPoint and easy third-party tools.
Myra Xian Updated on