

Updated on
Quick Answer:
You can record videos vertically on your Mac with the help of SurFlex Screen Recorder, OBS Studio, QuickTime Player, or iMovie. Whether you prefer to use a preinstalled app or third-party tool, you can find the solution you need.
If you are going to make videos for social networking platforms like TikTok, Instagram, and Snapchat, you may prefer to record vertical videos to ensure a better viewing experience for the video viewers. That’s probably the main reason why you want to record vertical video on Mac. Luckily, with the help of the built-in and third-party screen recorders, you will be able to record videos on your computer vertically with ease. Check the detailed tips below and use any of them to record videos on your Mac according to your preferences.
Table of contents
Record Vertical Video on Mac Easily
Tool: SurFlex Screen Recorder
Whether you need to record a vertical video on a PC or Mac, you can use SurFlex Screen Recorder to capture your desired screen without difficulty. It allows you to record any part of the screen and enables you to customize the recording region by manual selection or presets. Thus, when you want to record your computer screen vertically, you can select a vertical recording region to get it done.
Besides, SurFlex Screen Recorder provides different video formats for you to export the recording, making it easy for you to record videos in MP4, AVI, MOV, or other formats.
To record a vertical video on Mac:
Step 1. Go to Settings to set up your recording preferences, and then choose the Record Screen mode.
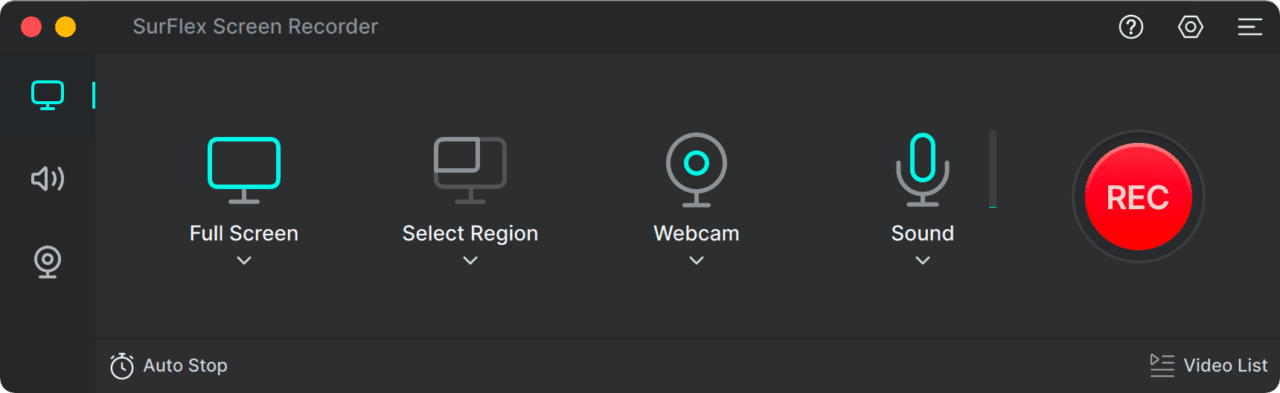
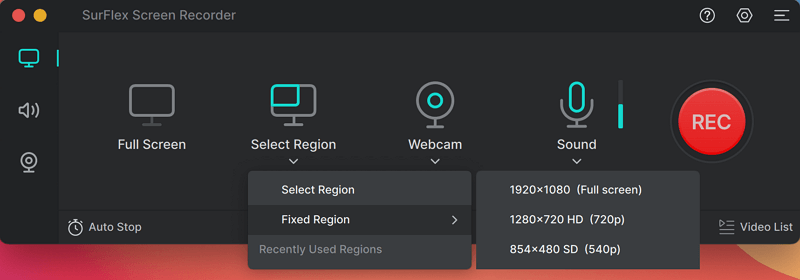
Step 2. Choose to record the Full Screen or a Selected Region and then select the recording area.
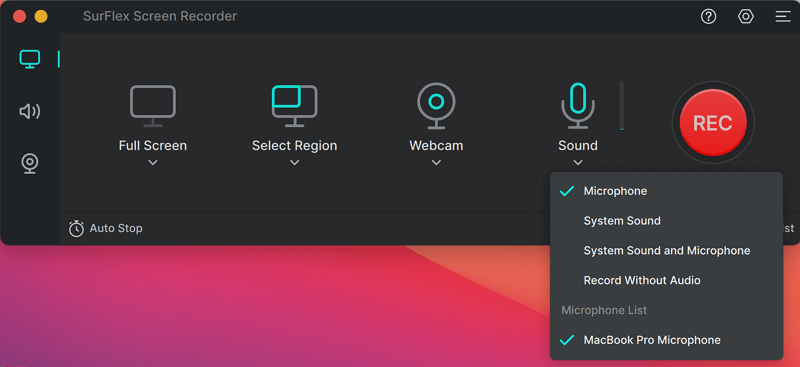
Step 3. Enable audio recording, select Microphone, System Sound, or System Sound and Microphone, and then click REC to start recording your Mac screen with audio.
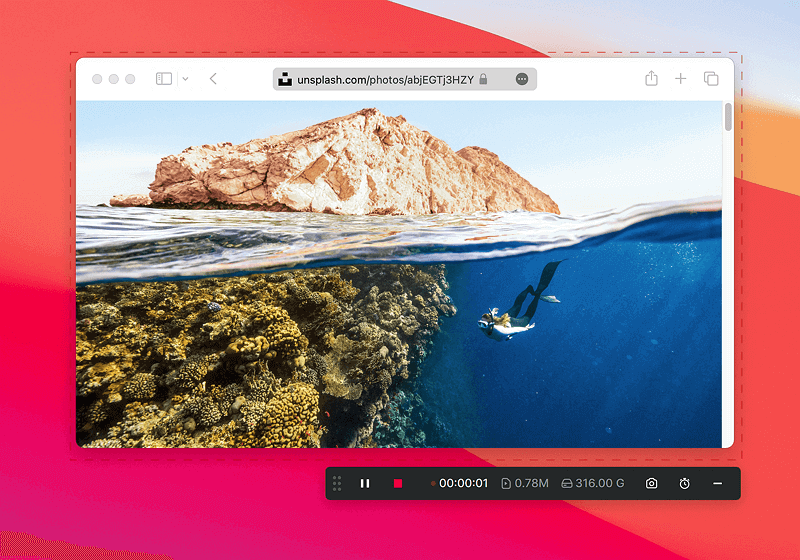
Step 4. Once you have finished recording, click the Stop button and then preview the video.
Record Vertical Video on OBS with Mac
Tool: OBS Studio
OBS Studio is a free, open-source, and cross-platform tool for screen recording and live streaming. With its screen recording capabilities, you will be able to make vertical videos on your Mac via proper settings. However, since OBS Studio is not as intuitive as other professional screen recorders, you may find it difficult to operate. If you don’t mind, you can follow the steps below to record your Mac screen vertically.
To record a vertical video on OBS:
Step 1. Download and install OBS Studio on your Mac.
Step 2. Open OBS Studio and go to File > Settings > Output to customize the output options.
Step 3. Then go to the Video tab to set the Base Resolution and Output Resolution according to your needs. Afterward, click OK.
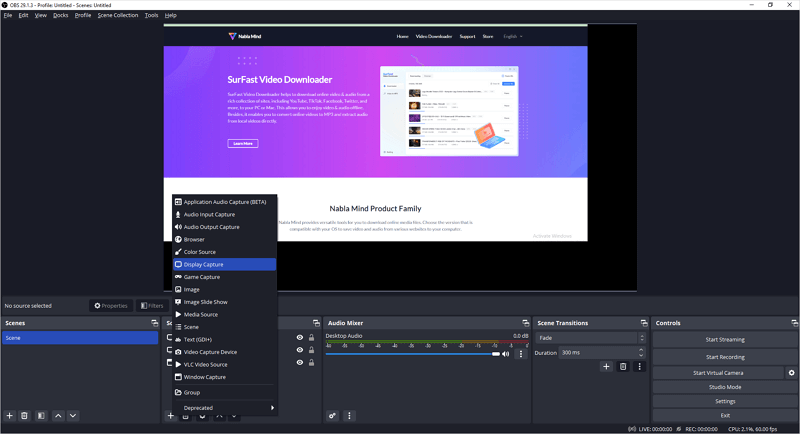
Step 4. Go to the Sources panel and then click Add to add all the recording sources you need, such as Window/Display Capture, Audio Output Capture, or Audio Input Capture.
Step 5. When you are ready, click Start Recording in the Controls panel to start recording a video vertically.
Step 6. When needed, click Stop Recording and check the video via File > Show Recordings.
You can also capture a vertical video by customizing the recording region in OBS. You can refer to the guide on how to record part of screen on Windows for more details.
Record Mac Screen Vertically for Free
Tool: QuickTime Player
As mentioned earlier, there are built-in apps on Mac that can help to make vertical videos. One of them is QuickTime Player. It allows you to record a selected portion of your screen and thus you can record a vertical region to create a video you need.
To record Mac screen vertically:
Step 1. Open QuickTime Player and go to File > New Screen Recording.
Step 2. Click Options to select the audio recording device and finish other recording settings.
Step 3. Choose to record a selected portion and then select a vertical region on your screen.
Step 4. Click Record to start recording a video on your Mac.
Step 5. Once the recording is finished, click Stop in the menu bar and save the recording to your Mac.

How to Make Vertical Video in iMovie on Mac
Tool: iMovie
Another preinstalled app on your Mac that enables you to make vertical videos is iMovie. It is primarily a video editor and thus can help you edit a recorded video to make it vertical. Besides, it is capable of recording yourself via the integrated camera on your Mac. If you are going to record yourself on Mac and make the recording vertical, using iMovie will be helpful.
To make a vertical video in iMovie on Mac:
Step 1. Open the iMovie app and go to Import > Import Media.
Step 2. Select the Camera option and click Import to > New Event > Record.
Step 3. Once the recording is finished, end the recording and save it to your Mac.
Step 4. Open the video in iMovie and click Crop > Rotate Clockwise.
Step 5. Rotate the video to make it vertical.
Wrapping Up
Vertical videos are essential for numerous social networking and video streaming platforms, making it necessary to learn how to record videos vertically on your Mac or PC. While built-in apps can assist with this, utilizing a third-party screen recorder grants you greater control over the video format and quality. Select any of the aforementioned tools based on your preferences and utilize them to effortlessly screen record on your Mac without any hassle.
About the Author
You May Also Like
-
How to Screen Record on Mac: 6 Tested Ways
You will know how to record screen on Mac via various free or paid Mac screen recorder tools. Pick up the one you like.
Myra Xian Updated on -
How to Screen Record on MacBook Air with Sound in Detail
You will know how to screen record on MacBook Air with sound using various ways. Pick up one you like to screen record MacBook Air easily.
Myra Xian Updated on -
How to Record Myself on Mac: Free & Easy
You will know how to record yourself on Mac, either with or without the screen at the same time, using easy and proven ways.
Myra Xian Updated on