

Updated on
Quick Answer:
You can use QuickTime to record screen on Mac with Audio by going to: QuickTime Player > File > New Screen Recording > Record.
QuickTime Player on Mac is now an all-inclusive tool to play, record, and edit videos and audio files. Thus, if you are using a Mac, you can use this built-in app on your device to record screen on Mac with audio. This allows you to capture your Mac screen without any third-party Mac screen recorder for free. (You can also record screen on Mac via shortcut, which also helps to capture the Mac screen at no cost.)
Table of contents
Overview of QuickTime Player Screen Recording Feature
The screen recording feature in QuickTime allows you to record screen on Mac without installing extra apps and without any cost. Before you start, you’d better check its main functions and ensure it can fulfill your needs perfectly.
Pros:
- Provides movie recording (camera), audio recording (microphone), and screen recording.
- Provides 4K, 1080p, and more output options for screen recordings.
- Allows to record screen with audio on Mac (external audio only).
Cons:
- Only supports MOV for video recordings and M4A for audio recordings.
- Has limited customizable options.
- Disallows recording screen with system sound.
How to Use QuickTime to Record Screen with Audio
Supports: External Audio
If QuickTime Player meets your requirements, you can follow the steps below to perform QuickTime screen recording with audio (external audio) effortlessly on your Mac.
Notes: I performed the screen recording on a MacBook Pro. However, the buttons or options may vary depending on the device or macOS version that you are using.
To record screen on Mac with audio using QuickTime Player:
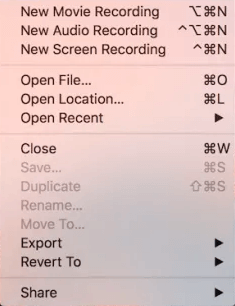
Step 1. Go to Launchpad to open QuickTime Player.
Step 2. Click File and choose New Screen Recording.
Step 3. Select Record Entire Screen or Record Selected Portion.
Step 4. Click Options, and check MacBook Pro Microphone so that you can record screen on your Mac with audio.
Step 5. Click Record to start recording.
Step 6. To stop screen recording in QuickTime, you can click the recording icon in the Menu Bar, use Command + Control + Escape, or directly tap Stop on the Touch Bar on your MacBook.

How to Perform QuickTime Screen Recording with Audio
Supports: Internal Audio
Yes, using QuickTime only can’t help you record the screen on Mac with system sound. But by adding an audio driver and via proper settings, you will be able to record screen with internal audio on Mac using QuickTime Player. There are various audio drivers for Mac, here I’d like to show you how to use BlackHole.
Before you start, download and install BlackHole on your Mac following the official instructions.
To use QuickTime to record screen with internal audio:
Step 1. Open Audio MIDI Setup on your Mac, click the plus icon, and select Create Multi-Output Device.
Step 2. Select the item and check BlackHole 2ch and MacBook Pro Speakers (or Built-in Output). Then check Drift Correction next to MacBook Pro Speakers (or Built-in Output).
Step 3. Launch QuickTime Media Player, go to Files, and choose New Screen Recording.
Step 4. Select the region you need to capture and click Options to choose BlackHole 2ch as the audio input option.
Step 5. Click Record.
Step 6. To end the QuickTime screen recording, do one of the following:
- Click the recording icon from the Menu Bar.
- Use Command-Control-Escape.
- Tap the Stop option from the Touch Bar.
How to Record Screen on Mac with Audio (External & Internal)
As you can see, you can finally use an audio driver to help you capture your Mac screen with system sound. But it’s not an easy task. Besides, it is impossible for QuickTime to grab both external and internal audio during the screen recording, which is necessary in some situations.
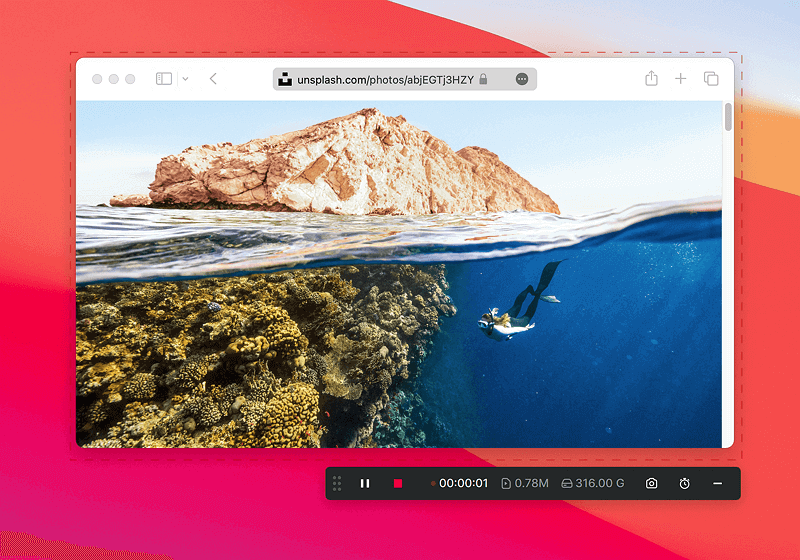
To record screen on Mac with system sound, microphone, or both easily, you will need a professional screen recorder like SurFlex Screen Recorder. Such a tool enables you to:
- Record screen or a specific window
- Record selected region or fixed region in various resolutions
- Record camera
- Record audio without screen
- Customize recording settings
If you like a more capable screen recording solution than QuickTime, SurFlex Screen Recorder is a recommended choice.
To record Mac screen with audio:
Step 1. Go to Settings to set up your recording preferences, and then choose the Record Screen mode.
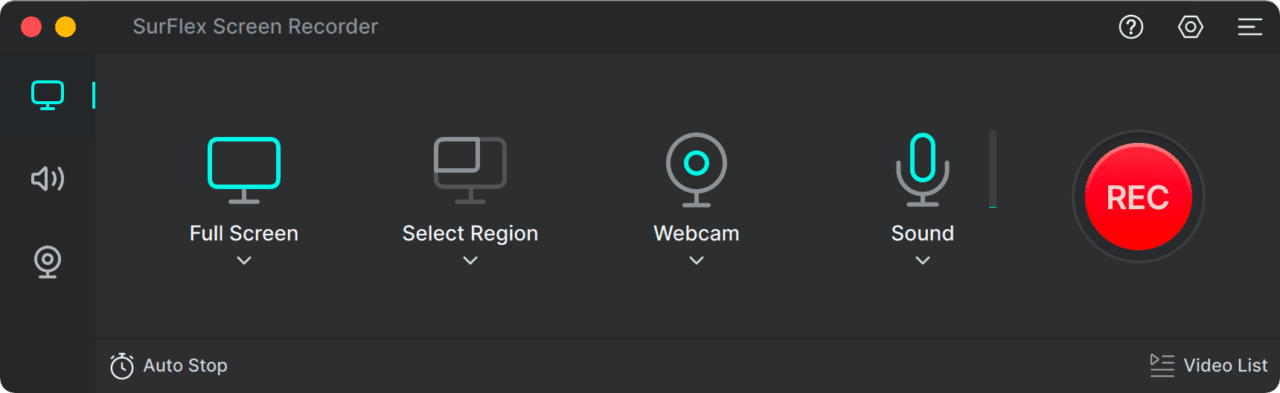
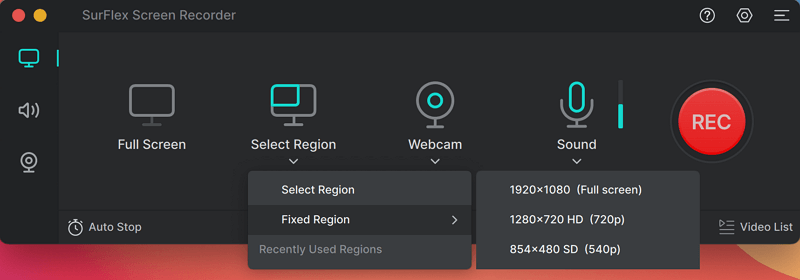
Step 2. Choose to record the Full Screen or a Selected Region and then select the recording area.
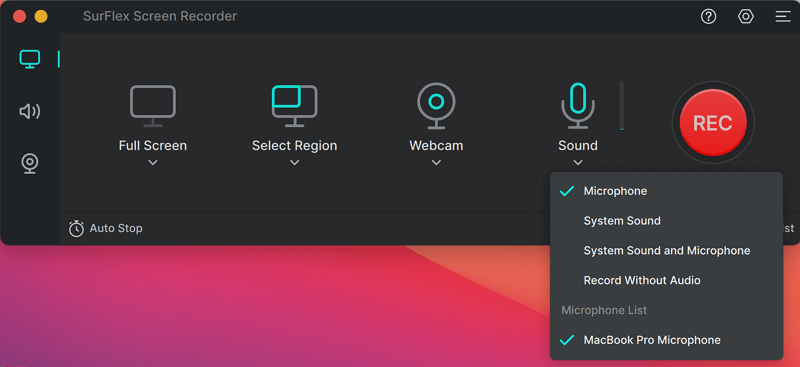
Step 3. Enable audio recording, select Microphone, System Sound, or System Sound and Microphone, and then click REC to start recording your Mac screen with audio.
Step 4. Once you have finished recording, click the Stop button and then preview the video.
FAQs on QuickTime Screen Recording with Audio
When you record screen on your Mac using QuickTime, you may also want to know:
There are three common ways for you to stop QuickTime screen recording:
1. Press Command-Control-Escape on your keyboard.
2. Click the screen recording icon in the Menu Bar.
3. Tap on Stop in the Touch Bar.
QuickTime Player allows you to record screen with microphone sound. If your recording has no sound, you need to check the Options settings and make sure you have selected your computer microphone as the audio input device.
Yes, QuickTime screen recording will include external audio, namely microphone sound, if you have set to capture it in the Options settings. However, it will not capture the internal sound on your Mac.
Wrapping Up
QuickTime can certainly fulfill some basic video recording needs. However, if you require more advanced options, it may not be the best choice for you. Therefore, it is recommended to use a professional Mac screen recorder if you frequently need to record your screen in various situations.
About the Author
You May Also Like
-
How to Record YouTube Videos on Mac in Every Way
You will know how to record YouTube videos on Mac to capture YouTube videos you like. Check the details below and pick up the way you like.
Myra Xian Updated on -
How to Record a Video on a Mac in 5 Ways
Whether you want to record yourself or your screen, you will know how to record video on Mac with five proven ways.
Myra Xian Updated on -
4 Ways to Record Vertical Video on Mac
You will know how to record vertical video on Mac in four easy ways. Check them in detail and record videos on your Mac effortlessly.
Myra Xian Updated on