

Updated on
Quick Answer:
You can screen record Mac using the following ways:
1. Screenshot (Shortcut)
2. QuickTime
3. SurFlex Screen Recorder
4. Snagit
5. Movavi Screen Recorder
6. OBS Studio
There are various reasons why you might want to record screen on Mac, such as creating tutorials, sharing gameplay, and creating content for social media. Therefore, screen recording on a Mac is in high demand nowadays. If you need to screen record on your MacBook or iMac but don’t know how to do it, check out this ultimate guide to record your Mac screen and capture everything you want.
Table of contents
How to Screen Record on Mac via Shortcut
Supports: Record Mac screen with microphone audio
Speaking of screen recording on Mac, you can do it without installing any third-party screen recorder, since the preinstalled Screenshot app can meet your basic screen recording needs perfectly.
Since macOS Mojave, the Screenshot app has been added with the screen recording feature that allows you to screen record Mac via a shortcut, namely Shift-Command-5. This feature works well to capture your entire Mac screen or a selected region. Besides, it enables you to record screen on Mac with audio (external only). Most importantly, since Screenshot is the built-in app on macOS, you don’t need to download and install extra apps or pay for it. That means you can record videos on your computer directly for free.
Notes: Screenshots natively supports external audio only. If you want to screen record on Mac with internal audio, you can either use a third-party Mac screen recorder or add an audio driver to your computer and then use Screenshot to catch the internal audio. For a detailed guide, go to the guide – screen record Mac via shortcut.
To record screen on Mac via Shortcut:
Step 1. Prepare the content you want to record.
Step 2. Press Shift + Command + 5 on your keyboard to launch the Screenshot control panel.
Step 3. Choose to record the entire screen or a selected region.
Step 4. To record the screen on Mac with audio, click Options and choose your microphone under Microphone.
Step 5. Click Record to start recording your screen.
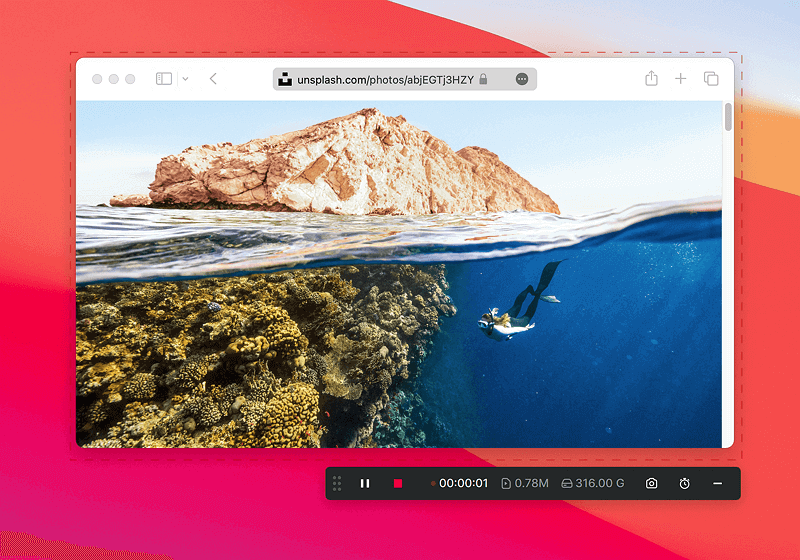
Step 6. To stop, click the Recording icon in the Menu Bar or tap Stop in the Touch Bar.

How to Record Screen on Mac via QuickTime
Supports: Record camera, record audio, and record screen with microphone sound
Similar to Screenshot, QuickTime is also a built-in app on macOS that will help to perform screen recording on MacBook without other software tools at no cost. Compared with using Screenshot, QuickTime provides more screen recording options for you:
- Record camera
- Record audio only
- Record screen
However, it also disallows the recording of system sounds. You also need to add a third-party audio driver to your device so that you can screen record on Mac with internal audio. Check the guide on QuickTime screen recording with audio for the details.
To record screen on Mac with audio with QuickTime:
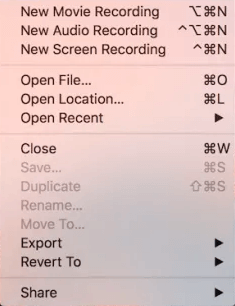
Step 1. Launch QuickTime, click Files, and then choose New Screen Recording.
Step 2. Choose Record Entire Screen or Record Selected Portion.
Step 3. Click Options and select your microphone as the audio input device.
Step 4. Click Record to start capturing your screen.
Step 5. To stop QuickTime screen recording, use Command + Control + Escape, tap the Stop option in your Touch bar, or click the recording icon in the menu bar.
How to Screen Record on a Mac with Audio
Supports: Record camera, record audio, and record screen with microphone sound, internal sound, or both
Although convenient, both Screenshot and QuickTime provide very basic screen recording features. When you want more advanced features, such as screencasting with both internal and external sound, they won’t do you a favor. In such cases, using a third-party professional screen recorder for Mac is necessary.
To record screen and audio on Mac easily, you can use SurFlex Screen Recorder – an easy and flexible Mac screen recorder. With this app installed, you can customize screen recording freely. Here are some of its features:
- Record screen and webcam
- Record audio, internal audio, external audio, or both
- Schedule screen recording
To record screen with audio on Mac:
Step 1. Go to Settings to set up your recording preferences, and then choose the Record Screen mode.
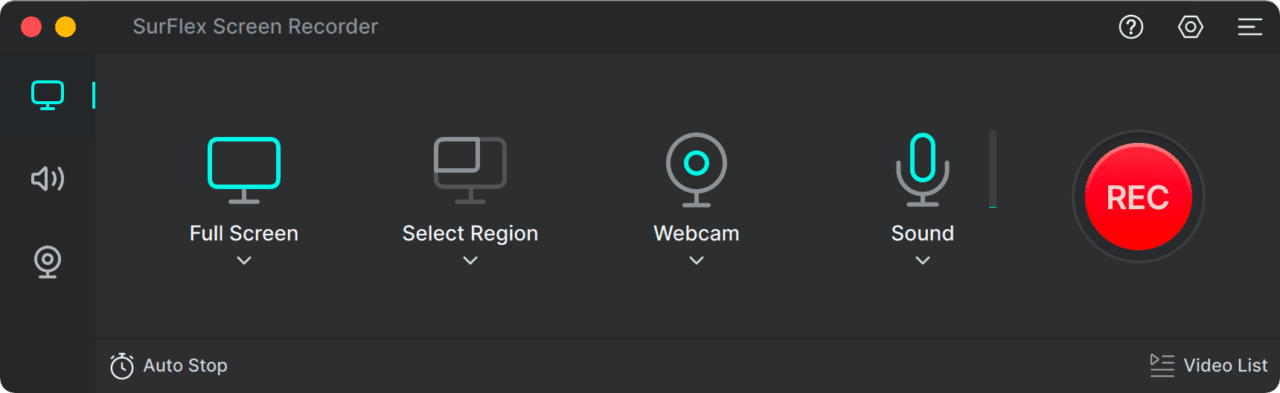
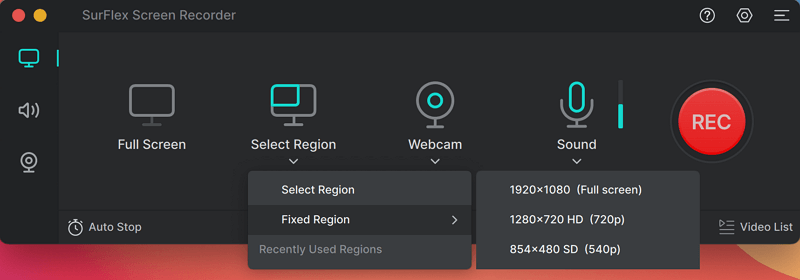
Step 2. Choose to record the Full Screen or a Selected Region and then select the recording area.
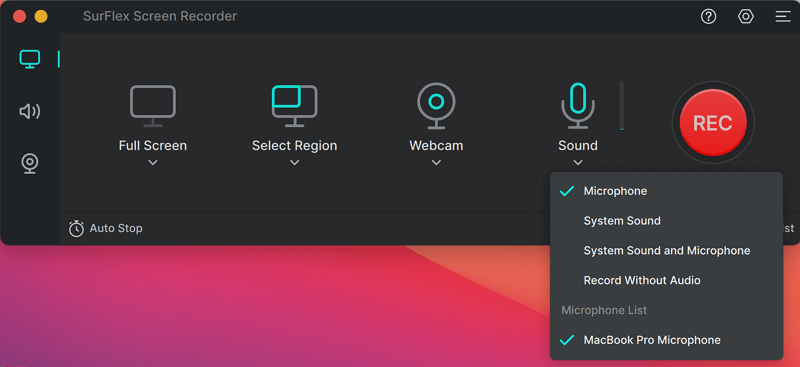
Step 3. Enable audio recording, select Microphone, System Sound, or System Sound and Microphone, and then click REC to start recording your Mac screen with audio.
Step 4. Once you have finished recording, click the Stop button and then preview the video.
(Whether you want to screen record on Macbook Pro or record screen on Macbook Air, it will come to help.)
How to Record Your Screen on Mac Flexibly
If you also want to add markups or take screenshots during the screen recording on your Mac, you will need screen recording software like Snagit. In addition to basic features, it has additional functions such as:
- Real-time drawing
- Instant video sharing
- Creating videos from images
- Making GIFs with recordings
Personally, Snagit is a good choice for recording videos if you are going to make tutorials and demonstrations.
To record Mac screen with Snagit:
Step 1. Launch the program, and then sign in or enter your license key.
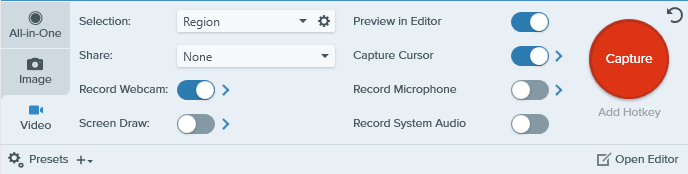
Step 2. Click the Video tab and set the screen recording settings.
Step 3. Click Capture to start.
How to Record Screen and Audio on Mac Easily
Movavi Screen Recorder is a lightweight screen recorder for macOS that can capture everything on your Mac as a high-quality video. Similar to Snagit, it also allows you to draw on the screen while recording and taking screenshots. You can also use it to schedule a recording so that you don’t miss anything on your computer.
To record screen and audio on MacBook:
Step 1. Launch Movavi Screen Recorder.
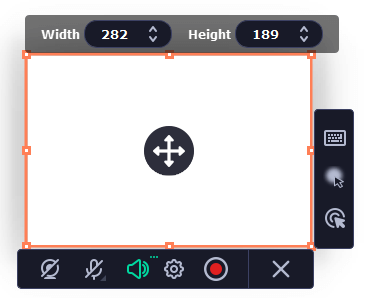
Step 2. Choose the area to capture and set the recording settings according to your preferences.
Step 3. Click the REC button to start recording.
Step 4. Edit the video recording if necessary and then save the file.
How to Screen Record on Mac for Free
If you want to know how to record your screen on Mac for free and need advanced features, using OBS Studio is a good choice. It’s a free and open-source program for video recording and live streaming. Most importantly, it is available for macOS.
Despite its advantages of being free and powerful, OBS has a high learning curve, which can be daunting for many users and discourage them from using it.
Unlike some of the screen recorders mentioned earlier, which allow you to start recording with simple settings, using OBS to record your screen requires manual configuration of various features, making it more difficult to use due to the higher level of technical expertise needed.
If you want to record videos using OBS Studio, it’s highly recommended to learn how to use it via video tutorials on YouTube.
FAQs on Screen Recording on Mac
When you record your Mac screen, you may also want to ask:
You can also use the shortcut provided by the Screenshot app to record screen on your MacBook Pro: Shift-Command-5.
If you use the built-in apps on Mac to record screen, either Screenshot or QuickTime, you may find that your recording has no sound. That’s probably because you do not choose your microphone as the audio input device in the Options settings. If you find your Mac record screen without system sound, that’s because Screenshot and QuickTime do not have this feature.
In addition to using QuickTime, there are many other ways to record videos on Mac. You can try the following screen recorder apps to capture screen:
1. Movavi
2. Snagit
3. SurFlex Screen Recorder
Wrapping Up
Although you can screen record on Mac for free using Screenshot or QuickTime, they may fail to meet your demands in some situations. That’s why some users prefer to use a professional screen recorder for Mac. Specify your needs and pick the most suitable tool to capture your Mac screen.
About the Author
You May Also Like
-
How to Screen Record on Mac Without Background Noise
Read this guide and you will learn how to screen record on Mac without background noise using a user-approved solution.
Myra Xian Updated on -
How to Record Yourself on MacBook: Detailed Guide
You will know how to record yourself on MacBook using the built-in screen recorder or third-party screen recording software for Mac.
Myra Xian Updated on -
How to Screen Record on MacBook Air: 4 Proven Tips
If you are wondering how to screen record on MacBook Air M1 or M2, you can apply the tips here to capture Mac screen with sound easily.
Myra Xian Updated on