

Updated on
Quick Answer:
You can easily record a GIF on your Mac using ApowerREC Screen Recorder, GIPHY Capture, GIFCap, or Chrome Capture. Whether you prefer a desktop GIF recorder, an online service, or a browser extension, you will find a suitable choice to apply.
GIFs have advantages such as an autoplay feature, small file size, and wide compatibility. Therefore, instead of recording videos in a regular format like MP4, you might prefer to record your screen as a GIF for sharing. To assist you in capturing a GIF on a Mac, we have introduced four proven Mac GIF recorder tools. With any of these tools, you can easily record GIF on your Mac without any difficulties.
Table of contents
Record GIF on Mac with ApowerREC Screen Recorder
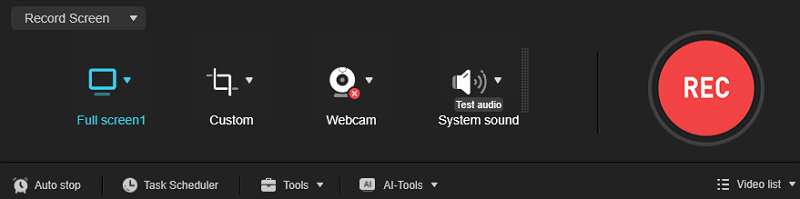
Whenever you need to capture a GIF on Mac or Windows, you can use ApowerREC Screen Recorder. As a professional screen recorder for desktop, ApowerREC not only helps to record any selected portion of your screen but also allows you to customize the output format, making it easy for you to create GIFs on Mac by capturing any content you like.
What’s more, ApowerREC enables you to select the video quality, video frame rate, and other recording options according to your needs. If you want to make a GIF in high quality, it is a suitable choice.
To record a GIF on Mac:
Step 1. Download and install ApowerREC on your Mac.
Step 2. Go to Settings to choose GIF as the output format and finish other output settings.
Step 3. Select the recording region and click REC.
Step 4. When you are done, click Stop and check the GIF file in your selected folder.
You can follow the same steps to record GIF on Windows computers when you need to.
Capture GIF on Mac with GIPHY Capture
GIPHY Capture is an exclusive GIF screen recorder designed specifically for Mac. With this tool, you can not only record your screen to GIF but also edit the recording by adding captions, adjusting the export size, changing frames, and more. If you’re looking for an easy yet powerful GIF maker for Mac, don’t miss out on this handy tool.
To record a GIF on Mac via GIPHY Capture:
Step 1. Download and install GIPHY Capture on your Mac.
Step 2. When you need to record, launch GIPHY Capture via the search bar.
Step 3. Select the recording area and then click the red Record button.
Step 4. Select your recording and trim the video if you need to.
Step 5. Set the Loop Type, Pixel Size, and Frame Rate settings.
Step 6. Click Save As and set the GIF name and destination folder.
Step 7. Click Save.

Record a GIF on Mac Online with GIFCap
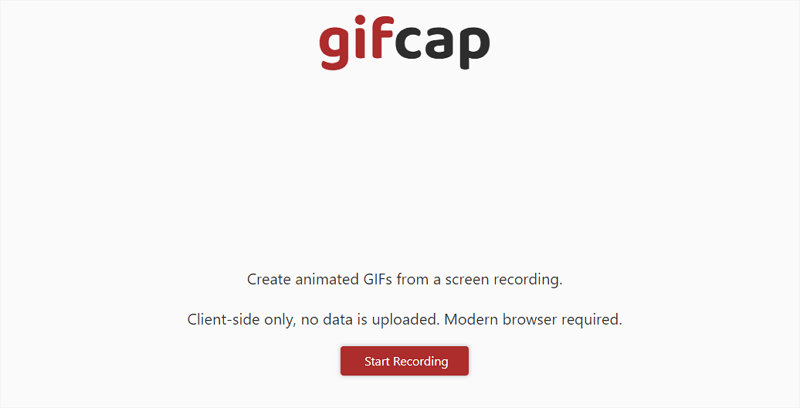
As mentioned earlier, there are also online services available for recording GIFs on a computer, such as GIFCap. It allows you to create a GIF by recording your browser tab, an app window, or the entire screen. Additionally, it provides a trimming feature for adjusting the video length. Overall, it offers an easy and software-free solution for recording GIFs on Mac.
However, it does not allow you to customize the recording region. If you need to record a specific portion of your screen, it is not the appropriate tool to use.
To record screen to GIF on Mac using GIFCap:
Step 1. Visit GIFCap using your browser.
Step 2. Click Start Recording.
Step 3. Choose the tab, window, or screen you want to record and then click Share.
Step 4. When needed, click Stop Sharing to end the recording.
Step 5. Trim the video according to your needs, and then click Render.
Stop 6. Click Download to save the GIF video to the Downloads folder on your Mac.
Screen Record GIF on Mac via Chrome Capture
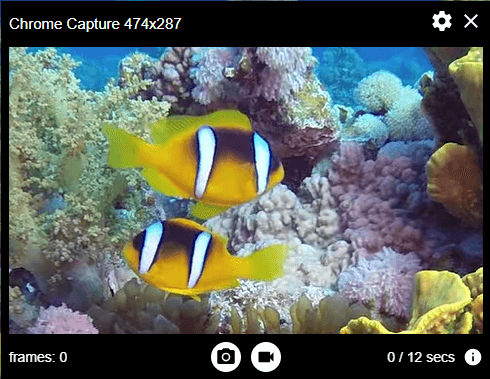
A browser extension like Chrome Capture is another web-based method for capturing GIFs on Mac. By adding this GIF recorder to your Chrome browser, you can record a GIF by capturing a browser tab, an app window, or the entire screen. However, it has an additional advantage: it allows you to record a selected area within the current browser tab. If this meets your needs, follow the steps below to give it a try.
To capture a GIF on Mac via Chrome Capture:
Step 1. Add Chrome Capture to your browser’s toolbar.
Step 2. Click Chrome Capture and choose Selected Area.
Step 3. Select the recording area and click the record icon.
Step 4. When you are done, click the Stop button.
Step 5. Edit the recording according to your preferences.
Step 6. Click Save, check the output settings, and click Save again.
Step 7. Go to the Downloads folder to check the GIF file.
Wrapping Up
Now that you know how to screen record GIFs on Mac, you have the option to choose between a more powerful desktop app or a more convenient online service to create them. After creating the GIF, you can easily share it with others or use it conveniently in your tutorials.
About the Author
You May Also Like
-
How to Screen Record on MacBook Air: 4 Proven Tips
If you are wondering how to screen record on MacBook Air M1 or M2, you can apply the tips here to capture Mac screen with sound easily.
Myra Xian Updated on -
How to Record YouTube Videos on Mac in Every Way
You will know how to record YouTube videos on Mac to capture YouTube videos you like. Check the details below and pick up the way you like.
Myra Xian Updated on -
How to Screen Record on Mac for YouTube: Perfect Fits
You will know how to screen record on Mac for YouTube with suitable resolution and format. Read on to theck the detail.
Myra Xian Updated on