

Updated on
Quick Answer:
You can record yourself on MacBook using one of the following tools:
1. QuickTime Player
2. Photo Booth
3. iMovie
4. SurFlex Screen Recorder
“How do I record a video of myself on my Mac?”
When it comes to screen recording on a Mac, you may not only want to record a window, an app, or a selected portion of your screen but also need to record yourself on a Mac sometimes. If that’s what you want but don’t know how to record yourself on your MacBook, no worry. Here I’d like to show you how to record yourself on a Mac easily.
Table of contents
How to Record Yourself on MacBook via QuickTime
Whether you are using a MacBook Air or MacBook Pro, you can use QuickTime Player – the built-in app on your Mac that allows you to edit and record videos to get things done.
Although both Screenshot and QuickTime Player allow you to screen record Mac, when it comes to recording yourself, only QuickTime Player will be helpful since it provides a feature called Movie Recording. This function allows you to record yourself on a Mac using the built-in camera.
To record yourself on MacBook:
Step 1. Launch QuickTime Player on your MacBook.
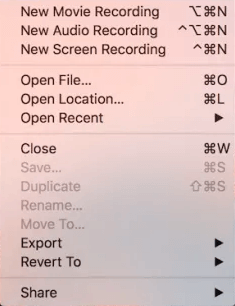
Step 2. Go to File > New Movie Recording and then you will see the monitoring window.
Step 3. Click the arrow next to the Record button and then select the camera, microphone, and video quality.
Step 4. Click Record to start recording yourself.
Step 5. To stop recording, click the Stop icon or tap Stop on your MacBook’s Touch Bar.
Step 6. Click File > Export As or Save, name the video recording, choose a destination folder, and then click Save to save the recording to your MacBook.
If you want to screen record Mac with internal audio using this built-in app, check the guide on QuickTime screen recording with audio for detailed steps.
How to Record Yourself on Mac via Photo Booth
Photo Booth is also built-in on your macOS which enables you to record yourself on Mac without any third-party software. It is designed to take photos and videos using your Mac’s built-in camera. When you record yourself using Photo Booth, you can select one of the special effects it provides before you start. Therefore, if you want to add effects to your screen recording, such as Mirror, Stretch, Dent, and more, you can use Photo Booth to take a video of yourself on Mac.
To record yourself on Mac:
Step 1. Open Photo Booth on your Mac.
Step 2. Switch to the video-taking option at the bottom of the window.
Step 3. Click Effects to select a special effect you like if needed.
Step 4. Click the Record button to start screen recording yourself.
Step 5. Click the button again to stop or tap Stop on the Touch Bar to end the screen recording.

How to Record Yourself on a Mac via iMovie
If you are using macOS 12.6 or later, you can also use iMovie to record yourself on a Mac. Since iMovie is primarily a video editing application, you can use it to edit your recorded video as well. Therefore, using iMovie is the best option if you need to both record and edit the video.
To record yourself on a Mac:
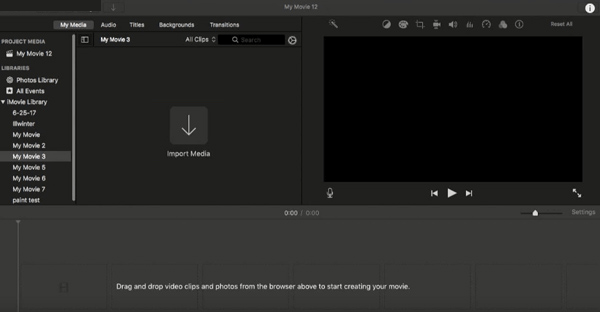
Step 1. Go to iMovie on your Mac and choose File > Import Media.
Step 2. Choose FaceTime HD Camera as the video input device.
Step 3. Click the Record icon to start recording yourself.
Step 4. Click the Stop button when needed and then you can edit the video via iMovie.
Step 5. Save the recording.
How to Record Yourself on MacBook via Mac Screen Recorder
Although there are many built-in tools on your macOS that enable you to record yourself on Mac for free, you may still need a professional screen recorder sometimes. For example, if you want to save the recordings to other formats rather than MOV, you will need a screen recorder for Mac like SurFlex Screen Recorder to help. It allows you to save the video in various formats, such as MP4, WMV, AVI, MOV, FLV, GIF, and more, making the recorded videos easily compatible with various devices and programs.
Besides, it can easily record screen with audio on Mac, allowing you to capture internal sound without strain.
To record yourself on Macbook:
Step 1. Launch SurFlex Screen Recorder and go to Settings to select the output options. Then choose the Record Webcam mode from the left side.
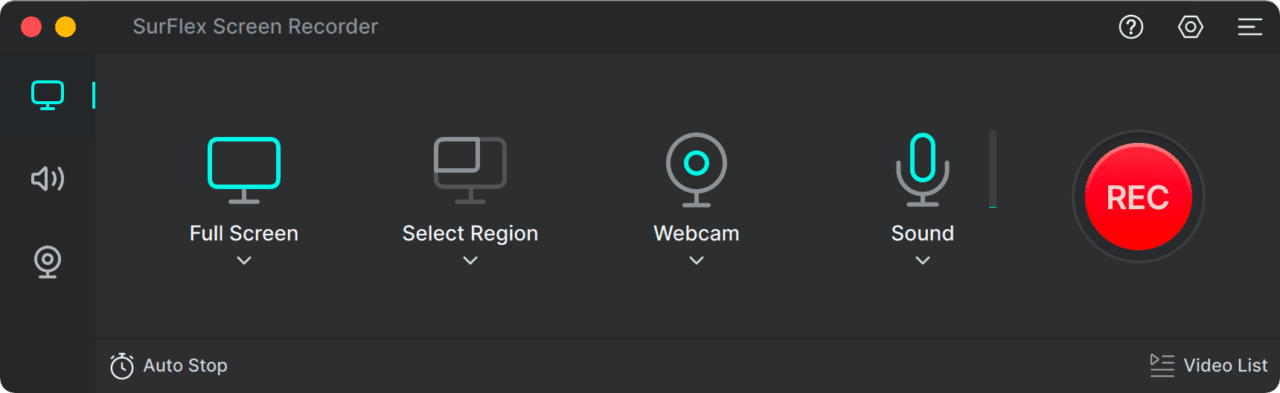
Step 2. Choose the camera recording settings, including the webcam you are going to use, the video resolution, the audio recording option, and the microphone. When you are ready, click REC to start recording yourself on Mac.
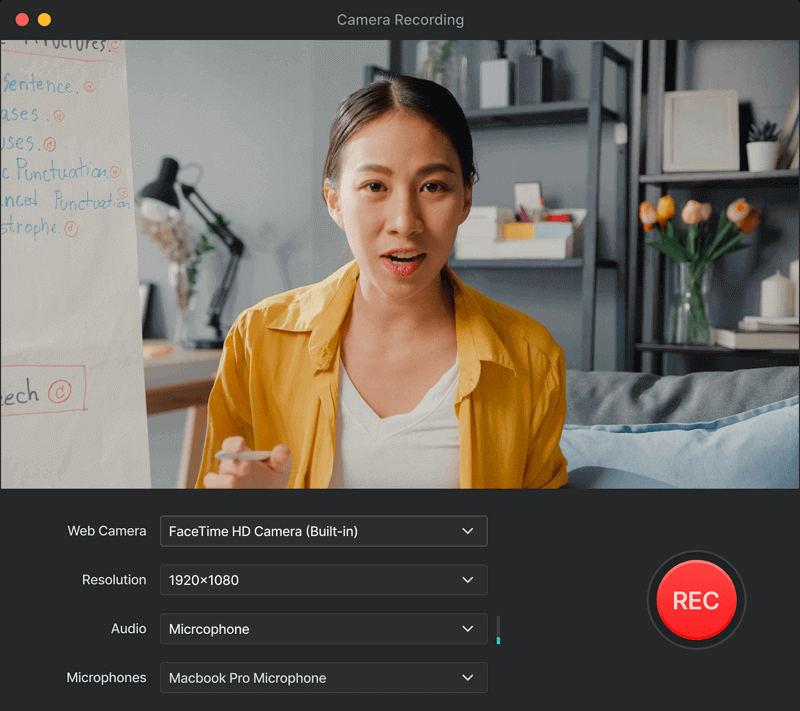
Step 3. Click the Stop icon when you are finished with the recording.
Record Yourself on Mac: FAQs
When you record yourself on Mac, you may also want to ask:
You can record a video of yourself on your Mac using built-in apps like QuickTime Player, Photo Booth, and iMovie
When you need to record yourself and a presentation on Mac, you will need can use QuickTime Player or a third-party screen recorder that supports recording screen and webcam simultaneously to help. Let me show you how to record yourself and screen via QuickTime Player:
1. Launch QuickTime, click File, choose New Movie Recording, click View, and choose Float on Top.
2. Adjust the monitoring window to the size you want.
3. Click File, choose New Screen Recording, select the region that includes your presentation and the webcam, then click Record.
To record internally on your MacBook, such as the internal audio and your Mac screen, the easiest way is to use a third-party screen recorder. You can choose one of the following tools:
1. Movavi Screen Recorder
2. Snagit
3. Camtasia
4. OBS
5. SurFlex Screen Recorder
Wrapping Up
Now you know how to record yourself on a Mac. Whether you want a free or flexible solution, you can find the corresponding tool you like. By the way, if you want to record yourself and your screen at the same time, you can use QuickTime Player or a professional Mac screen recorder like Movavi Screen Recorder to get things done.
About the Author
You May Also Like
-
How to Screen Record on Mac for YouTube: Perfect Fits
You will know how to screen record on Mac for YouTube with suitable resolution and format. Read on to theck the detail.
Myra Xian Updated on -
How to Record MP4 on Mac in 4 Ways
After reading this guide, you will know how to record MP4 on Mac with easy and flexible screen recorder tools or services.
Myra Xian Updated on -
How to Record Myself on Mac: Free & Easy
You will know how to record yourself on Mac, either with or without the screen at the same time, using easy and proven ways.
Myra Xian Updated on