

Updated on
Quick Answer:
You can record a section of the screen on Windows 10 using:
1. Xbox Game Bar
2. SurFlex Screen Recorder
3. Bandicam
4. OBS Studio
Windows 10 has a built-in recorder, the Xbox Game Bar, that is helpful to record screen on Windows 10 with audio. However, it can only record the currently active app window but does not allow you to customize the recorded area. Thus, if you are going to record part of the screen, such as a game or app window, using Xbox Game Bar recording will fulfill your needs. But if you want to record a customized section of the screen, you will need other tools to help.
If you want to record part of screen on Windows 10, check the tips below and you will know how to record a section of your screen in different situations.
Table of contents
How to Record Part of Screen on Windows 10 for Free
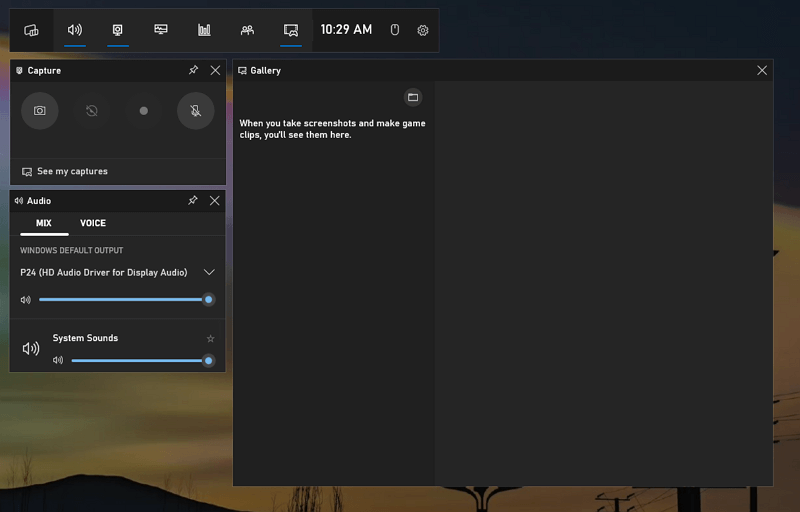
As mentioned above, if you are going to record a specific window on your computer, using Xbox Game Bar is a handy choice to record the part of the screen. Xbox Game Bar recording is also helpful for recording fullscreen games on Windows so that you can capture gameplay easily.
It’s worth noting that Xbox Game Bar recording can’t record the desktop, the File Explorer window, or any selected portion. Thus, check whether it meets your needs before you start.
If you haven’t used Xbox Game Bar before, go to Settings > Gaming > Captures to check and change the recording settings according to your preferences.
To record part of screen on Windows 10:
Step 1. Make sure the window you want to capture is currently active.
Step 2. Press Windows + Alt + R to start recording part of your screen on Windows 10 immediately.
Step 3. When you need to stop, click the Stop button in the control bar or press Windows + Alt + R again.
Step 4. Click the Game clip recorded message to preview the recording or go to C:\Users\admin\Videos\Captures to check all recordings.
Xbox Game Bar is also available in Windows 11, allowing you to screen record on Windows 11 with audio easily. If it can’t get your needs met, check the guide on how to screen record on Windows without Game Bar to get more workable solutions.
How to Record a Portion of Your Screen on Windows 10 with SurFlex Screen Recorder
Although it’s impossible for Xbox Game Bar recording to record a selected portion of your screen, it’s a piece of cake for a professional third-party screen recorder to capture part of your screen on your computer. Thus, when you are looking to record a portion of your screen on Windows 10 or any other Windows version, using a Windows screen recorder like SurFlex Screen Recorder will fulfill your needs perfectly.
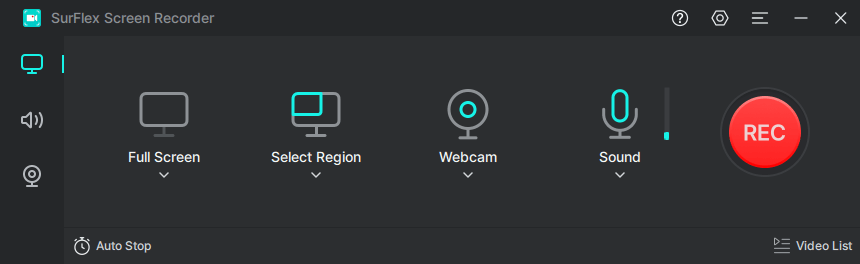
SurFlex Screen Recorder is suitable for all kinds of screen recording situations. No matter what you want to capture, the full screen, a part of the screen, a window, an app/game, or a webcam, it will do you a favor. Therefore, whether you want to record the full screen or part of the screen on Windows 10, using this screen recorder app will get it done for you.
To record a portion of your screen on Windows 10 easily:
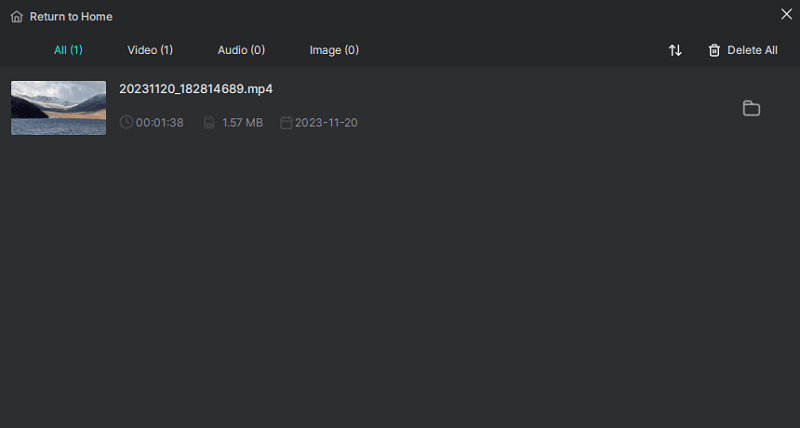
Step 1. Open SurFlex Screen Recorder and go to Settings to select the output options. Afterward, set up the webcam and audio options according to your needs.
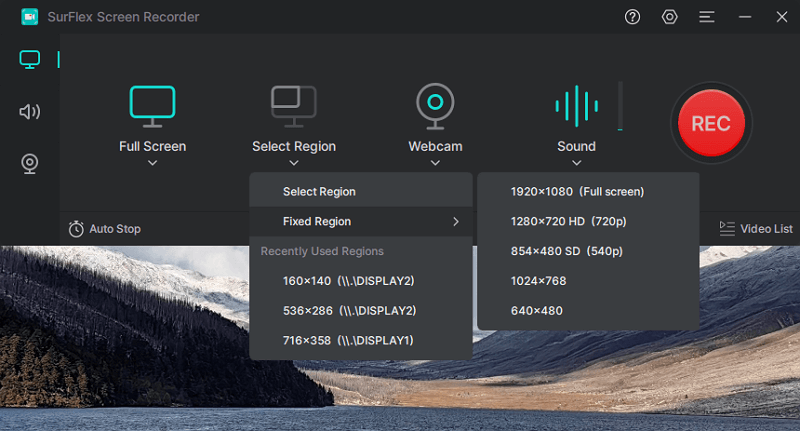
Step 2. Choose Select Region and choose to capture a selected portion or a fixed region.
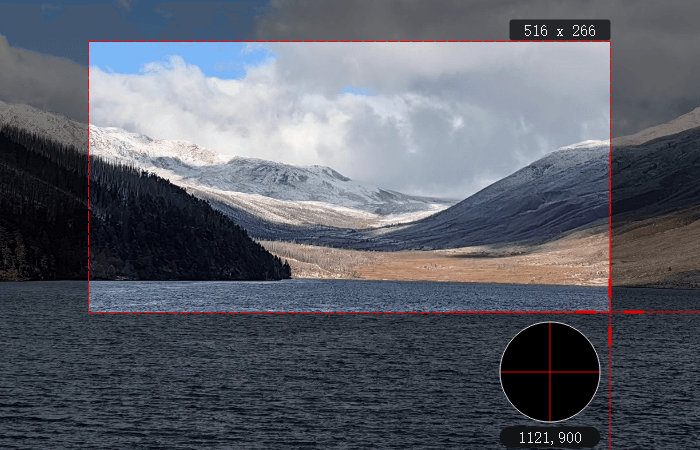
Step 3. Choose the recording area and click REC to start recording this part of the screen on your computer.
Step 4. Once the recording is done, click Stop in the recording bar.

Step 5. Check the recorded video in the popup window.
How to Record a Section of Your Screen on Windows 10 with Bandicam
In addition to SurFlex Screen Recorder, there are many user-friendly screen recorder apps that work equally well to record a section of your screen. Among the numerous choices, I’d like to recommend you try Bandicam. It is a Windows screen recorder that supports multiple screen recording modes and various customizable options. With these features, you will be able to screen record on Windows and capture everything you want from your PC or laptop.
In addition to allowing you to record a selected area on Windows, it also enables you to record screen around your mouse. If you are going to make demonstrations, this feature will be quite helpful.
Notes: If you use the free version, it will add a watermark to your recording by default.
To record a section of your screen:
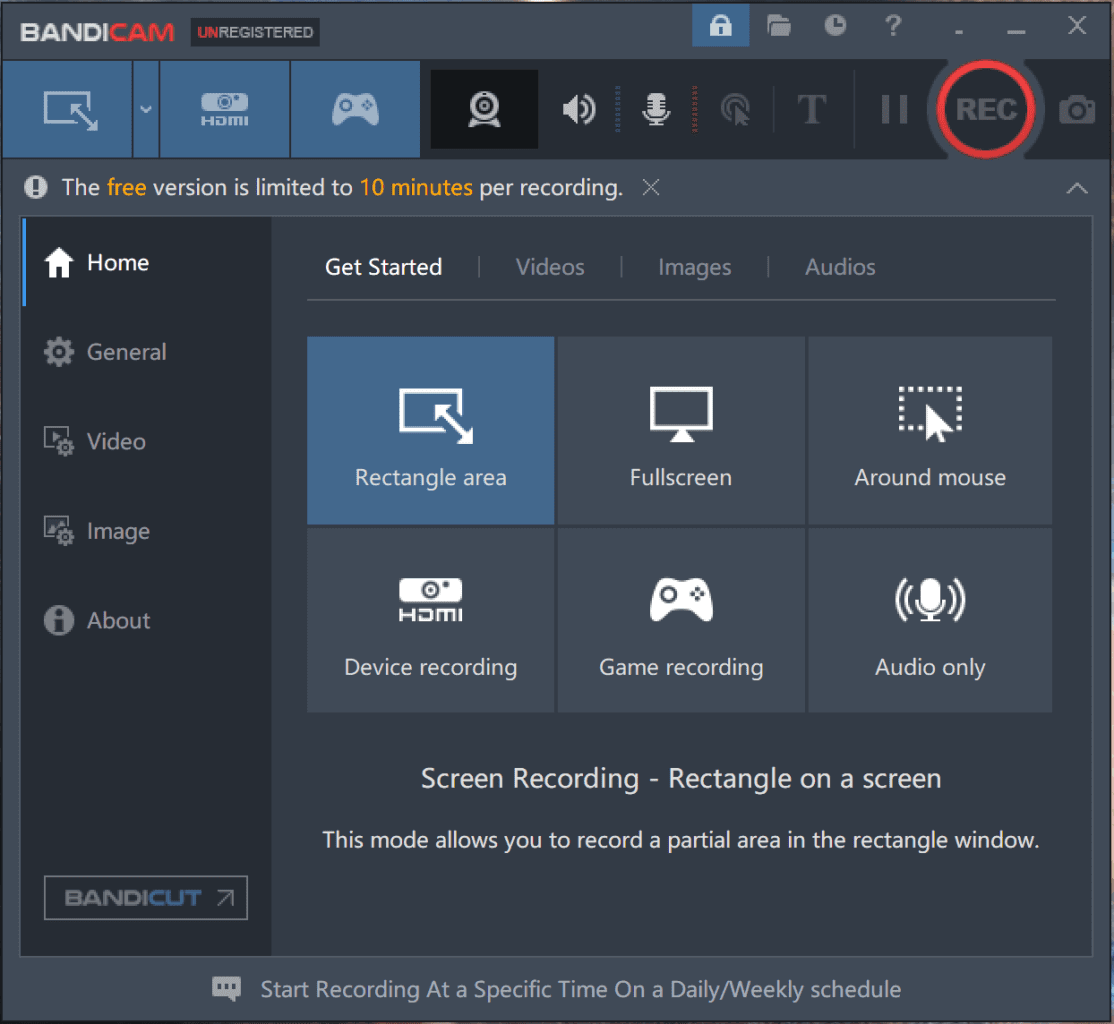
Step 1. Download and install Bandicam on your computer.
Step 2. Open Bandicam and click Video to set up your recording preferences.
Step 3. Click the Screen Recording Mode, choose Select a recording area, and then choose the portion of the screen you’d like to record.
Step 4. Click REC to start recording screen on your Windows 10 computer.
Step 5. When you need to stop, click the red square button to end the recording.
How to Record Part of Screen with OBS
If you want a free yet powerful screen recorder to record part of your screen, then OBS Studio is the best choice for you. It is a free, open-source screen recording and video streaming program available for Windows and macOS. With it, you will be able to record part of screen on Windows for free.
The downside is that OBS Studio is more complex to use compared with the simplified screen recorder apps mentioned above. Thus, you may find it difficult to operate. If you don’t mind, follow the steps below to screen record on Windows 10 using OBS Studio.
To record part of your screen on OBS:
Step 1. Download and install OBS Studio on your Windows 10 PC or laptop.
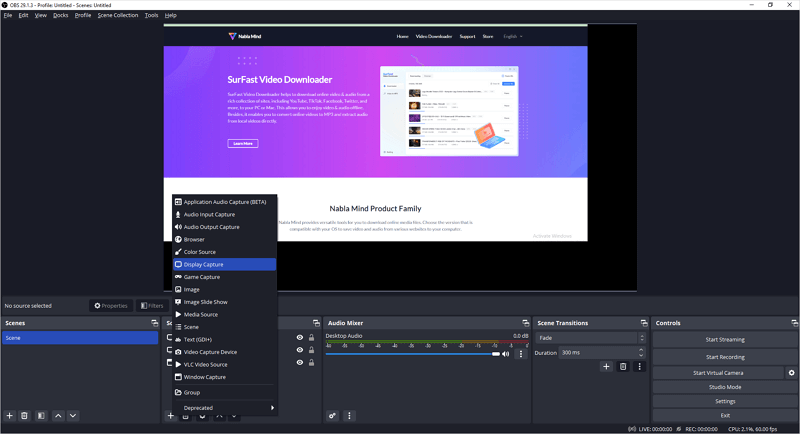
Step 2. Open OBS Studio and go to the Sources panel.
Step 3. Click the Plus icon, choose Display Capture, name the source, and click OK.
Step 4. Right-click the newly added source, choose Filters, click the Plus icon, choose Crop/Pad, and then click OK.
Step 5. Set the cropping parameters to crop the parts of the screen you don’t want to capture and click Close.
Step 6. Go to the Controls panel and click Start Recording to start recording the section of your screen.
Step 7. Click Stop Recording when necessary.
Step 8. Go to File > Show Recordings to check the recorded video.
Wrapping Up
Using a third-party screen recorder makes it easy to record a portion of your screen on Windows freely. If you want an easy method, you can use a user-friendly tool like SurFlex Screen Recorder or Bandicam. If you prefer a free solution to record part of your screen, use Xbox Game Bar or OBS Studio to capture what you want. Specify your needs and pick up the most suitable way to apply.
About the Author
You May Also Like
-
How to Record High-Quality Video with OBS: New Update
You will know how to record high-quality video with OBS with proper settings, including customizing video format, quality, and more.
Myra Xian Updated on -
How to Clip with OBS [Detailed Guide]
If you are going to record clips on your PC and want to use a free tool, check this guide to learn how to clip with OBS.
Myra Xian Updated on -
How to Screen Record on Gateway Laptop in 3 Ways
You will know how to screen record on Gateway laptop in various Windows versions using either built-in or third-party screen recorder tools.
Myra Xian Updated on