

Updated on
Quick Answer:
You can record a video of FL Studio on your PC or Mac using SurFlex Screen Recorder, OBS Studio, SurFlex Online Free Screen Recorder, or QuickTime Player. Whether you like a built-in tool, online service, or third-party app, you can find the solution you need.
You may want to record your FL Studio screen to share your music production process, create instructional videos, archive your work, and more. If that’s what you want, check this guide and learn how to screen record FL Studio on your Mac or PC with audio with a few simple clicks.
Table of contents
How to Screen Record FL Studio with Audio
Tool: SurFlex Screen Recorder
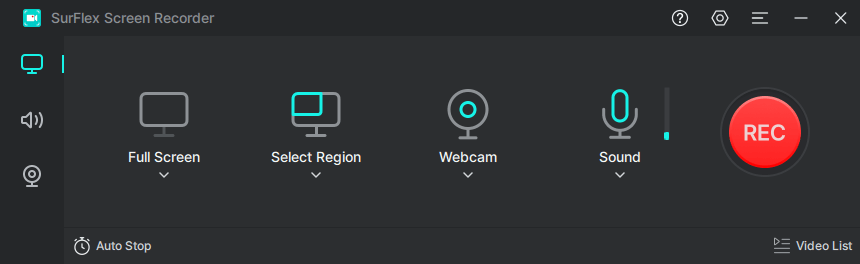
Whether you want to record the screen of FL Studio on your PC or Mac, you can use SurFlex Screen Recorder to capture your desired content. This screen recorder helps to record the entire screen, an app window, or any selected portion on your computer. Besides, it will capture audio during the screen recording, allowing you to screen record on your computer with system sound, microphone audio, or both. If you want to screen record FL Studio with audio, let it help.
To screen record FL Studio with audio:
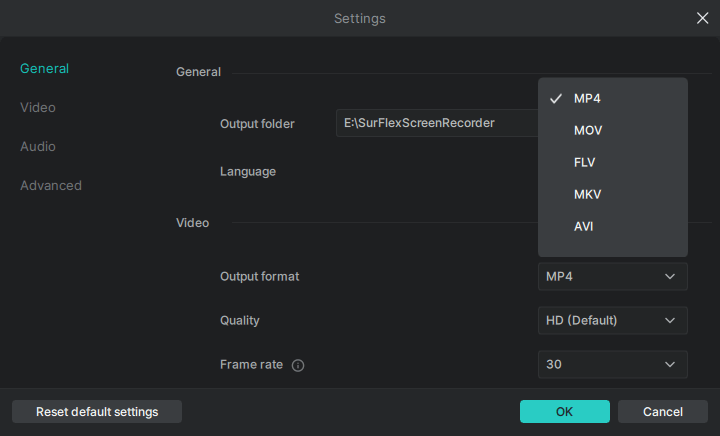
Step 1. Open SurFlex Screen Recorder on your PC and then click the Settings icon.
Step 2. Select the output options and then click OK.
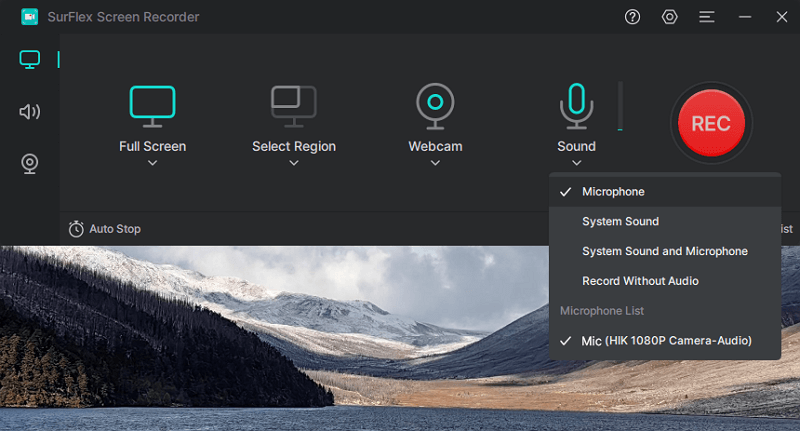
Step 3. Select the audio recording option you need.
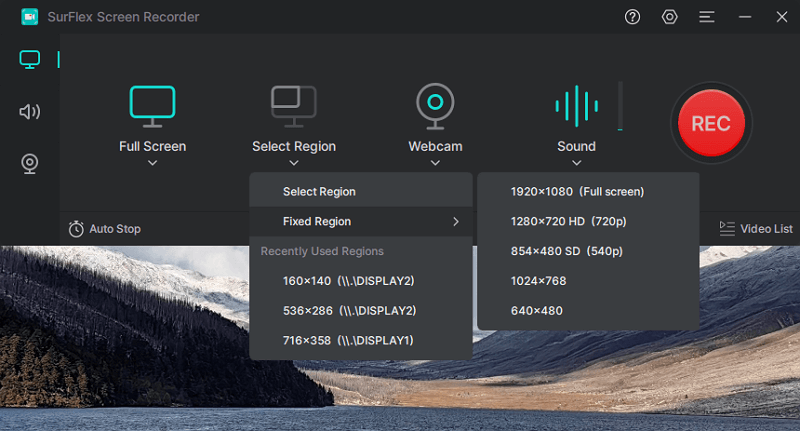
Step 4. Choose to record the whole screen or a selected portion.
Step 5. Select the FL Studio window as the recording region and click REC to start recording FL Studio on your computer.
When you need to record yourself singing with background music next time, you can also use this to finish the screen recording.
How to Screen Record FL Studio Using OBS
Tool: OBS Studio
Whenever you need to screen record on Windows or Mac, you may want a free screen recorder to help. Although there is more than one free screen recorder available, OBS Studio is always the most popular one. It allows you to record any video or audio content from your computer, be it a Mac or PC. Therefore, when you want to record the FL Studio screen, OBS Studio is also a workable solution.
To screen record FL Studio using OBS:
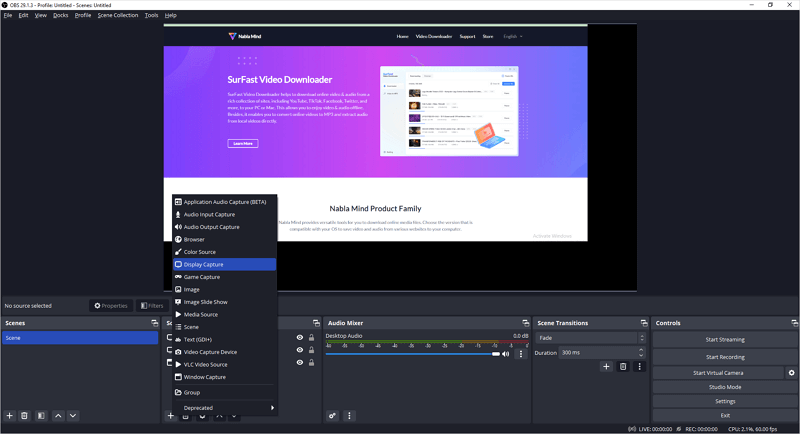
Step 1. Download and install OBS Studio on your computer.
Step 2. Open OBS Studio and go to File > Settings > Output to customize the output options.
Step 3. Go to the Sources panel to add Window Capture, Audio Output Capture, and other recording sources you need.
Step 4. Make sure your FL Studio window is selected. When you are ready, click Start Recording in the Controls panel.
Step 5. Once done, click Stop Recording and check the video in the storage folder you set.
How to Record FL Studio Screen for Free
Tool: SurFlex Online Free Screen Recorder
OBS Studio is not the only solution for screen recording. If you are interested in recording FL Studio for free, you can try SurFlex Online Free Screen Recorder. This online screen recorder enables you to record your FL Studio screen without any cost, time limit, or watermark. Most importantly, it can also capture system sound, microphone, and camera during the screen recording, fulfilling your needs in different situations.
To record FL Studio for free:
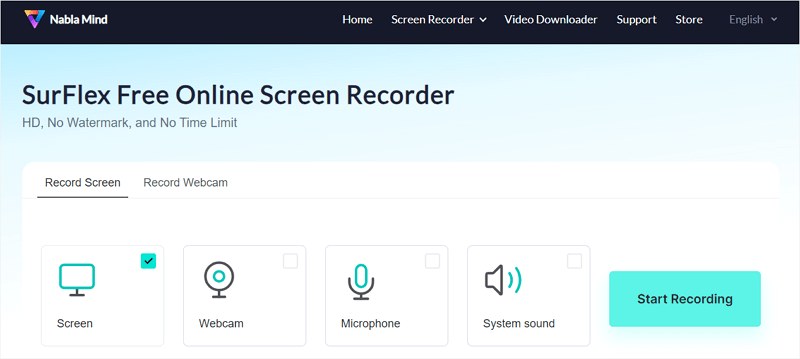
Step 1. Visit SurFlex free online screen recorder.
Step 2. Select the recording sources you need and click Start Recording.
Step 3. Select to record the entire screen and click Share to start recording the screen.
Step 4. Go to FL Studio and let the website record your desired content.
Step 5. When you are done, go back to the online screen recorder and click Stop Recording.
Note: To record a video with audio, you need to record the entire screen. Thus, you can maximize the FL Studio window so that you can capture the app window only.
How to Screen Record FL Studio on Mac
Tool: QuickTime Player
If you are going to record your FL Studio screen on Mac, you can use the built-in screen recorder, QuickTime Player, to help. It helps to record the entire screen or a selected portion on your computer, allowing you to easily capture the FL Studio window. However, it can only screen record on Mac with microphone audio. If you want to record audio coming from your Mac, you will need to add an extra audio driver to help. For more details, you can check the guide on QuickTime screen recording with audio. Here I’d like to show you how to record FL Studio with the microphone.
To record a video of FL Studio on Mac:
Step 1. Prepare FL Studio for recording.
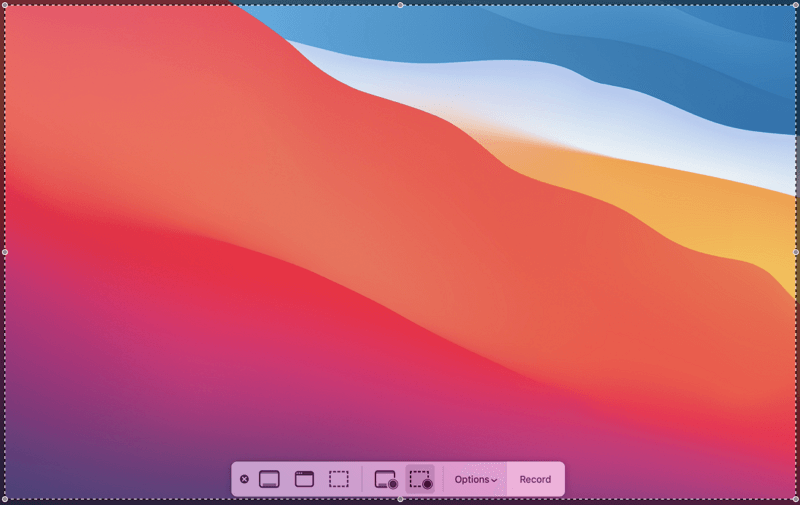
Step 2. Open QuickTime Player and go to File > New Screen Recording.
Step 3. Click Options to select the audio recording option.
Step 4. Select the FL Studio window as the recording region.
Step 5. Click Record to start recording the FL Studio screen.
Step 6. Once completed, press Command + Control + Escape to end the recording.
Wrapping Up
Whenever you want to record FL Studio or other applications on your computer, you can use one of the screen recorders to get it done. It is worth mentioning that Mac can’t record internal audio by default. If you want to screen record on Mac with internal audio, using a third-party tool like SurFlex Screen Recorder is the easiest solution.
About the Author
You May Also Like
-
How to Screen Record on Windows 10 with Audio: 4 Tips
You will know how to screen record on Windows 10 with audio easily using easy and well-performed Windows 10 screen recorder apps or services.
Myra Xian Updated on -
5 Ways to Record GIF on Windows 10 or Windows 11
Whether you are using Windows 10 or Windows 11, you will know how to record GIF on Windows with five easy tips.
Myra Xian Updated on -
How to Record Last 15 Seconds on PC in Windows 10 & 11
Check this guide and you will know how to record last 15 seconds on PC in Windows 10, Windows 11, and more using Xbox Game Bar.
Myra Xian Updated on