

Updated on
Quick Answer:
You can easily make OBS record in MP4 by changing the default output settings from MKV to MP4. Even if you have recorded a video in MKV, you can convert MKV to MP4 without quality loss using the Remux Recording feature in OBS Studio.
When recording videos on your computer, you may have specific preferences for the video format due to reasons such as compatibility and file size. In most cases, you may prefer to record in MP4 format so that you can use the videos in various programs and on different devices. That’s probably why you want to know how to make OBS record in MP4 on your computer. If that’s what you want to do, follow this guide, and you will learn how to change the video format on OBS and create MP4 recordings easily.
Table of contents
How to Make OBS Record in MP4
Although OBS saves recordings in the MKV format by default, you can easily change it to another video format, such as MP4, FLV, or MOV, according to your needs. This can be done in the Settings.
To change the video format on OBS:
Step 1. Go to OBS Studio and click File > Settings.
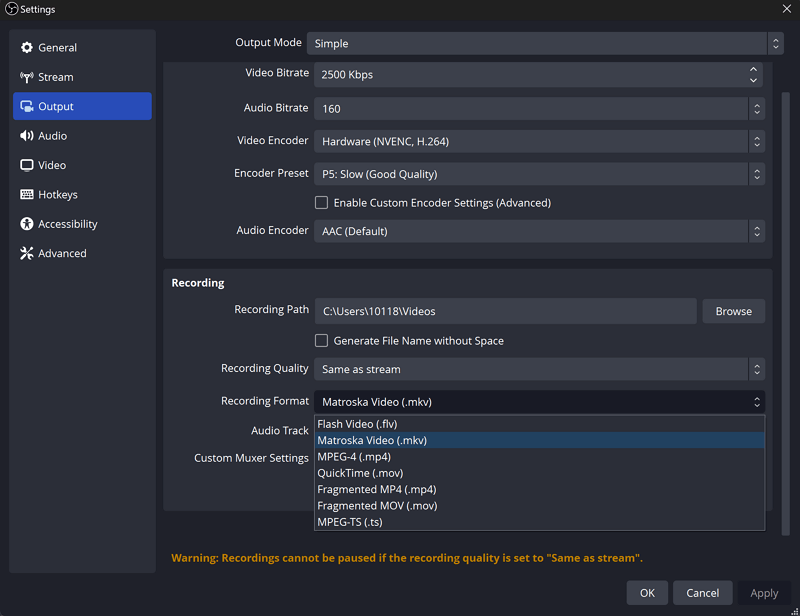
Step 2. Click the Output tab and head to the Recordings section.
Step 3. Go to Recording Format and expand the drop-down menu to select MP4 as the output format.
How to Screen Record on OBS
After customizing the video output format as MP4, you can now follow the easy steps below to record a video with OBS to create the MP4 file you need.
To record a video with OBS in MP4 format:
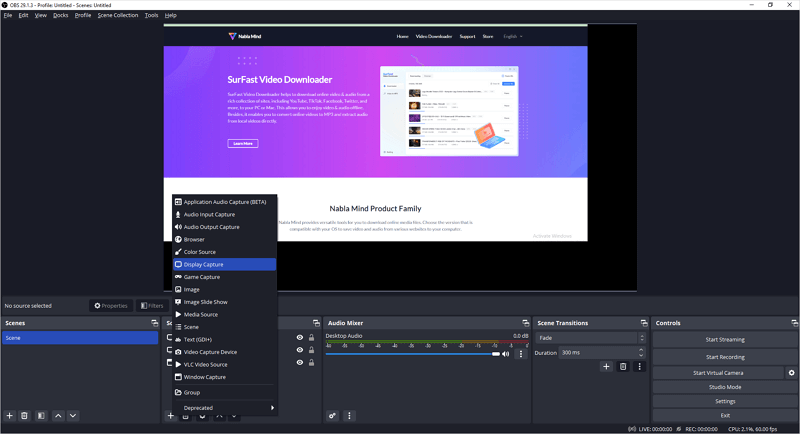
Step 1. Open OBS Studio and go to the Sources panel.
Step 2. Click the plus icon to add the recording sources you need and set them up properly, such as Window Capture (an app window), Audio Output Capture (system sound), and Audio Input Capture (microphone).
Step 3. If needed, go to the Audio Mixer panel to adjust the audio output effect.
Step 4. When you are ready, click Start Recording.
Step 5. After capturing the content you need, click Stop Recording.
Step 6. Go to File > Show Recordings to check the MP4 file.
Bonus Tip: How to Convert MKV to MP4 in OBS
If you have created a video recording in MKV format and want to convert it to MP4, OBS Studio provides a built-in feature called Remux Recording that allows you to do so. This feature involves rewrapping the recorded video file without re-encoding the video data. It means you can change the container format of the video file to MP4, FLV, or MOV without affecting the video quality or requiring re-encoding. This improves compatibility and usability while preserving the original video quality, making it a good method for you to convert MKV to MP4 in OBS.
Note: Instead of directly recording in MP4 format with OBS, it is recommended to record videos in MKV format and then convert them to MP4 using the Remux Recording feature. This approach can improve the stability of the screen recording process.
To convert MKV to MP4 in OBS:
Step 1. Go to OBS > File > Remux Recordings.
Step 2. Click the three dots under OBS Recording.
Step 3. Select the MKV file you want to convert.
Step 4. Edit the target file name or storage path according to your needs.
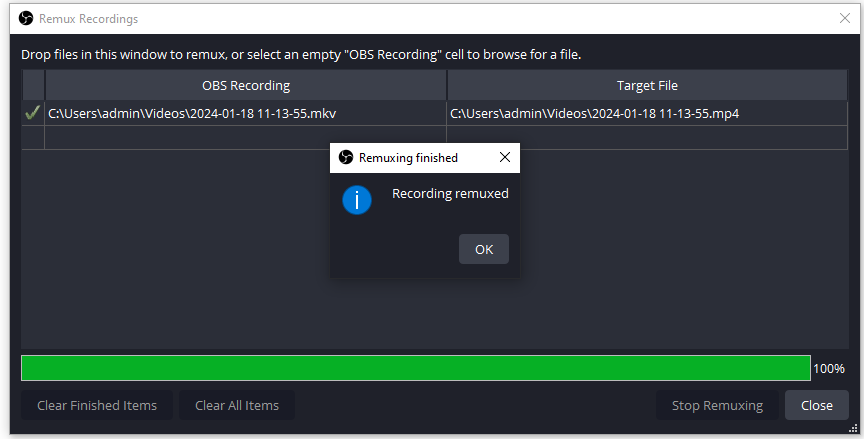
Step 5. Click Remux.
Step 6. When it has been completed, go to the folder you select to check the MP4 file.
Wrapping Up
Since MP4 is the most popular video format, there are many other screen recorders available that can help you easily record in MP4 on your PC or Mac. If you would like to give it a try, you can use SurFlex Screen Recorder, which allows you to create recordings in MP4 or other video formats.
About the Author
You May Also Like
-
How to Screen Record on Gateway Laptop in 3 Ways
You will know how to screen record on Gateway laptop in various Windows versions using either built-in or third-party screen recorder tools.
Myra Xian Updated on -
4 Ways to Record Video Playing on Your Computer
Read this guide and you will know how to record a video playing on your computer with tested and worked video recorders.
Myra Xian Updated on -
How to Record Vertical Video on PC in 3 Ways
You will know how to record vertical video on PC with OBS or other screen recorders. Use any of them to create videos you need.
Myra Xian Updated on