

Updated on
Quick Answer:
You can record 1080p with OBS by setting both the base resolution and output resolution as 1920×1080. Afterward, you can record videos in 1080p using OBS with ease.
When you record videos on your computer, 1080p is probably the most popular output resolution since it strikes a balance between video quality and file size. Here I’d like to show you how to record 1080p with OBS on your computer. If you want to know the best OBS settings for recording 1080p 60fps videos, you will get the answer.
Table of contents
Best OBS Settings for Recording 1080p 60fps
Whenever you record a video on your computer using screen recording software, it’s important to customize the recording settings according to your needs and preferences. If you aim to record a 1080p 60fps video with OBS Studio, you can refer to the following recommended OBS settings for recording 1080p 60fps videos:
Step 1. Go to Settings > Output > Output Mode and choose Simple.
Step 2. Scroll down to the Recording section, set Indistinguishable Quality as the Recording Quality and Software (x264) as the Video Encoder.
Step 3. Click Video from the left panel.
Step 4. Set 1920×1080 (1080p) as the resolution and 60 as the frame rate.
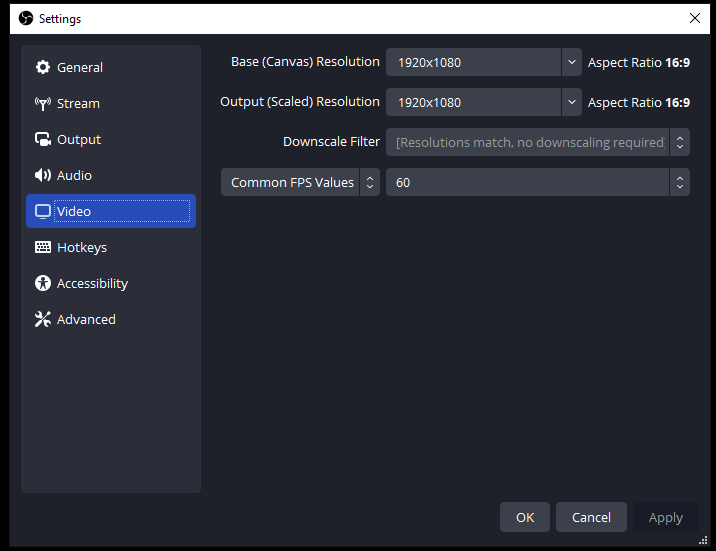
By adjusting these settings, you can ensure the best quality and smoothness for your recorded videos.
How to Record 1080p with OBS: Step-by-Step
After setting up the recording and output settings properly, you can now follow the steps below to record a 1080p video using OBS.
To record in 1080p with OBS:
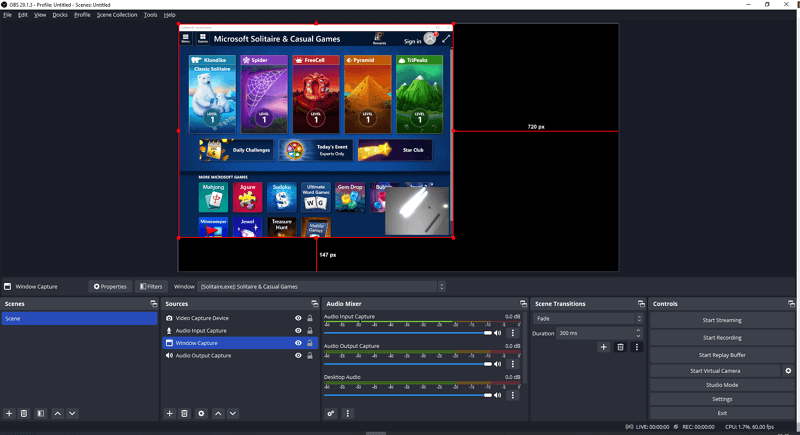
Step 1. Launch OBS Studio on your computer.
Step 2. Go to the Sources panel to add the recording sources you need, such as Window Capture and Audio Output Capture, depending on what you want to record.
Step 3. Set up the recording source accordingly.
Step 4. If necessary, go to Audio Mixer to adjust the audio effects.
Step 5. When you are ready, click Start Recording.
Step 6. When you are done, click Stop Recording.
Step 7. Go to File > Show Recordings to check the video.
Wrapping Up
It’s important to know that the quality of the OBS recording is influenced by factors beyond the OBS settings, such as hardware specifications and the recording environment. Additionally, it is necessary to adjust the settings based on the content you want to capture, enabling you to create better videos for gameplay, YouTube, and other purposes.
About the Author
You May Also Like
-
3 New Tips: How to Record Screen on Windows 10
Here you will know how to screen record Windows 10 in detail using free or easy Windows screen recorder apps.
Myra Xian Updated on -
How to Record Myself on My Laptop in Windows 11, 10, and More
You will know how to record yourself on Windows 10, Windows 11, and more with easy laptop video recorder apps.
Myra Xian Updated on -
How to Record a Video on PC in 4 Ways
Check the easy tips here to learn how to record a video on PC in 4 ways, then pick up the one you like to apply.
Myra Xian Updated on