

Updated on
Quick Answer:
You can use Snipping Tool to record screen on Windows 11. However, it can’t record your computer screen with audio. Thus, you will need another Windows screen recorder to record screen on Windows with audio.
Table of contents
Can Snipping Tool Record Video
The Snipping Tool is a built-in tool available on Windows 10 and Windows 11, primarily used for taking screenshots. However, since the release of Windows 11, Snipping Tool has been updated with a built-in screen recorder. Therefore, the answer to the question “Can Snipping Tool record video?” varies depending on the version of Windows you are using.
If you are using Windows 11 build 22621.1344 or higher, the built-in Snipping Tool can be used to record screen on Windows for you. If not, your Snipping Tool can only take and edit screenshots on your computer.
How to Screen Record via Snipping Tool
If the screen recording feature is available in the Snipping Tool on your Windows 11 PC or laptop. You can follow the steps below to learn how to use Snipping Tool to screen record Windows 11. Before you start, it’s worth stressing that Snipping Tool can only screen record Windows without sound. That means if you want to record screen on Windows with audio, you will need other tools to help.
To record screen with Snipping Tool:
Step 1. Press the Windows key on your keyboard or click the Start menu from your desktop.
Step 2. Search for Snipping Tool and then launch the app.
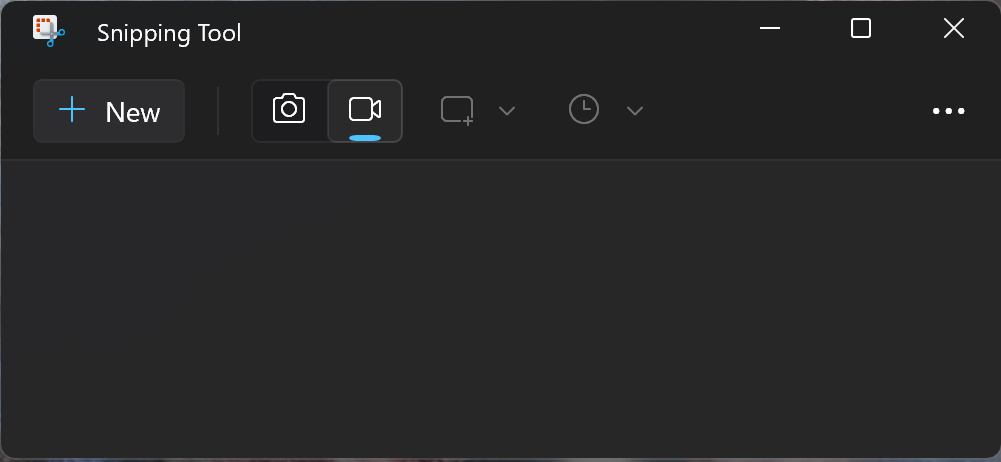
Step 3. Click the Camera icon to switch to the Record mode.
Step 4. Click New and select the screen you’d like to capture. Afterward, click Start.
Step 5. When you’re done, click the Stop button to end the screen recording Windows 11.
Step 6. Preview the recording and click Save As to save the recorded video as MP4 on your computer.
Snipping Tool Record Video: Alternatives
As mentioned above, using Snipping Tool to record video on Windows 11 has a significant drawback that you cannot ignore – it cannot record the screen on Windows 11 with audio, which is needed in most screen recording situations. Therefore, it’s necessary to supplement other ways on how to screen record Windows with audio using other screen recording tools.
Screen Record Windows 11 with Xbox Game Bar
Another built-in screen recorder on Windows 11 is Xbox Game Bar. Most importantly, it enables you to screen record on Windows 11 with audio, including system sound and microphone audio. Being free to use, Xbox Game Bar screen recording is a good alternative for Snipping Tool video recording. If you want to know how to record screen on Windows with Xbox Game Bar, check the guide on Xbox Game Bar recording for reference.
Besides, since Xbox Game Bar is also available on Windows 10, you can also use it to record your screen on Windows 10 for free.
Record Screen on Windows 11 with SurFlex Screen Recorder
Xbox Game Bar is convenient to use. However, it also has its limitations. For example, you can’t record your desktop or a selected portion of your screen using Xbox Game Bar. If that’s what you want, using a professional screen recorder such as SurFlex Screen Recorder is the optimal choice.
Such a Windows 11 screen recorder enables you to record full screen, selected screen, window, app, game, webcam, and more on your computer freely, either with or without audio. If you want a more advanced screen recording than Snipping Tool, using SurFlex Screen Recorder will fulfill your needs well.
Moreover, it is compatible with all Windows versions, enabling you to record screen on Windows 7 and screen record Windows 8 easily.
To screen record on Windows 11:
Step 1. Launch SurFlex Screen Recorder on your PC and click Settings to set up the output options. Then select the audio recording options according to your needs.
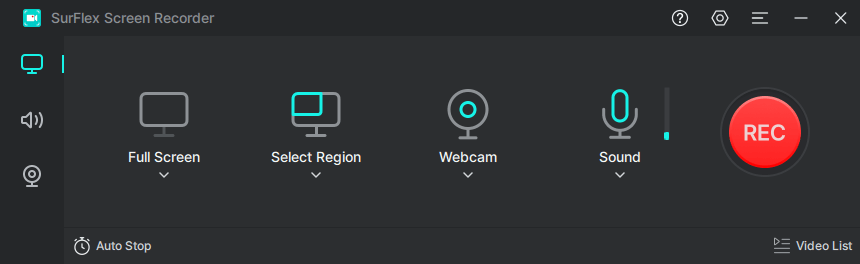
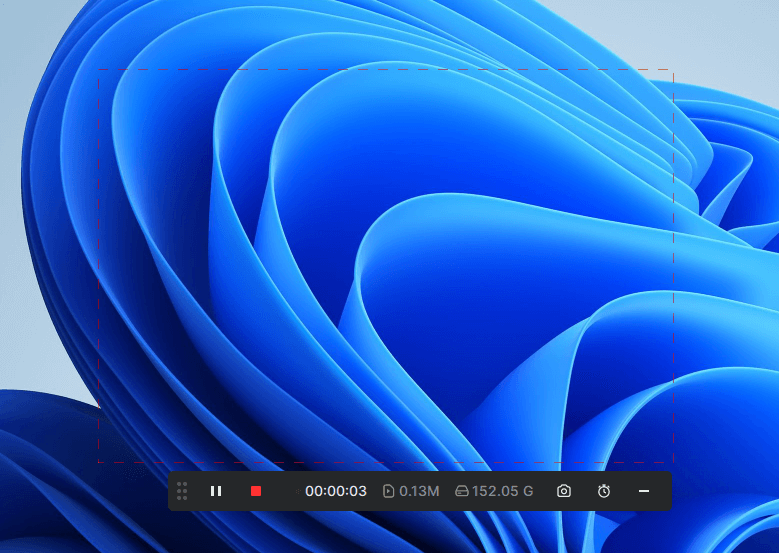
Step 2. Select the recording area, such as your desktop, an app window, or any selected portion. Then click the REC button.

Step 3. When the screen recording is done, click the Stop icon in the menu bar.
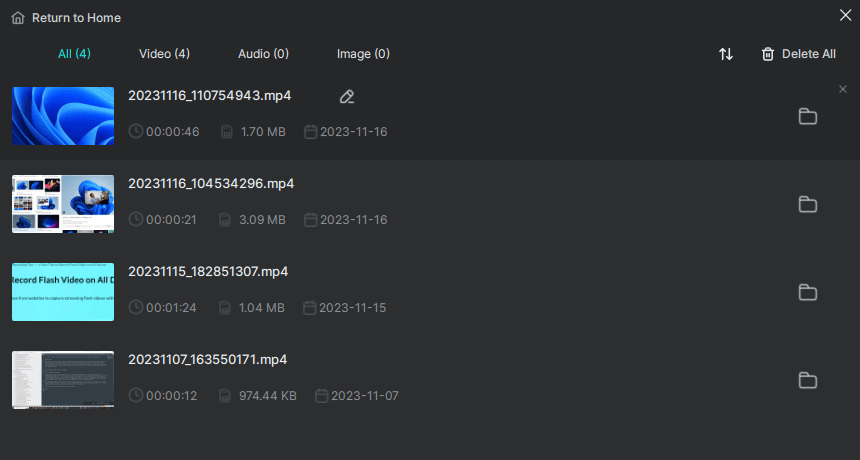
Step 4. Check the video in the popup window.
Record Video with Snipping Tool: FAQs
When you record screen on Windows, you may also want to know:
Snipping Tool on Windows 10 doesn’t have a screen recording feature. Thus, you cannot record the screen with Snipping Tool on Windows 10. Instead, you can use the built-in Xbox Game Bar on Windows 10 to capture your computer screen.
Snipping Tool cannot record video with sound. It can only record the screen without audio.
The screen recordings made with Snipping Tool are saved in the folder you choose after the recording ends.
Wrapping Up
Although Snipping Tool is a free built-in screen recording tool on Windows, its functionality is quite limited. Due to its inability to record audio, it may not be able to meet your screen recording needs in many situations. Therefore, it’s important to know about other ways to record your screen on Windows.
About the Author
You May Also Like
-
How to Screen Record on HP Laptop in Windows 10, 11, and More
You will know how to screen record on HP laptop, be it Windows 11, Windows 10, or earlier versions, with easy and proven ways.
Myra Xian Updated on -
How to Screen Record on Toshiba Laptop in 4 Tested Ways
Whether you are using Windows 7 or Windows 11, you will know how to screen record on Toshiba laptop successfully.
Myra Xian Updated on -
How to Screen Record on Alienware: 4 Tips You Will Like
No matter which Windows version you use, you will know how to screen record on Alienware laptop with simple clicks.
Myra Xian Updated on