

Updated on
Quick Answer:
Screen recording Windows 7 can be easily done using:
1. Problem Steps Recorder
2. SurFlex Screen Recorder
3. Microsoft PowerPoint
4. ScreenCapture
While the majority of Windows users are currently using Windows 10 and Windows 11, recent data shows that there are still approximately 4% of users globally who are utilizing Windows 7.
Therefore, it is essential to provide detailed instructions on how to record the screen on Windows 7, in addition to the previously covered guides on how to record screen on Windows 11, 10, and 8. By doing so, Windows 7 users can also effectively capture their computer screen for the purpose of creating tutorials or reporting technical issues. If you are seeking guidance on how to record your computer screen on Windows 7, the following four tips will provide useful information on how to utilize capable Windows 7 screen recorder tools.
Table of contents
How to Record Screen on Windows 7 with Built-in Steps Recorder
Just like the recording screen on Windows 8, you can also record screen on Windows 7 using the built-in screen recorder on Windows 7, 8, and 10, which is the Problem Steps Recorder.
However, while this tool is free to use and eliminates the need for any additional software installation, it is primarily designed by Microsoft for recording steps to reproduce a problem. Thus, it comes with various limitations such as:
Limited functionality: Problem Steps Recorder does not provide as many features as third-party Windows 7 screen recorder tools, such as the ability to record a selected region, window, app, game, webcam, and more.
Lack of customization options: One of the drawbacks of using Problem Steps Recorder is the absence of customization options. This means that users cannot adjust recording settings, such as frame rate, resolution, or audio quality, which could negatively impact the quality of the recorded videos.
Limited output format: This built-in screen recorder on Windows 7 only saves recordings as a ZIP file in MHTML format by default.
If these drawbacks are acceptable to you, you can follow the steps below to capture your Windows 7 screen.
To screen record Windows 7:
Step 1. Click Start and go to Accessories > Problem Steps Recorder.
Step 2. Click Start Record in the control panel.
Step 3. Go through the steps you want to record.
Step 4. Click Stop Record to end the recording.
Step 5. Save the recording as a ZIP file on your Windows 7 computer.

How to Screen Record on Windows 7 with Audio with Ease
To be honest, the Problems Steps Recorder on Windows 7 has limitations in terms of its functionality, which makes it insufficient for fulfilling the majority of Windows 7 screen recording needs. Therefore, for most users, third-party screen recorder tools for Windows are necessary to capture the desired screen content. If you are also in need of such a tool, you may consider using SurFlex Screen Recorder to record your screen on a Windows 7 PC or laptop. Overall, SurFlex Screen Recorder is capable of capturing everything and ensuring that no video or audio is missed.
SurFlex Scree Recorder supports recording various audio and video sources and exporting them in different audio and video formats. During the recording process, real-time drawing is also possible. It can capture any desired window or application, making it a versatile tool for various screen recording needs.
To screen record on Windows 7 easily:
Step 1. Open the screen recorder, click Settings to choose the video format and quality you prefer and then set up the recording options you need.
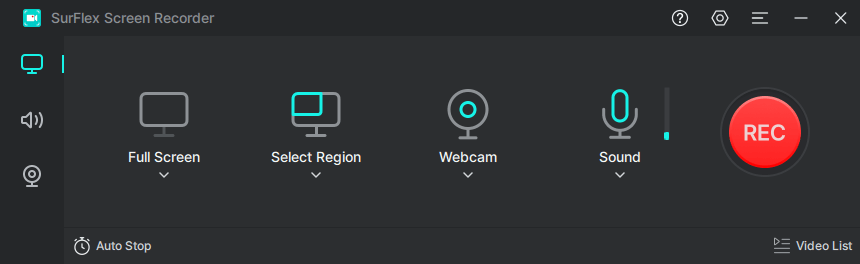
Step 2. Select the target screen, window, or any selected portion, and then click REC to start recording on Windows 7.

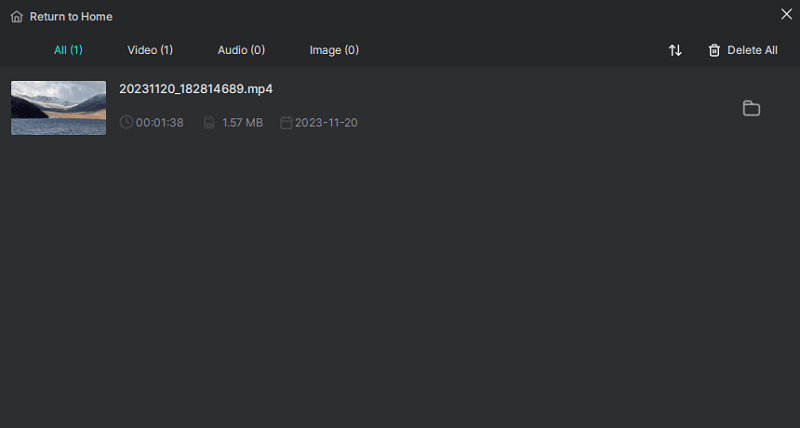
Step 3. When the Windows 7 screen recording is done, click the Stop icon in the Controls bar.

Step 4. Check the video in the popup window.
SurFlex Screen Recorder supports all Windows versions. Thus, you can screen record Windows 10 easily with it.
How to Screen Record Windows 7 with PowerPoint
If you plan to record a presentation with a webcam overlay, Microsoft PowerPoint should meet your needs well. It has a built-in screen recording feature that allows you to easily record your presentation, voice, and webcam. If your intention is to screen record on Windows 7 for such a purpose, you can directly use PowerPoint to accomplish the task.
Notes: Since screen recording in PowerPoint only works for your presentation, you’ll need other screen recording tools if you want to capture other content.
Step 1. Open the PowerPoint file on your Windows 7 computer.
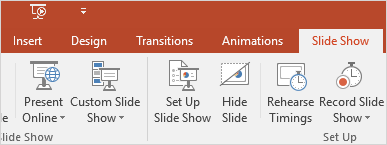
Step 2. Go to the Slide Show and click the Record Slide Show button.
Step 3. During the recording, drawing tools can be used during recording to assist with your explanations.
Step 4. Click the Stop button to end the recording when you want to.
How to Record Your Computer Screen on Windows 7
Supported browsers: Google Chrome, Mozilla Firefox, Microsoft Edge, Opera.
If you are not interested in using the built-in screen recorder on Windows 7 or downloading third-party professional tools, you may consider using an online Windows 7 screen recorder like ScreenCapture.
It is a completely free online screen recording tool (although the free version does come with a watermark) that can help you capture a specific browser tab, application window, or the entire screen with audio. However, due to its online nature, there are several limitations in terms of functionality. If you require more advanced features and customization options, a desktop tool would be more suitable for your needs.
To record screen on Windows 7 Online:
Step 1. Open a browser on your Windows 7 and visit ScreenCapture.com.
Step 2. Click Start Recording, choose the page or window you want to capture, and then click Share.
Step 3. Click Stop Sharing on the shared page or window to end the recording and then go to ScreenCapture to click Stop Recording.
Step 4. Then you can preview the recording. If you are satisfied with it, click Download to save it to your computer.
By default, the video will be saved as an MP4 file in HD quality.

Screen Record Windows 7: FAQs
When you record screen on Windows, you may also want to know:
Windows 7 does have a built-in screen recorder called Problem Steps Recorder. However, it has limited features and is primarily designed for recording videos to reproduce problems. If you require more flexibility in screen recording on Windows 7, it is necessary to use a third-party screen recorder.
Many people claim that you can use the keyboard shortcut Windows + Alt + R to screen record on Windows 7. However, this is incorrect as this shortcut is used to start recording on Windows 10 and Windows 11 using the built-in Xbox Game Bar. If you want to use a keyboard shortcut to record your screen on Windows 7, you can configure shortcuts in the settings of a professional screen recorder for Windows.
To record gameplay on Windows 7, utilizing the Record Game mode in SurFlex Screen Recorder can fulfill your requirements.
Whether you want to capture internal or external audio, you can use the following tools to record screen on Windows 7 with audio easily:
1. SurFlex Screen Recorder
2. Movavi Screen Recorder
3. OBS Studio
4. Bandicam
5. ScreenREC
Wrapping Up
The ideal Windows 7 screen recording tool for you will depend on your specific recording needs. However, in most situations, using dedicated screen recording software is recommended to ensure optimal results.
If you frequently need to capture your screen and create videos, using feature-rich tools by downloading and installing them is highly recommended. These tools offer advanced functionality and customization options that are not available with built-in or free online tools. Therefore, investing in high-quality screen recording software is an excellent way to enhance your recording capabilities and achieve professional-grade results.
About the Author
You May Also Like
-
How to Record Vertical Video on PC in 3 Ways
You will know how to record vertical video on PC with OBS or other screen recorders. Use any of them to create videos you need.
Myra Xian Updated on -
How to Screen Record on Dell Desktop in 4 Ways
You will know how to screen record on Dell desktop in four easy and tested ways. Pick up the Dell screen recorder you like to apply.
Myra Xian Updated on -
How to Record 1080p with OBS: Detailed Guide
You will learn how to record 1080p with OBS on your computer with the proper settings and step-by-step operations.
Myra Xian Updated on