

Updated on
Quick Answer:
You can record audio with VLC on your PC or Mac by setting up the capture device and recording settings properly. Additionally, you can record audio, be it system sound, microphone sound, or both, on your computer using a professional audio recorder like SurFlex Screen Recorder.
Although VLC is mainly a media player, it also has an audio recording feature that allows you to record audio on your computer, be it a Mac or PC. If you want to record audio with VLC but don’t know how to do it, check this guide to get the answer.
Table of contents
How to Record Audio with VLC on PC
By enabling advanced controls in VLC and setting up the recording device properly, you can record audio using VLC on your Windows PC or laptop with a few simple clicks. Whether you are going to capture system sound or record streaming audio with VLC, you can follow the steps below.
To record audio with VLC:
Step 1. Download and install the VLC media player on your PC.
Step 2. Click the View menu and enable Advanced Controls.
Step 3. Head to Media > Open Capture Device.
Step 4. In the Capture mode section, choose DirectShow if you are going to record the microphone on your PC, or choose Desktop if you are going to record internal audio coming from your computer.
Step 5. If you choose to record microphone audio, you will need to select the recording device next to Audio Device Name.
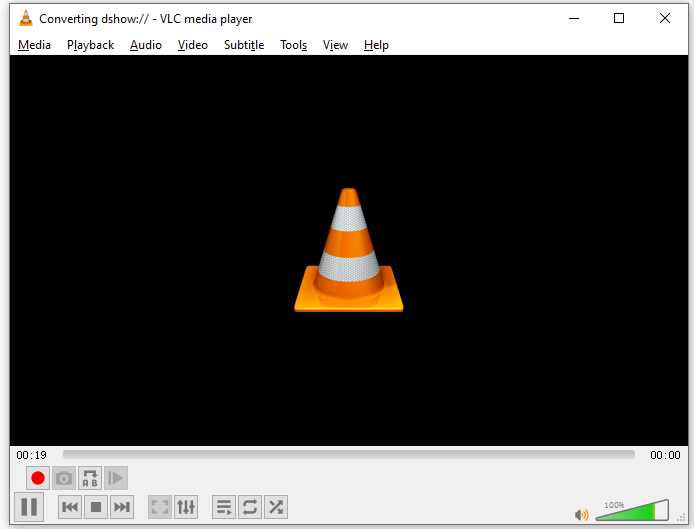
Step 6. After setup, click the triangle next to Play and choose Convert.
Step 7. Choose the audio output format next to Profile, set the storage folder, and then click Start.
Step 8. When you are done, click the Stop button in the controls bar and the recording will be saved to your selected folder.
Note: If you want to screen record with VLC with audio, you need to choose the video recording device in the Capture Device settings.
How to Use VLC to Record Audion on Mac
Due to variations among VLC media player versions on different platforms, the steps to record audio on a Mac using VLC are slightly different from those on a PC. Besides, since Mac doesn’t have the built-in feature to record internal audio, you will need to add and set up an extra audio driver, such as BlackHome or Soundflower, on your Mac first, and then choose it as the recording device. Afterward, you can record internal audio on Mac using VLC.
Step 1. Install VLC on your Mac and then launch the app.
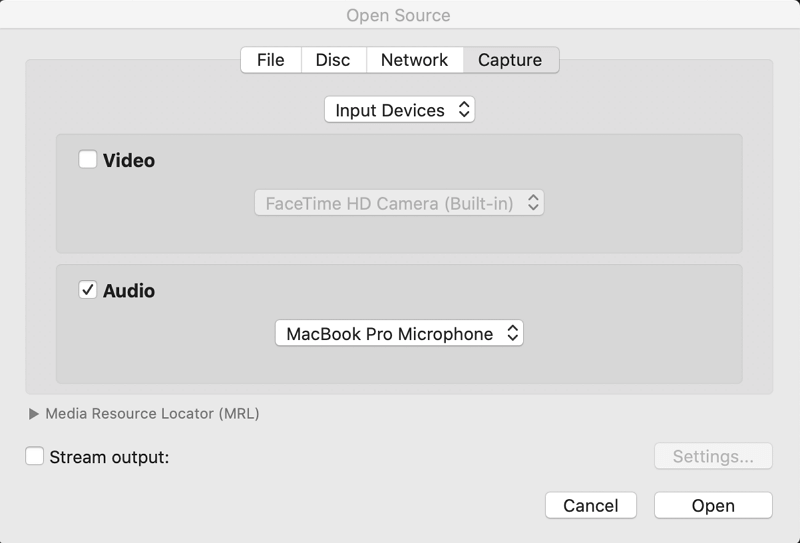
Step 2. Click File > Open Capture Device.
Step 3. Select Audio and choose the audio recording device.
Step 4. Then click Open.
Step 5. Head to Playback from the VLC menu and choose Record to start recording audio on your Mac.
Step 6. Once finished, click the Stop icon.
Step 7. Go to the Music folder on your Mac to check the VLC audio recording.
Record Audio Using VLC Alternative
Using VLC to record audio on your computer is much more complex than using a professional audio recorder. Besides, VLC can only record either system sound or microphone sound by default, making it impossible for you to record system sound and microphone at the same time. Therefore, I’d like to recommend you try an easier tool, SurFlex Screen Recorder. Whether you want to screen record with audio or record audio only on your computer, it will be helpful. Most importantly, while recording audio, it can record internal audio, external audio, or both. If that’s what you want, follow the steps below to learn how to use the VLC alternative to capture audio.
To record audio with VLC alternative:
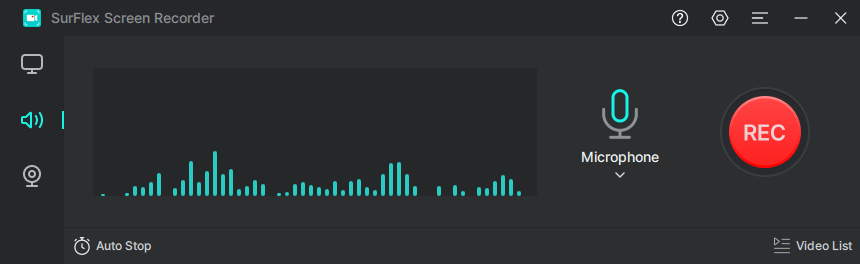
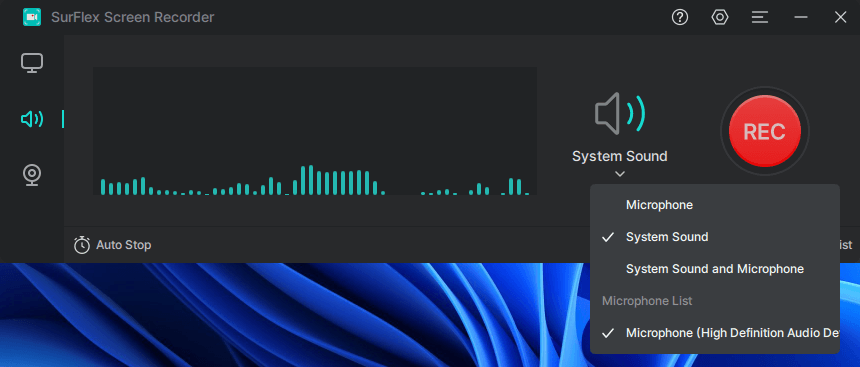
Step 1. Open SurFlex Screen Recorder and choose Record Audio from the left side of the window.
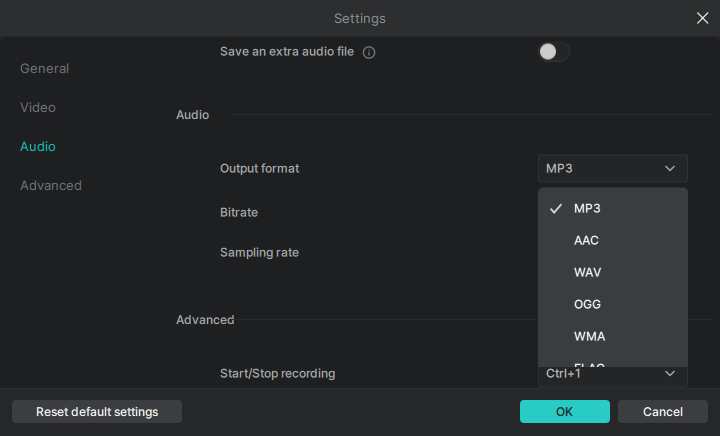
Step 2. Click Settings to choose the output options, such as audio format and bitrate.
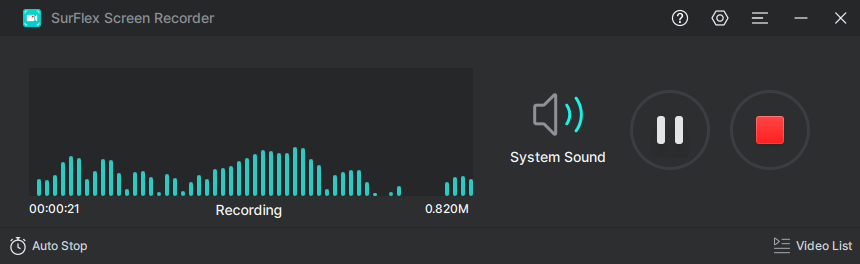
Step 3. Select the audio recording option you need, including Microphone, System Sound, and System Sound and Microphone. Click REC to start recording audio on your computer.
Step 4. Once the audio recording is completed, click the red Stop button.
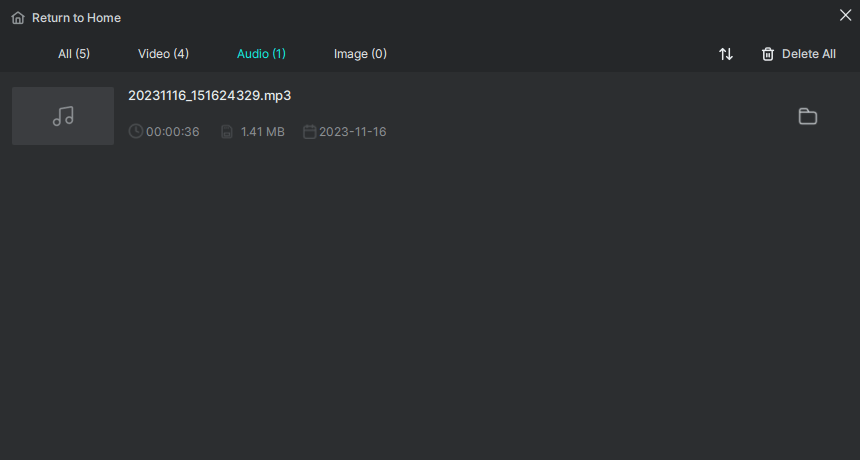
Step 5. Check the audio file in the recording list.
Wrapping Up
Whether you want to record audio or screen record with audio using VLC, you can follow the steps in this guide to accomplish it. However, while VLC is free to use, it may not be as effective and user-friendly as a professional screen recorder. If you frequently need to record audio on your PC or Mac, it is advisable to utilize a professional tool for assistance.
About the Author
You May Also Like
-
4 Ways to Record Audio from Website
You can record audio from website easily and save it in any format you prefer. Check this guide to get the detailed tips.
Myra Xian Updated on -
3 Proven Ways to Record Audio from Chrome
You will know how to record audio from Chrome with different types of audio recorders. Use any of them to capture audio with ease.
Myra Xian Updated on -
Detailed Steps to Record Audio from Firefox
If you want to know how to record audio from Firefox, check the easy tip here and you will know how to do it with a few simple clicks.
Myra Xian Updated on