

Updated on
Quick Answer:
You can record audio streams on your Windows 7 PC or laptop by using SurFlex Screen Recorder, Audacity, or Free Online Audio Recorder. All are helpful for recording internal audio on your computer.
When recording audio on your Windows 7 PC or laptop, you may have the need to capture sound from a microphone or audio playing on your computer. The tips for achieving this vary depending on the type of audio you intend to capture. In this guide, I will demonstrate three easy methods to help you record streaming audio on Windows 7 so that you can effortlessly capture internal audio from your computer.
Table of contents
Record Streaming Audio on Windows 7 Freely
Tool: SurFlex Screen Recorder
Recording streaming audio from a website or app on your computer can be easily done with the help of SurFlex Screen Recorder. Its audio recording feature is capable of recording various types of audio on your computer, including audio streams playing on your device. When you use it to record streaming audio on Windows 7, you can customize the audio format and quality and create audio recordings that suit your needs perfectly.
Besides, as its name suggests, SurFlex Screen Recorder also works to record screen on Windows 7. If you not only need to record audio but also want to record videos on your PC, using this app will serve you well.
To record streaming audio on Windows 7:
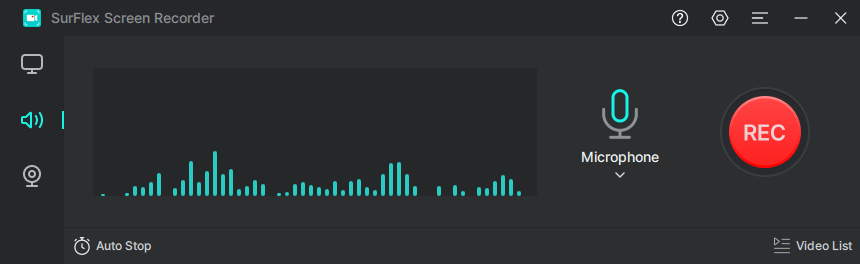
Step 1. Launch SurFlex Screen Recorder and then choose the Record Audio mode.
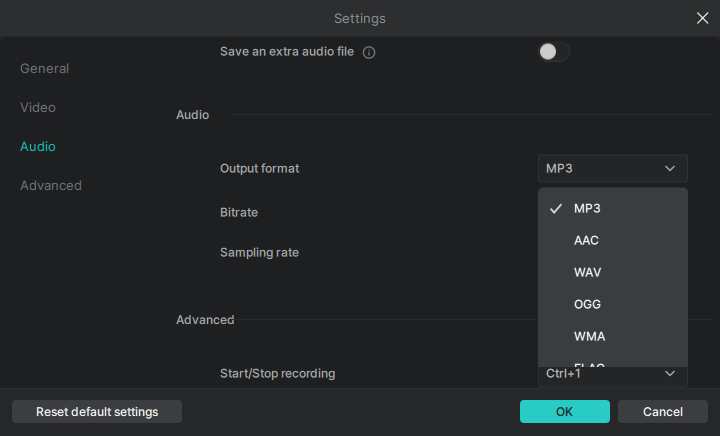
Step 2. Click Settings to customize the audio output options according to your preferences and then click OK.
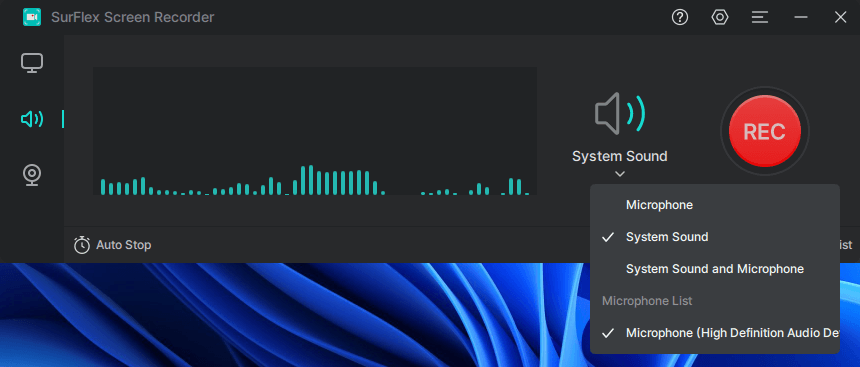
Step 3. To record streaming audio, choose System Sound among the audio recording options and then click REC.
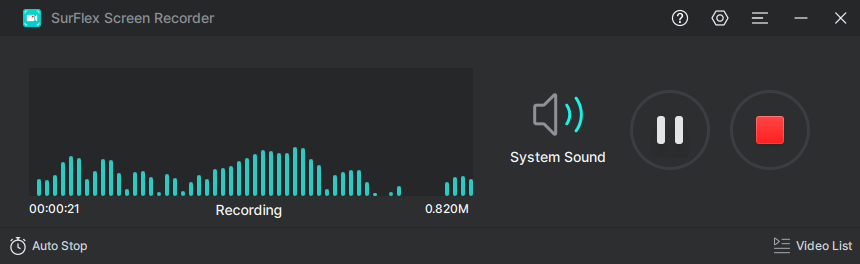
Step 4. When you are finished with the audio recording, click Stop.
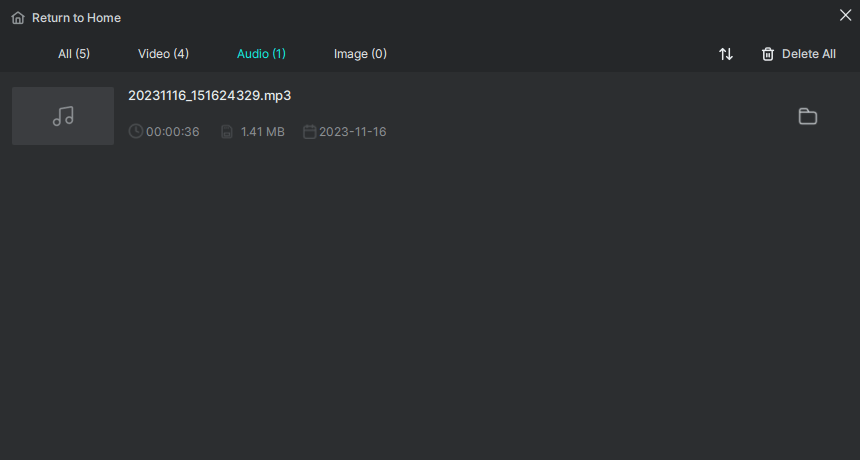
Step 5. Check the audio file in the popup window.
Record Audio Stream on Windows 7 for Free
Tool: Audacity
Recording internal audio on Windows 7 or other Windows versions is made easy with the free, open-source, and cross-platform audio recorder, Audacity. This app works to record internal audio or microphone sound on your computer and will save the audio files in MP3, WAV, or OGG format. Besides, since it is also an audio editor, you can edit the audio recording if you need to. If you want to record streaming audio on Windows 7 for free, don’t miss Audacity.
To record streaming audio on Windows 7 for free:
Step 1. Download and install Audacity on your PC.
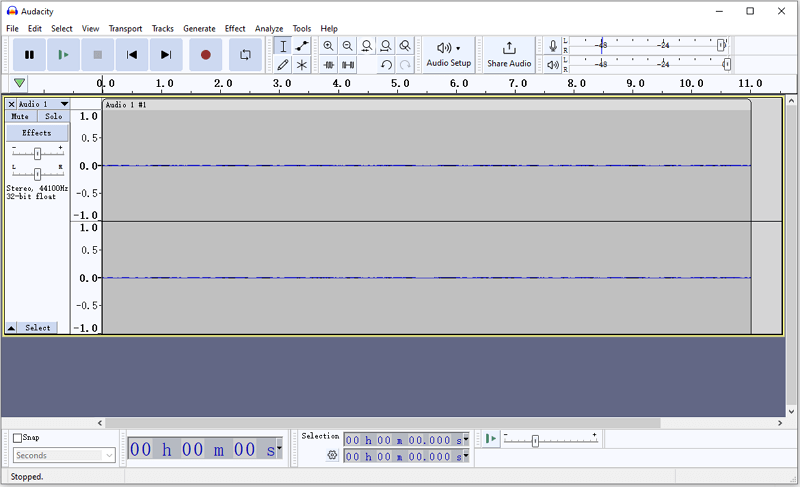
Step 2. Open Audacity and click Audio Setup.
Step 3. Go to Host to choose Windows WASAPI and then click Recording Device to select your computer’s speaker.
Step 4. When you are ready, click the Record button to start recording a new track.
Step 5. When you are done, click Stop and edit the audio track according to your needs.
Step 6. Click File > Export to save the audio recording to your Windows 7 computer.
Record Streaming Audio on Windows 7 Online
Tool: Free Online Audio Recorder
If you prefer to record audio from websites without any software installation, using Free Online Audio Recorder will fulfill your needs. This web-based audio record enables you to record audio from Chrome and can capture audio from a browser tab, an app window, or your desktop. Thus, when you are going to record streaming audio on your PC or laptop, it will be helpful. By default, the recordings will be saved in MP3 format, which you can use on various devices and programs.
To record internal audio on Windows 7 online:
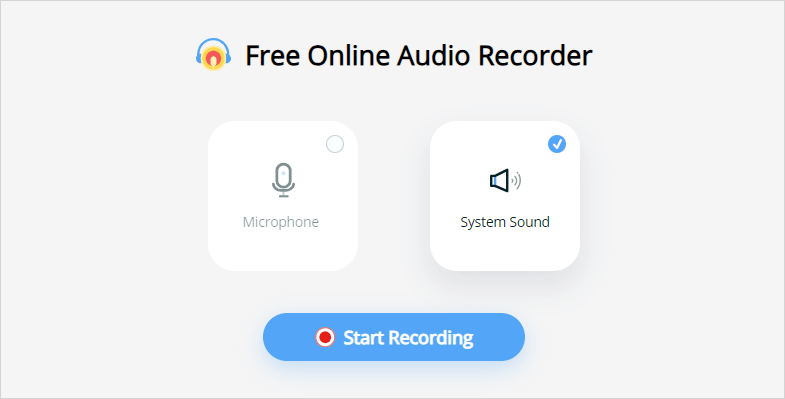
Step 1. Open a browser, such as Chrome, to visit Free Online Audio Recorder and click Start Recording.
Step 2. Select to record System Sound and click Start Recording.
Step 3. Select the browser tab, app window, or screen you need to record audio from.
Step 4. Enable the Also share tab audio option and click Share.
Step 5. To end the recording, click Stop Sharing at the top left of the screen.
Step 6. Go back to the audio recorder and click Save to save the audio file to your computer.
Wrapping Up
Whenever you need to record internal audio on Windows 7, be it system sound, app sound, or audio streams, you can use the tools in this guide to capture any content you need and save it in a preferred format, such as MP3, WAV, M4A, and more. Specify your needs and pick the way you like best to capture browser audio with ease.
About the Author
You May Also Like
-
How to Record on SoundCloud on All Devices
You will know how to record on SoundCloud to capture audio streams from SoundCloud on your computer or mobile in detailed steps.
Myra Xian Updated on -
How to Record Audio on Zoom in Detail
In this guide, you will know how to record audio on Zoom to capture audio from a Zoom meeting with different ways.
Myra Xian Updated on -
How to Record Microphone and Speakers with Audacity: Detailed
You will know how to record microphone and speakers with Audacity on your PC or laptop after reading this step-by-step guide.
Myra Xian Updated on