

Updated on
Quick Answer:
You can screen record on Gateway laptop using:
1. Snipping Tool
2. Xbox Game Bar
3. SurFlex Screen Recorder
Gateway laptop runs on Windows and each Windows has one or more native screen recording apps. In addition, there are various types of Windows screen recorder tools available. Thus, when you need to screen record on your Gateway laptop, there are actually many choices for you. If you want to know how to screen record on Gateway laptop, check the tips below:
Table of contents
How to Screen Record on Gateway Laptop in Windows 11
Tool: Snipping Tool
If your laptop runs Windows 11, then there is a pre-installed screenshot tool and screen recorder for you – Snipping Tool. Whether you want to screenshot or screen record on a Gateway laptop, Snipping Tool will be a solution.
Snipping Tool screen record helps to capture your desktop or a selected portion on your computer. However, it can’t capture the audio while recording. That’s probably why it is not a popular screen recording solution. If you want to screen record on a Gateway laptop with audio, use the alternative ways instead.
To screen record on Gateway laptop with Snipping Tool:
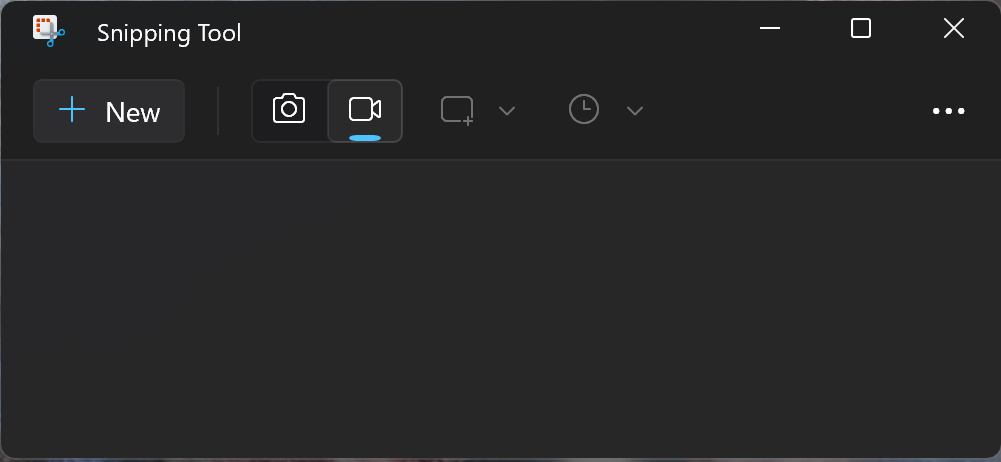
Step 1. Press Windows + Shift + S to open Snipping Tool.
Step 2. Select the video icon to turn on the record mode and click New.
Step 3. Select and drag a rectangle area of the screen you want to record and click Start.
Step 4. When you are finished with your recording, click the Stop button to end the recording.
Step 5. Save the recording to your computer.
If you want to know how to screen record on Windows 11 without Snipping Tool, check the corresponding guide.
How to Screen Record on Gateway Laptop in Windows 10 & 11
Tool: Xbox Game Bar
As for Windows 10, Snipping Tool’s screen recording feature is not available and there is Xbox Game Bar to help. It is native to Windows 10 & 11 and allows you to screen record on Windows 10 or 11 Gateway laptop for free.
Xbox Game Bar recording can capture both screen and audio that comes inside or outside of the computer. However, as its name indicates, it can only capture the window of a game (or app) with audio. If you want to record the desktop on your Gateway or record the File Explorer window, it won’t work.
If Xbox Game Bar meets your needs, you can go to Settings > Gaming > Captures to set up the recording settings first and then follow the steps below to record screen on your Gateway laptop.
To screen record on a Gateway laptop:
Step 1. Press Windows + Alt + R to start recording your Gateway laptop.
Step 2. Press these keys again or click the Stop button in the control bar to end the recording.
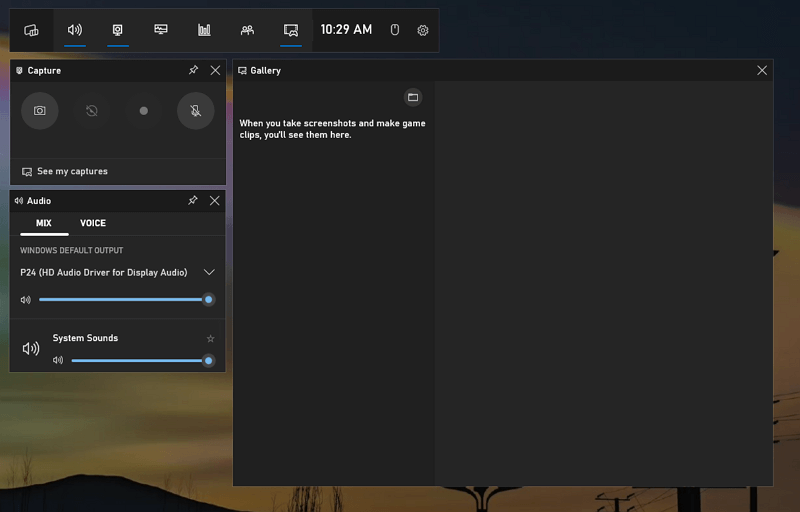
Step 3. You can click the Game clip recorded message or press Windows + G to open Xbox Game Bar and go to the Gallery panel to check the video.
The recordings created with Xbox Game Bar are stored in C:\Users\admin\Videos\Captures by default.
How to Screen Record on Gateway Laptop on All Windows Versions
If you want an all-in-one screen recording solution, using a third-party screen recorder like SurFlex Screen Recorder is necessary. Such a professional tool is capable of capturing everything you want from your Gateway computer. Whether you want to record screen on Windows with audio, record a webcam, or record audio only, this Gateway screen recorder will get it done.
Besides, unlike Snipping Tool and Xbox Game Bar which only save the recordings as MP4 files, SurFlex Screen Recorder enables you to customize the video output format, making it easy for you to save the recorded videos as MP4, AVI, MOV, FLC, and more freely.
To screen record on Gateway laptop with audio:
Step 1. Open SurFlex Screen Recorder and go to Settings to select the output options. Afterward, set up the webcam and audio options according to your needs.
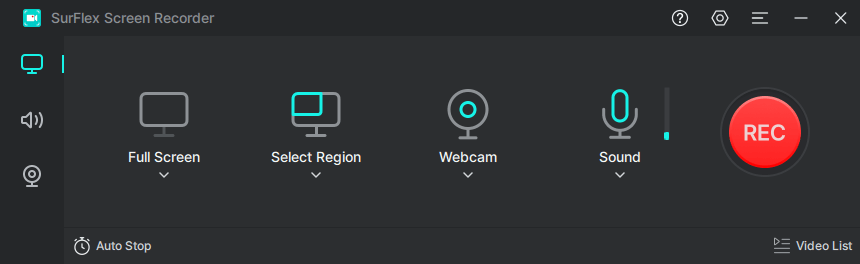
Step 2. Select the recording screen, region, or window, and then click REC to start the screen recording on your laptop.

Step 3. Once the recording is done, click Stop in the recording bar.

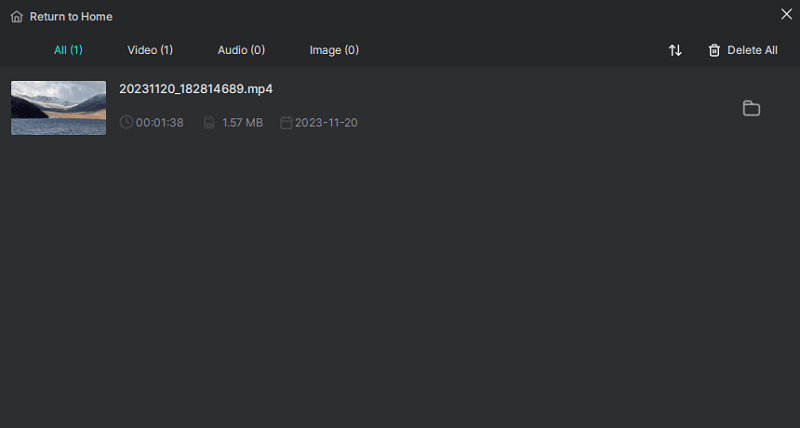
Step 4. Check the recorded video in the popup window.
Bonus Tip: How to Screenshot on a Gateway Laptop
In addition to recording your Gateway screen, some of you may also need to take a screenshot on a gateway laptop. To screenshot on a Gateway laptop, Snipping Tool is helpful. It is a screenshot tool available on Windows 8, 10, and 11 and works to screenshot on Gateway laptop smoothly. Take Windows 10 Gateway laptop as an example:
To screenshot on Gateway laptop in Windows 10:
Step 1. Press Windows + Shift + S to open Snipping Tool.
Step 2. Choose a screenshot mode, including Rectangular Snip, Freeform Snip, Window Snip, and Fullscreen Snip.
Step 3. Select the target area you’d like to capture.
Step 4. The screenshot is saved to your clipboard, and you can paste it according to your needs.
Wrapping Up
Whether you want to take screenshots or record your screen on your Gateway laptop, there are other types of tools available to assist you, such as online services and browser extensions. For example, Awesome Screenshot & Recorder and Loom are powerful browser extensions that can be helpful for capturing screenshots and recordings. If you find the built-in tools to be unhelpful or inconvenient, you can try using one of these alternative tools instead.
About the Author
You May Also Like
-
How to Screen Record on PC in Windows 10, 11, and More
You will know how to screen record on PC, no matter which Windows it runs. Pick up the way you like to record computer screen with ease.
Myra Xian Updated on -
How to Record High-Quality Video with OBS: New Update
You will know how to record high-quality video with OBS with proper settings, including customizing video format, quality, and more.
Myra Xian Updated on -
How to Record Part of Screen on Windows 10 in 3 Ways
You will know how to record part of screen on Windows 10 or other Windows versions using easy and powerful screen recorders for Windows.
Myra Xian Updated on