

Updated on
Quick Answer:
You can record your computer screen vertically using SurFlex Screen Recorder, ShareX, or OBS Studio. Among these tools, SurFlex Screen Recorder is the easiest solution and the other two tools are completely free to use.
When you create videos for social platforms like TikTok, you may want to record vertical video to better fit the screen. That’s probably why you want to know how to record vertical video on PC. Luckily, it’s quite easy to record part of the screen on Windows 10 or other versions, as long as you find a proper tool to use. If you are looking to record videos on your computer vertically, check this guide and learn how to do it without difficulty.
Table of contents
How to Record Vertical Video on PC
Tool: SurFlex Screen Recorder
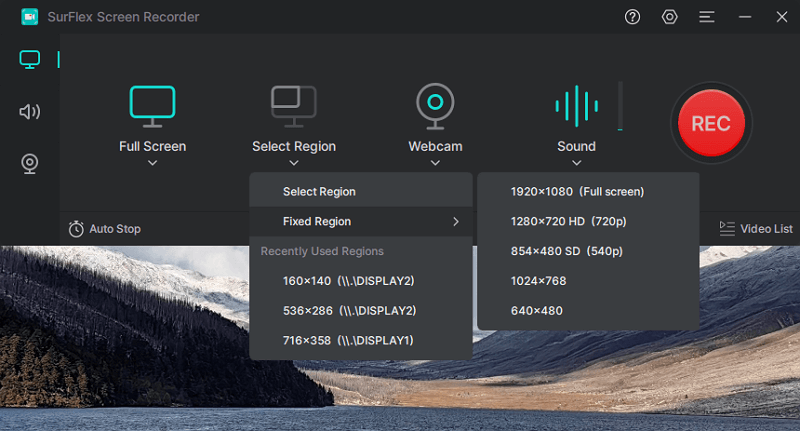
To record your computer screen vertically, SurFlex Screen Recorder will help. It allows you to record the full screen or any selected portion of your screen. Thus, you can select a vertical recording region on your PC and effortlessly record a vertical video on your PC.
With SurFlex Screen Recorder, you have the flexibility to customize the recording area by manually selecting a portion of the screen or setting the size according to your preferences. Additionally, you can choose from various output video formats such as MP4, MOV, AVI, and more, as well as different video quality options including original quality, HD, and SD. Whether you need to record a vertical video in MP4 or any other format, SurFlex Screen Recorder makes the process effortless and user-friendly.
To record a vertical video on PC:
Step 1. Open SurFlex Screen Recorder. Before the screen recording, click Settings to customize the output options.
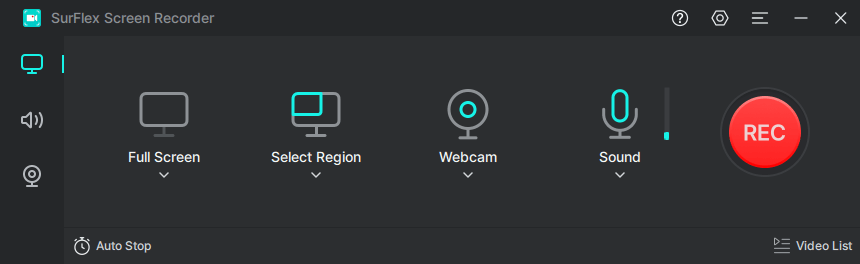
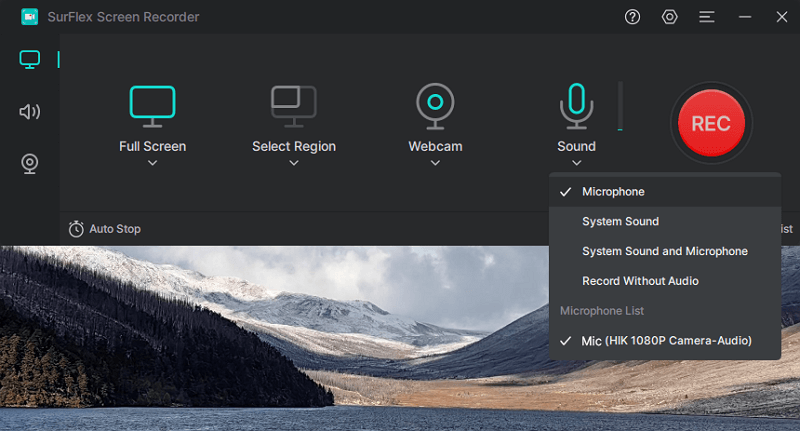
Step 2. If you want to record a video with audio on your PC, enable audio recording and select the audio type you need.
Step 3. Choose to record the full screen or a selected region, select the recording area, and then click REC to start recording a video on your PC.
Step 4. The recording will start in five seconds (you can customize the option in Settings). Once the recording is finished, click Stop.

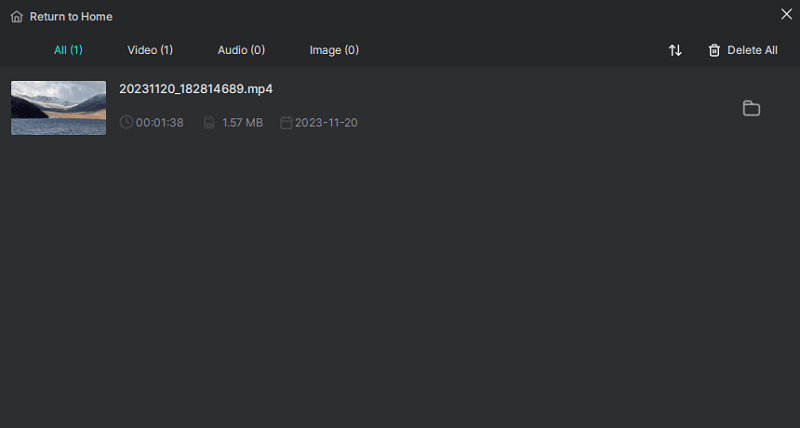
Step 5. Check the recorded video in the popup window.
How to Record Computer Screen Vertically
Tool: ShareX
ShareX is another option that offers a viable solution for recording videos on a PC. It allows you to record any selected portion of your screen at no cost. However, it’s worth noting that ShareX may not excel in recording high-quality videos and it has more complex settings compared to professional screen recorders. If you’re looking for a more straightforward screen recording experience on Windows, using a third-party screen recorder like SurFlex Screen Recorder would better suit your needs.
To record computer screen vertically:
Step 1. Download and install ShareX on your computer.
Step 2. Launch ShareX and go to Task settings > Screen recorder > Screen recording options.
Step 3. Set up the recording options according to your needs.
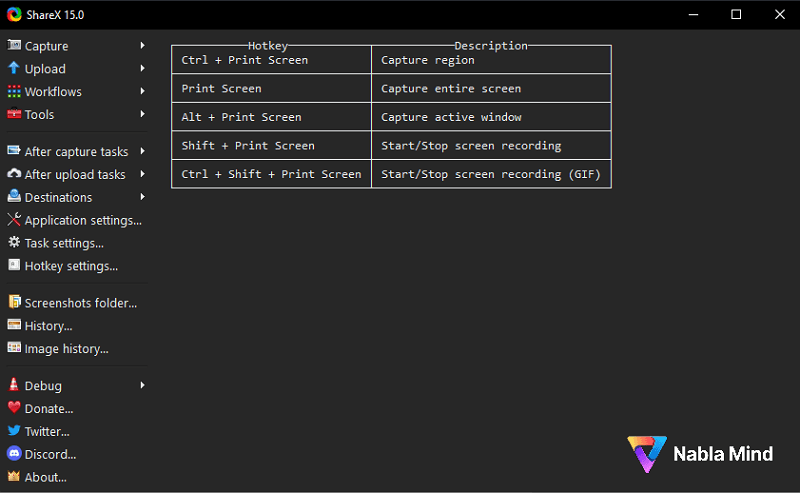
Step 4. When you are ready to record, press Shift + Print Screen and select a vertical recording region to start recording a video immediately.
Step 5. When you are done, click Stop in the control bar and then check the recorded video.
How to Record a Vertical Video with OBS Studio
Tool: OBS Studio
Although both OBS Studio and ShareX are freeware, OBS Studio offers a wider range of screen recording features compared to ShareX. This is likely why many users prefer to record vertical videos using OBS Studio on their computers. OBS Studio allows you to capture any on-screen content on your computer, complete with audio, including system sound, microphone audio, or a combination of both. However, you will need to configure your screen recording by yourself, which is more difficult to operate compared with the two tools above. If you’re willing to proceed, you can follow the steps below to record videos on your computer.
To record vertical video on OBS:
Step 1. Download and install OBS Studio on your PC.
Step 2. Go to OBS Studio > File > Settings to customize the output options.
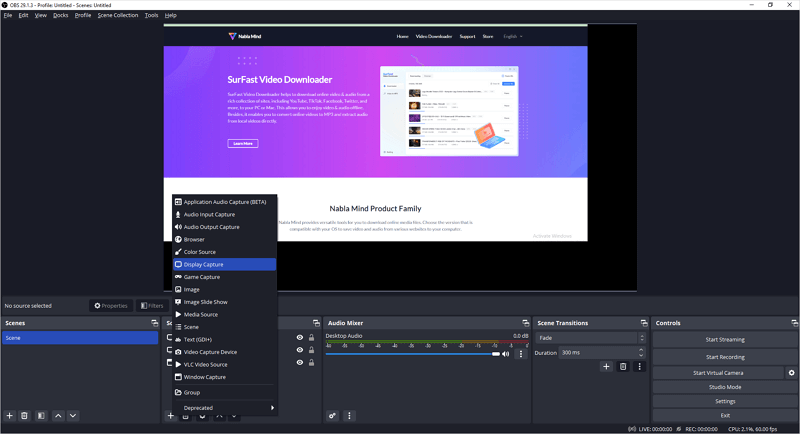
Step 3. Head to the sources panel and click the plus icon to add the recording sources you need, such as Display Capture, Audio Output Capture, and more.
Step 4. Since you want to record a vertical part of your screen, right-click the Display Capture option you add and choose Filters.
Step 5. Click the plus icon, select Crop/Pad, and then click OK.
Step 6. Set the cropping parameters according to your needs to create a vertical recording region. Then click Close.
Step 7. Click Start Recording in the Controls panel to start recording a video.
Step 8. When you are finished with the recording, click Stop Recording and check the video in the folder you select in Settings.
Wrapping Up
Whenever you need to record clips on your PC, the aforementioned tools provide easy ways to capture your desired content. It’s important to note that while Windows 10 and later versions come with a built-in screen recorder called Xbox Game Bar, it defaults to recording a window and doesn’t allow customization of the recording region. Therefore, it is not suitable for recording vertical videos on your computer. For such purposes, you will need to rely on a third-party tool to assist you.
About the Author
You May Also Like
-
How to Screen Record on Razer Laptop in Windows 11, 10, and More
You will know how to screen record on Razer laptop using 4 easy and tested screen recorder tools, including Razer Cortex.
Myra Xian Updated on -
How to Record Part of Screen on Windows 10 in 3 Ways
You will know how to record part of screen on Windows 10 or other Windows versions using easy and powerful screen recorders for Windows.
Myra Xian Updated on -
4 Tips to Record Discord Stream on Any Device Easily
Whether you are using a computer or a mobile phone, you can find a way to record Discord stream on your device with ease in this guide.
Myra Xian Updated on