
SurFlex Screen Recorder Official Guide
Overview
SurFlex Screen Recorder records your screen, a webcam, or audio on your own computer. You can capture the full screen, part of the screen, an app window, the webcam alone, or the webcam together with the screen. Audio can be the system sound, a microphone, or both.
It runs on Windows 7, Windows 8, Windows 8.1, Windows 10, and Windows 11, and on macOS 10.15 or later. Download it from the SurFlex Screen Recorder page.
There are three recording modes:
- Record Screen captures the full screen, a selected region, or an app window. You can add the webcam and sound in this mode.
- Record Audio captures sound only. No screen is recorded.
- Record Webcam captures the webcam only.
If you use more than one monitor, record one screen at a time.
Choose the Format Before You Record
Open SurFlex Screen Recorder and click Settings before you start. This is where you set the output.
Video can be saved as MP4, MOV, FLV, MKV, or AVI. Picture quality can be Original, HD, or SD. The frame rate can be set up to 60 fps.
Audio can be saved as MP3, AAC, WAV, OGG, WMA, or FLAC.
Set these once. Later recordings keep them until you change Settings again. When a recording ends, click Stop and check the file in the pop-up window.
Record the Full Screen
- Open SurFlex Screen Recorder and click Settings. Choose the video format, quality, and frame rate.
- Choose Record Screen, then choose the full screen.
- Turn sound on or off. If you want sound, select System Sound, Microphone, or System Sound and Microphone.
- Click REC.
- Click Stop in the recording bar when you are done.
- Check the video in the popup window.
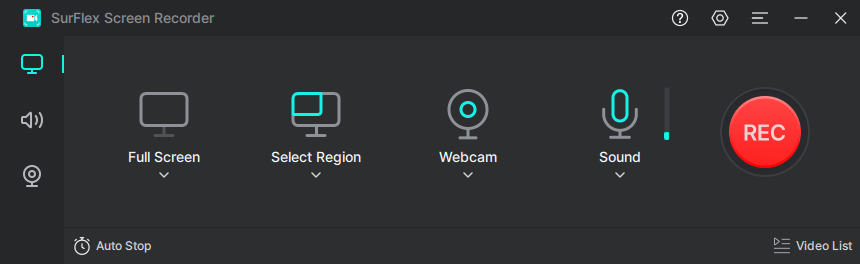
Use the full screen for a meeting, a game, or a webpage when you want everything that is visible.
Record Part of the Screen or an App Window
- Open Settings and set the output.
- Choose Record Screen, then choose Select Region.
- Select a custom area, or select the app window you want to capture.
- Set the audio if you need it, then click REC.
- Click Stop, and check the video in the popup window.
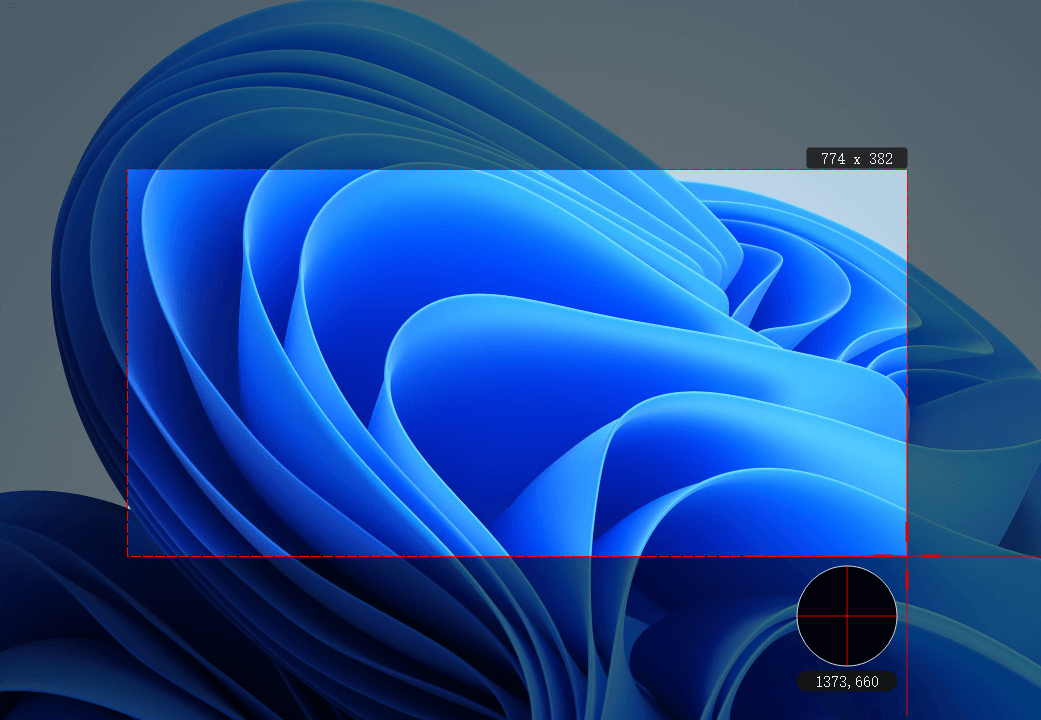
A selected region records only that rectangle. An app window follows that window, so the rest of the desktop stays out of the video. Use this for a tutorial that should show one program.
Record the Screen with Your Webcam
- Open Settings and set the output.
- Stay in Record Screen. Turn on audio if you want your voice or the system sound, and choose Microphone, System Sound, or System Sound and Microphone.
- Turn on Webcam. Select the camera and a resolution.
- Choose the full screen, a region, or an app window. Move and resize the webcam picture.
- Click REC. Click Stop when you are done, then check the video in the pop-up window.
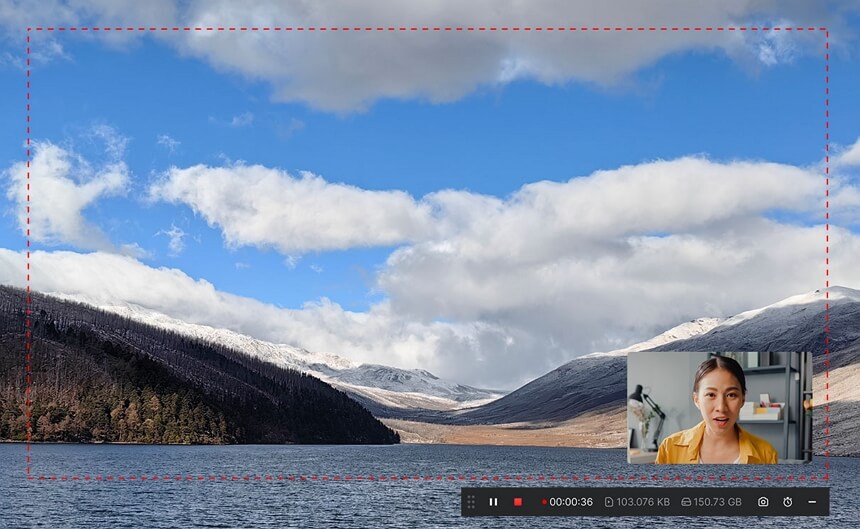
The webcam is a picture on top of the screen recording. It is not a separate video file.
Record the Screen with Audio
Sound is optional in Record Screen. Turn it on before you click REC.
- System Sound records what the computer is playing, such as a video, a browser, an app, or a game.
- Microphone records an external microphone or your voice.
- System Sound and Microphone records both.
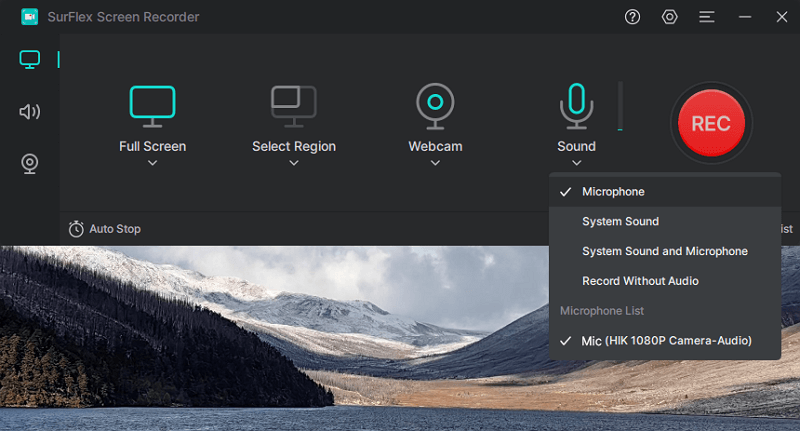
Then choose the full screen, a region, or a window, and click REC. Click Stop and check the pop-up. If the recording has no sound, the audio option was off, or the wrong source was selected.
Record Audio Only
Use Record Audio when you do not want a video.
- Click Settings and choose the audio format.
- Choose Record Audio.
- Select Microphone, System Sound, or System Sound and Microphone.
- Click REC.
- Click Stop, then check the audio in the pop-up window.
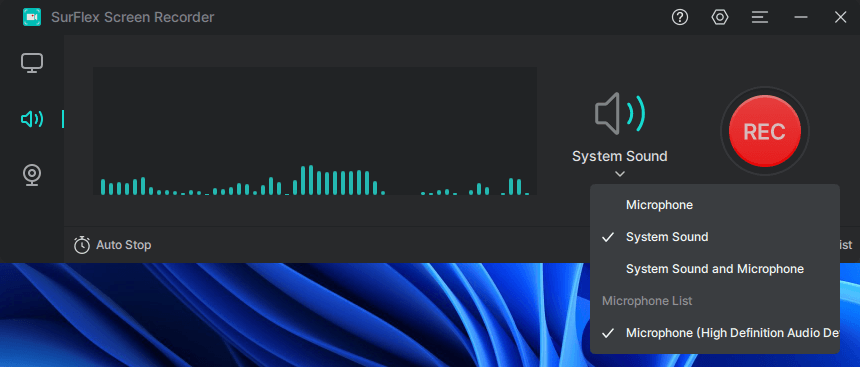
This mode does not capture the screen or the webcam.
Record the Webcam Only
Use Record Webcam when you do not want the desktop in the video.
- Click Settings and set the video format, quality, and frame rate.
- Choose Record Webcam.
- Select the camera and a resolution. Turn on Microphone if you want your voice.
- Click REC.
- Click Stop, then check the video in the pop-up window.

To show your face and the desktop in one video, use Record Screen with Webcam turned on. Do not use this mode for that.
While a Recording Is Running
- Click Stop in the recording bar to finish. The result opens in the pop-up window.
- Auto-stop can end the recording when it reaches a length or a file size you set.
- You can take a screenshot during a recording and save the image.
- Shortcuts for recording can be changed in Settings.
FAQ
Only if you turn sound on first. System Sound records the computer. Microphone records your voice. System Sound and Microphone records both. If you leave audio off, the video is silent.
Yes. Those are screen recordings. Use the full screen, or Select Region and choose the meeting or game window. Turn on System Sound for the other people, and Microphone if you also want your own voice.
Yes. Stay in Record Screen, turn on Webcam, and place the camera picture on the screen. Use Record Webcam only when you do not want the desktop in the video.
Yes. Choose Select Region, then select the app window or draw the area you want. The rest of the screen is not recorded.
Use MP4 for a video you will share or edit. Use MP3 when you are in Record Audio and only need the sound. Set the format, Original, HD, or SD, and the frame rate in Settings before you click REC. The frame rate goes up to 60 fps.
Yes. SurFlex Screen Recorder runs on macOS 10.15 or later, and on Windows 7 through Windows 11.